Cinnamon Rolls: Ooey Gooey Goodness

The weather outside is frightful…or becomingly so. As we enter into the cold months, I find ways in the kitchen to warm the body, heart and soul. The cold, crisp winter air chills you to the bone. There is no better comfort than to feel the warmth of the oven, watch buns bake and to have the smell of cinnamon and sugar fill your home.

IMG_1380 copy

I LOVE CINNAMON ROLLS! (And it’s probably safe to say that you do too.) These sweet, sticky, oozing buns full of cinnamon flavour are something I can’t refuse. It’s a mystery why I hadn’t tried baking these sooner! The satisfaction of creating each gorgeous little bun, and perfect cinnamon swirl, is unsurpassed.

I’ve had my share of different cinnamon buns from all over the place and some are definitely better than others. A good friend of mine baked a batch last month and brought me a couple (I have the greatest friends!). I had to make them for myself, THEY WERE DELICIOUS, and so she sent me the recipe that she used. The original recipe is from The Pioneer Woman, Ree Drummond, who has a wonderful blog, great recipes and a cookbook. I made a few slight changes and cut the recipe in half, because who could eat 50 cinnamon rolls!? I mean, I could…but I wouldn’t… 🙂 Continue reading

Keep It Simple, Silly! Simple Crepes For Any Occasion

Since I was a child, crepes have been one of my favourite desserts. I loved how sweet and egg-y my mother used to make them. I’d eat them faster than she could make them, and I wouldn’t stop eating until she stopped flipping them off the pan onto my plate. I’ve now come to realize, after having tried so many savoury crepes, that they don’t always have to be sweet. These delicate pancakes are simple, easy to make and extremely versatile. You can use any toppings you like! Sweet or savoury!

IMG_4523

I had a crepe craving last night and now that I don’t live with the legendary crepe-making mama, I decided to figure out how to make them (or something like them) on my own. I discovered that they are easier than I thought! The beauty of a crepe is in its simplicity. Simple ingredients and simple preparation. Sometimes enjoying something as simple as a plain sweet crepe is just what you need.  Continue reading

Oatmeal Chocolate Cranberry Cookies!

Oatmeal cookies have always been a favourite of mine. But what’s better than oatmeal cookies? Oatmeal, chocolate chip, craisin cookies!

IMG_0499

I thought I’d post this recipe because these cookies have become a staple in our home. I’ve been making them non-stop for a few years now. There’s always a jar full of oatmeal cookies. I often get a friendly reminder that we’re down to the last two or three cookies. That means: make more, cookie maker!

Oats are also good for you! Click here to check out some of the health benefits of eating oats. 🙂

I think this started out as just an oatmeal chocolate chip cookie recipe. It was one of those recipes you scribble down on a piece of paper and stuff into a cookbook for safe-keeping. It’s a classic, and I’ve used it time and time again. I started playing around with the chocolate chips, replacing them with other ingredients. My usual mix is chocolate chips, raisins and craisins, but it all works. Make these your own! You can try to incorporate other dried fruits or different chips. Semi-sweet chocolate chips work best though, I think.

Oatmeal cookies are nice and easy to make too! This recipe is great for all my first-time bakers. There’s absolutely nothing to fear! The worst thing you could do is burn them, so just keep an eye out and you’ll be fine! Continue reading

Gluten-Free Avocado Brownies: A Healthier Brownie Recipe

This is a recipe for the chocolate addicts, the bakers, the health-conscious eaters, the avocado lovers, and my non-gluten-eating friends. Despite the fact that I called these avocado brownies, these are regular brownies, that taste amazing. They’re not green, and the gluten-free aspect doesn’t change the texture or the taste of them. I know sometimes gluten-free baking results in a weird taste or texture you might not be used to, or like. I can assure you. These brownies are yummy!

Confession: I couldn’t wait for mine to cool before devouring…so it didn’t come too nicely out of the pan. (Note the giant holes.) It still tasted the great! 🙂

IMG_8803

Continue reading

Springtime Sugar Cookies: A Healthier Recipe

IMG_5413

Birthday party tonight. Springtime is coming. I want to bake. Those are enough reasons to dig out the cute springtime cookie cutters I bought last spring, that were never used, and bake some cookies! I didn’t have a lot of time, so I wanted a simple recipe. Sugar cookies are really easy to make and don’t require many ingredients. Looking up some recipes, I noticed that classic sugar cookies are not particularly health-friendly. They’re mostly made of flour, lots of butter, and lots of sugar. I decided to try doing a version that’s a bit healthier. I switched most of the flour for whole wheat flour and didn’t use as much butter. I used 3 tablespoons of butter, as opposed to the 1 cup of butter in most recipes. I also used brown sugar, and less of it. I browned the butter and added a bit of spice to the cookies, which I think also cut some of the sweetness. I passed on the colourful, sugar-loaded (but so pretty) royal icing and opted to do just a light sprinkle of sanding sugar over top. I still got the springtime pastel colours I wanted!

Get baking! Spring is here!

Spiced Browned Butter Sugar Cookies

IMG_5340

Ingredients:

  • 1 cup whole wheat flour
  • 1/2 cup all purpose flour
  • 1 teaspoon baking powder
  • 1/4 teaspoon salt
  • 1/4 teaspoon cinnamon
  • 1/4 teaspoon nutmeg
  • 3 tablespoons butter
  • 1 tablespoon sunflower oil
  • 1 large egg
  • 1/2 cup brown sugar
  • 1/2 teaspoon vanilla extract
  • coloured sanding sugar/sugar crystals to sprinkle over top

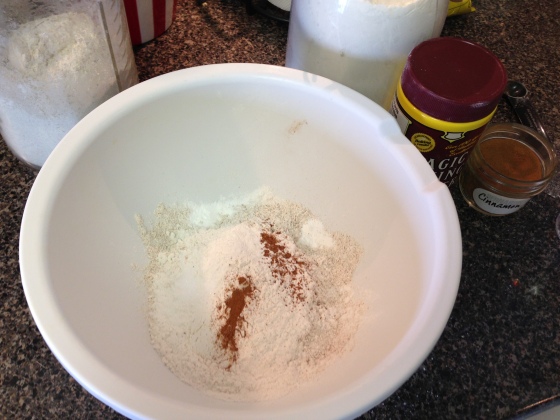
In a medium-sized bowl, mix both flours, baking powder, nutmeg, cinnamon, and salt together. Set aside.
IMG_5342 IMG_5347


Now you’re going to brown the butter. Do this in a small skillet or pan on low heat. Keep stirring until fragrant and you can see it has become a slight light brown colour. It may take a few minutes (1-3). Don’t take your eyes off it, you don’t want it to burn. I love that buttery smell!

IMG_5348 IMG_5352 IMG_5364


When your butter has slightly browned, remove it from the heat and set it aside to cool. Once it has cooled off, use an electric mixer to mix the browned butter together with the egg, oil, brown sugar, and vanilla extract. Mix until well blended.

IMG_5367


Add the wet mixture to your flour mixture. Mix on low speed until it’s combined. (I started using my hands.)

IMG_5368 IMG_5372


Using your hands, flatten the ball of dough into a disc shape, wrap in plastic wrap and refrigerate for at least an hour (you can leave it for up to 2 days).

IMG_5374


When done refrigerating, preheat your oven to 350 degrees, and remove the dough disc from the fridge. Line two baking sheets with parchment paper. On a lightly floured surface, roll out your dough. I made mine pretty thin. 1/8 of an inch is usually pretty standard.

IMG_5388


FYI, you don’t need as much flour as in the picture above. I got a little flour-happy. Too much flour will dry your dough out and cause cracking.

IMG_5389


Now for the fun! Cut your cookies into fun shapes! I stuck to my springtime theme of ducks, bunnies, flowers, umbrellas, lambs, and chicks.  Transfer the cut cookies to your lined baking sheets. I used a butter knife to help me pick them up (or you could use a floured spatula).

IMG_5392 IMG_5406 IMG_5394 IMG_5396


Once your cookies are all transferred, sprinkle them coloured sugars to make them extra pretty!

IMG_5401IMG_5404


Bake your cookies for 6 to 8 minutes or until the edges just start to brown. Let them cool for a couple minutes before you move them from the baking sheets. I ended up baking mine a little too long, and some of them were burnt. 😦

IMG_5407 IMG_5421

Now, try a few! (I said FEW, NOT ALL.)

These cookies should stay good in an airtight container for about a week. Ha! They won’t last a week anyway. So tasty!

Happy springtime baking, friends!

xx


Key Lime Pie In The Sky!

I made a spur of the moment decision that tonight was a good night to bake my first pie. And for some reason, right after I thought pie…I thought key lime. I didn’t even realize until just now how fitting it is to make a lime pie over the St. Patty’s Day weekend (limes…green…get it?). So I looked up the simplest recipes I could find, picked one that seemed foolproof, and picked up a few things from the store on the way home. I stuck to a simple recipe just to be safe. I always start simple when I’m trying something for the first time. Everything was going smoothly until I discovered that the recipe I was trying to follow, that was supposed to be for one pie, actually made enough filling for two. So I had to save half the filling and make a second crust. (Who wants a free key lime pie?!) Despite the fact that I try to be Chef Vanessa: Master Chef of the Universe in the kitchen, things don’t always go as planned. Most of the time they do not. But that’s what keeps things exciting, right?

A fresh chilled key lime pie is so refreshing. I love it’s tart, sweet, creaminess. Here’s how I made mine. Hope you find this recipe useful. It was really easy. You can do it! 

Key Lime Pie (makes one pie)

Ingredients:

  • 1 1/2 cups graham cracker crumbs (I smashed them in a ziploc bag with a rolling pin)
  • 1/2 cup sugar
  • 4 tablespoons softened butter (1/2 a stick of the small butter sticks)
  • 1 (14 ounce) can of sweetened condensed milk (that’s about 420 mL…I couldn’t find a 14 oz can at the store)
  • 1/2 cup of key lime or regular lime juice
  • 1 whole large egg
  • 1/2 tablespoon lime zest
  • 1/2 cup sour cream (about half of those small half-size sour cream tubs…about 125 mL)
  • 1 tablespoon powdered sugar (icing sugar)

Let’s Bake!

Preheat the oven to 375 degrees F.

Image

This part’s fun! In a bowl, mix the graham cracker crumbs, sugar and butter with you hands! Just keep squishing til the butter’s all mixed in. You’ll have a crumbly playdough kind of texture.

IMG_4781

IMG_4784

IMG_4785

Take this crust mixture and press it firmly into a 10-inch pie pan. Really pack it down. And then bake until the crust is brown, about 20 minutes.

IMG_4804

IMG_4805

Crust done! Remove it from the oven and let it cool to room temperature. Lower the oven temperature to 325 degrees F.

Now in a separate bowl, you will make the filling. Combine condensed milk, lime juice, egg, and lime zest. Whisk until well blended.

IMG_4794 IMG_4802

Place the filling into the cooled pie shell and bake in the oven for 15 minutes (at 325 degrees).

IMG_4809

IMG_4810

IMG_4814

The pie won’t look any different then it did when you put it into the oven. The filling is baked and solidified now. Chill it in the refrigerator for at least 2 hours. I chilled mine overnight because it was so late.

Once your pie is chilled, mix the sour cream and icing sugar and spread the mixture over the top of the pie with a spatula. I added a little lime zest on top to make it pretty. Serve chilled!

IMG_4817

IMG_4818

IMG_4819

Mission complete! So proud of my first pie! Happy St. Patrick’s Day! And happy baking! xx

(Maybe I’ll add to this post when I’ve eaten the pie later tonight.) 🙂

May your glass be ever full.
May the roof over your head be always strong.
And may you be in heaven half an hour before the devil knows you’re dead.
—Irish prayer

Â