I love Chinese fish balls (and beef balls, squid balls…all of them). After all, I am part Chinese. How could I not? I’ve grown up eating them in fish ball noodle soup, curried on bamboo skewers, barbecued, in hotpots…Asians use them everywhere! If you’ve been to Hong Kong, curried fish balls are a very popular street food. These stalls can be found all over, they’re sort of the Hong Kong equivalent to hot dog stands. I have to admit though, there’s something creepy about those seafood/meat balls and how rubbery they are. If you’ve ever accidentally dropped a cooked fish ball on the floor and seen how high it bounces off the ground…weird, right? And a lot of the time, they don’t taste very fishy at all. I never really questioned what I was eating, I just ate. I thought I’d do a little investigating on how Asian fish balls were made.
I found out that the bouncier the fish ball, the better. The rubbery bounciness actually has nothing to do with the ingredients of the fish ball. (Thank goodness!) It has to do with how long and hard the fish paste is slapped down repeatedly before being balled. I’ve seen women in Hong Kong marketplaces slamming big balls of fish meat on large wooden chopping blocks. Now I know why. To make their fish balls bounce and spring open upon being eaten!…I guess.
The rest of the answers I found are not so pretty. The whole fish ball fad dates back to to the 50’s in Hong Kong. They were made as a cheap, yet filling, snack food targeted towards the low to middle class population. Most fish balls you buy today are made with cheap fish and full of additives, such as MSG, and fillers. The cheaper fish balls consist of very little fish (sometimes less than 20%) and contain a large proportion of flour. Fish balls are mass produced in factories and made with fish that are not carefully selected. The fish portion of the fish balls is called surimi. What the heck is surimi?
Surimi is an Asian fish-based food product, and a common ingredient in Asian processed foods. I’ll let Wikipedia sum it up:
“Lean meat from fish or land animals is first separated or minced. The meat then is rinsed numerous times to eliminate undesirable odors. The result is beaten and pulverized to form a gelatinous paste. Depending on the desired texture and flavor of the surimi product, the gelatinous paste is mixed with differing proportions of additives such as starch, egg white, salt, vegetable oil, humectants, sorbitol, sugar,soy protein, seasonings, and enhancers such as transglutaminases and monosodium glutamate (MSG). If the surimi is to be packed and frozen, food-grade cryoprotectants are added as preservatives while the meat paste is being mixed. Under most circumstances, surimi is processed immediately into a formed and cured product.”
Surimi is a cheaper way for manufacturers to imitate the flavour and texture of a more expensive product. They take this tasteless gelatinous paste and then add the desired artificial flavour. Not so appetizing. I’ll have a real lobster tail, thanks.
So, on to making your own fish balls at home! I came across this recipe a couple weeks ago and thought it was amazing! I’ve stolen it from The Iron Cheftress, a blog I really like. You should check it out! It’s full of creative and healthy recipes amongst lots of other interesting stuff.
This recipe makes crispy pan-fried fish balls, with a bit of jalapeno spiciness. The best part is, they’re made purely of fish and a lot less carbs then store bought versions. They’re really yummy and would be a great meal or served as an appetizer. However, these are a dry and crispy fish ball, they’re not really meant for soup. I’m going to try making some real Asian-style fish balls in broth soon, but that’ll be a different recipe to share. 🙂
Crispy Fish Balls
Ingredients:
- 1 pound of white fish (I used 2 frozen basa fillets I had in the freezer…a bit less than a pound)
- 1/3 of a jalapeno pepper (use more or less depending on how spicy you like it)
- 1 inch cube of fresh ginger
- 1 1/2 inch piece of a thick carrot
- 2 cloves of garlic (I’m sure I used more, I always use more with garlic)
- 1 small shallot
- 1 tablespoon of fish sauce (optional)
- Salt (salt is unnecessary to salt frozen fish)
- Ground black pepper
- 1/2 cup of bran cereal, whole wheat flour, oat flour, whatever flour you’d like (I made these during Passover so I used matzah ball mix and it worked perfectly)
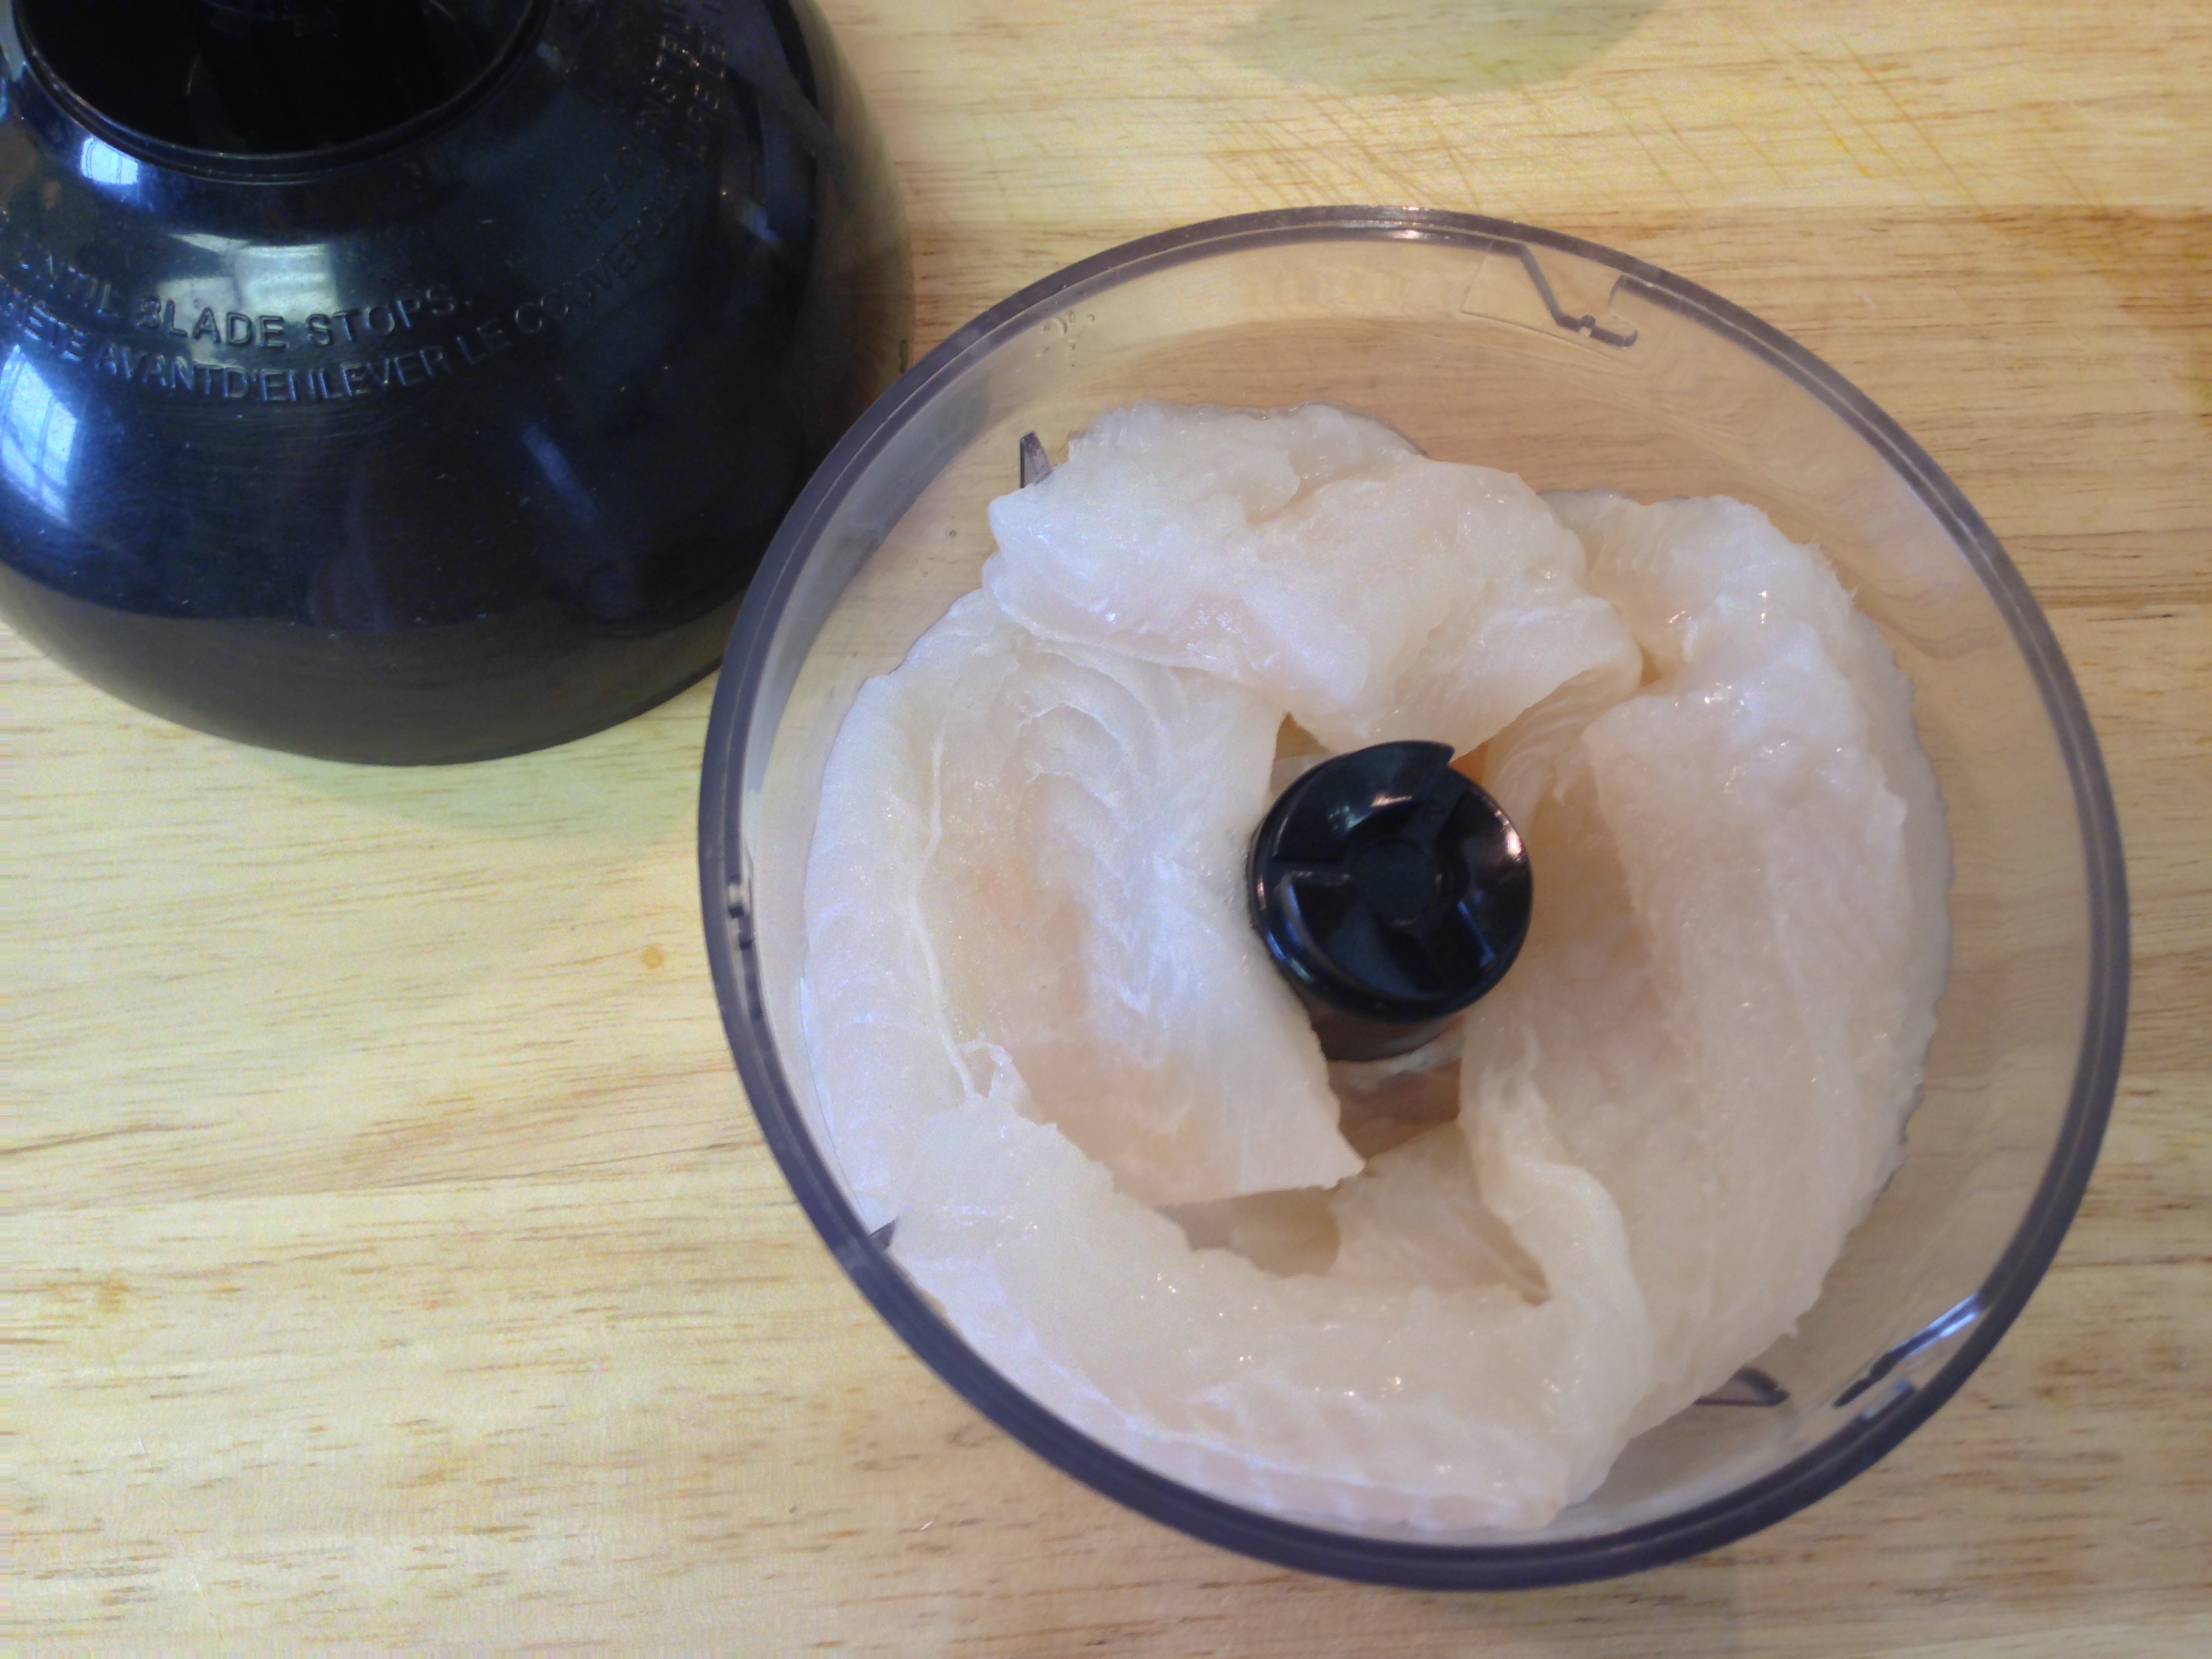
1. Process the fish until it becomes a paste, then transfer to a bowl. I used a food processor, but I’ve seen it done using the back of a chopper knife on a cutting board. (Probably more traditional Asian. If you don’t have a food processor then that will work.)

2. Process jalapeno, carrot, ginger, garlic, and shallot. Add to the bowl of fish paste. (If you don’t have a food processor, you’ll have to samurai chop those veggies to bits.)
3. Mix it all together and season with black pepper (and salt if needed). Roll the fish paste into small bite-sized balls.

4. If you are using bran cereal, grind it up. If not, have whatever flour you’re using in a small bowl. Roll each fish ball in your bran/flour until all sides are coated. I used matzah ball mix (for Passover purposes).
5. Heat a pan on medium heat and spray with cooking oil to keep the fish balls from sticking.
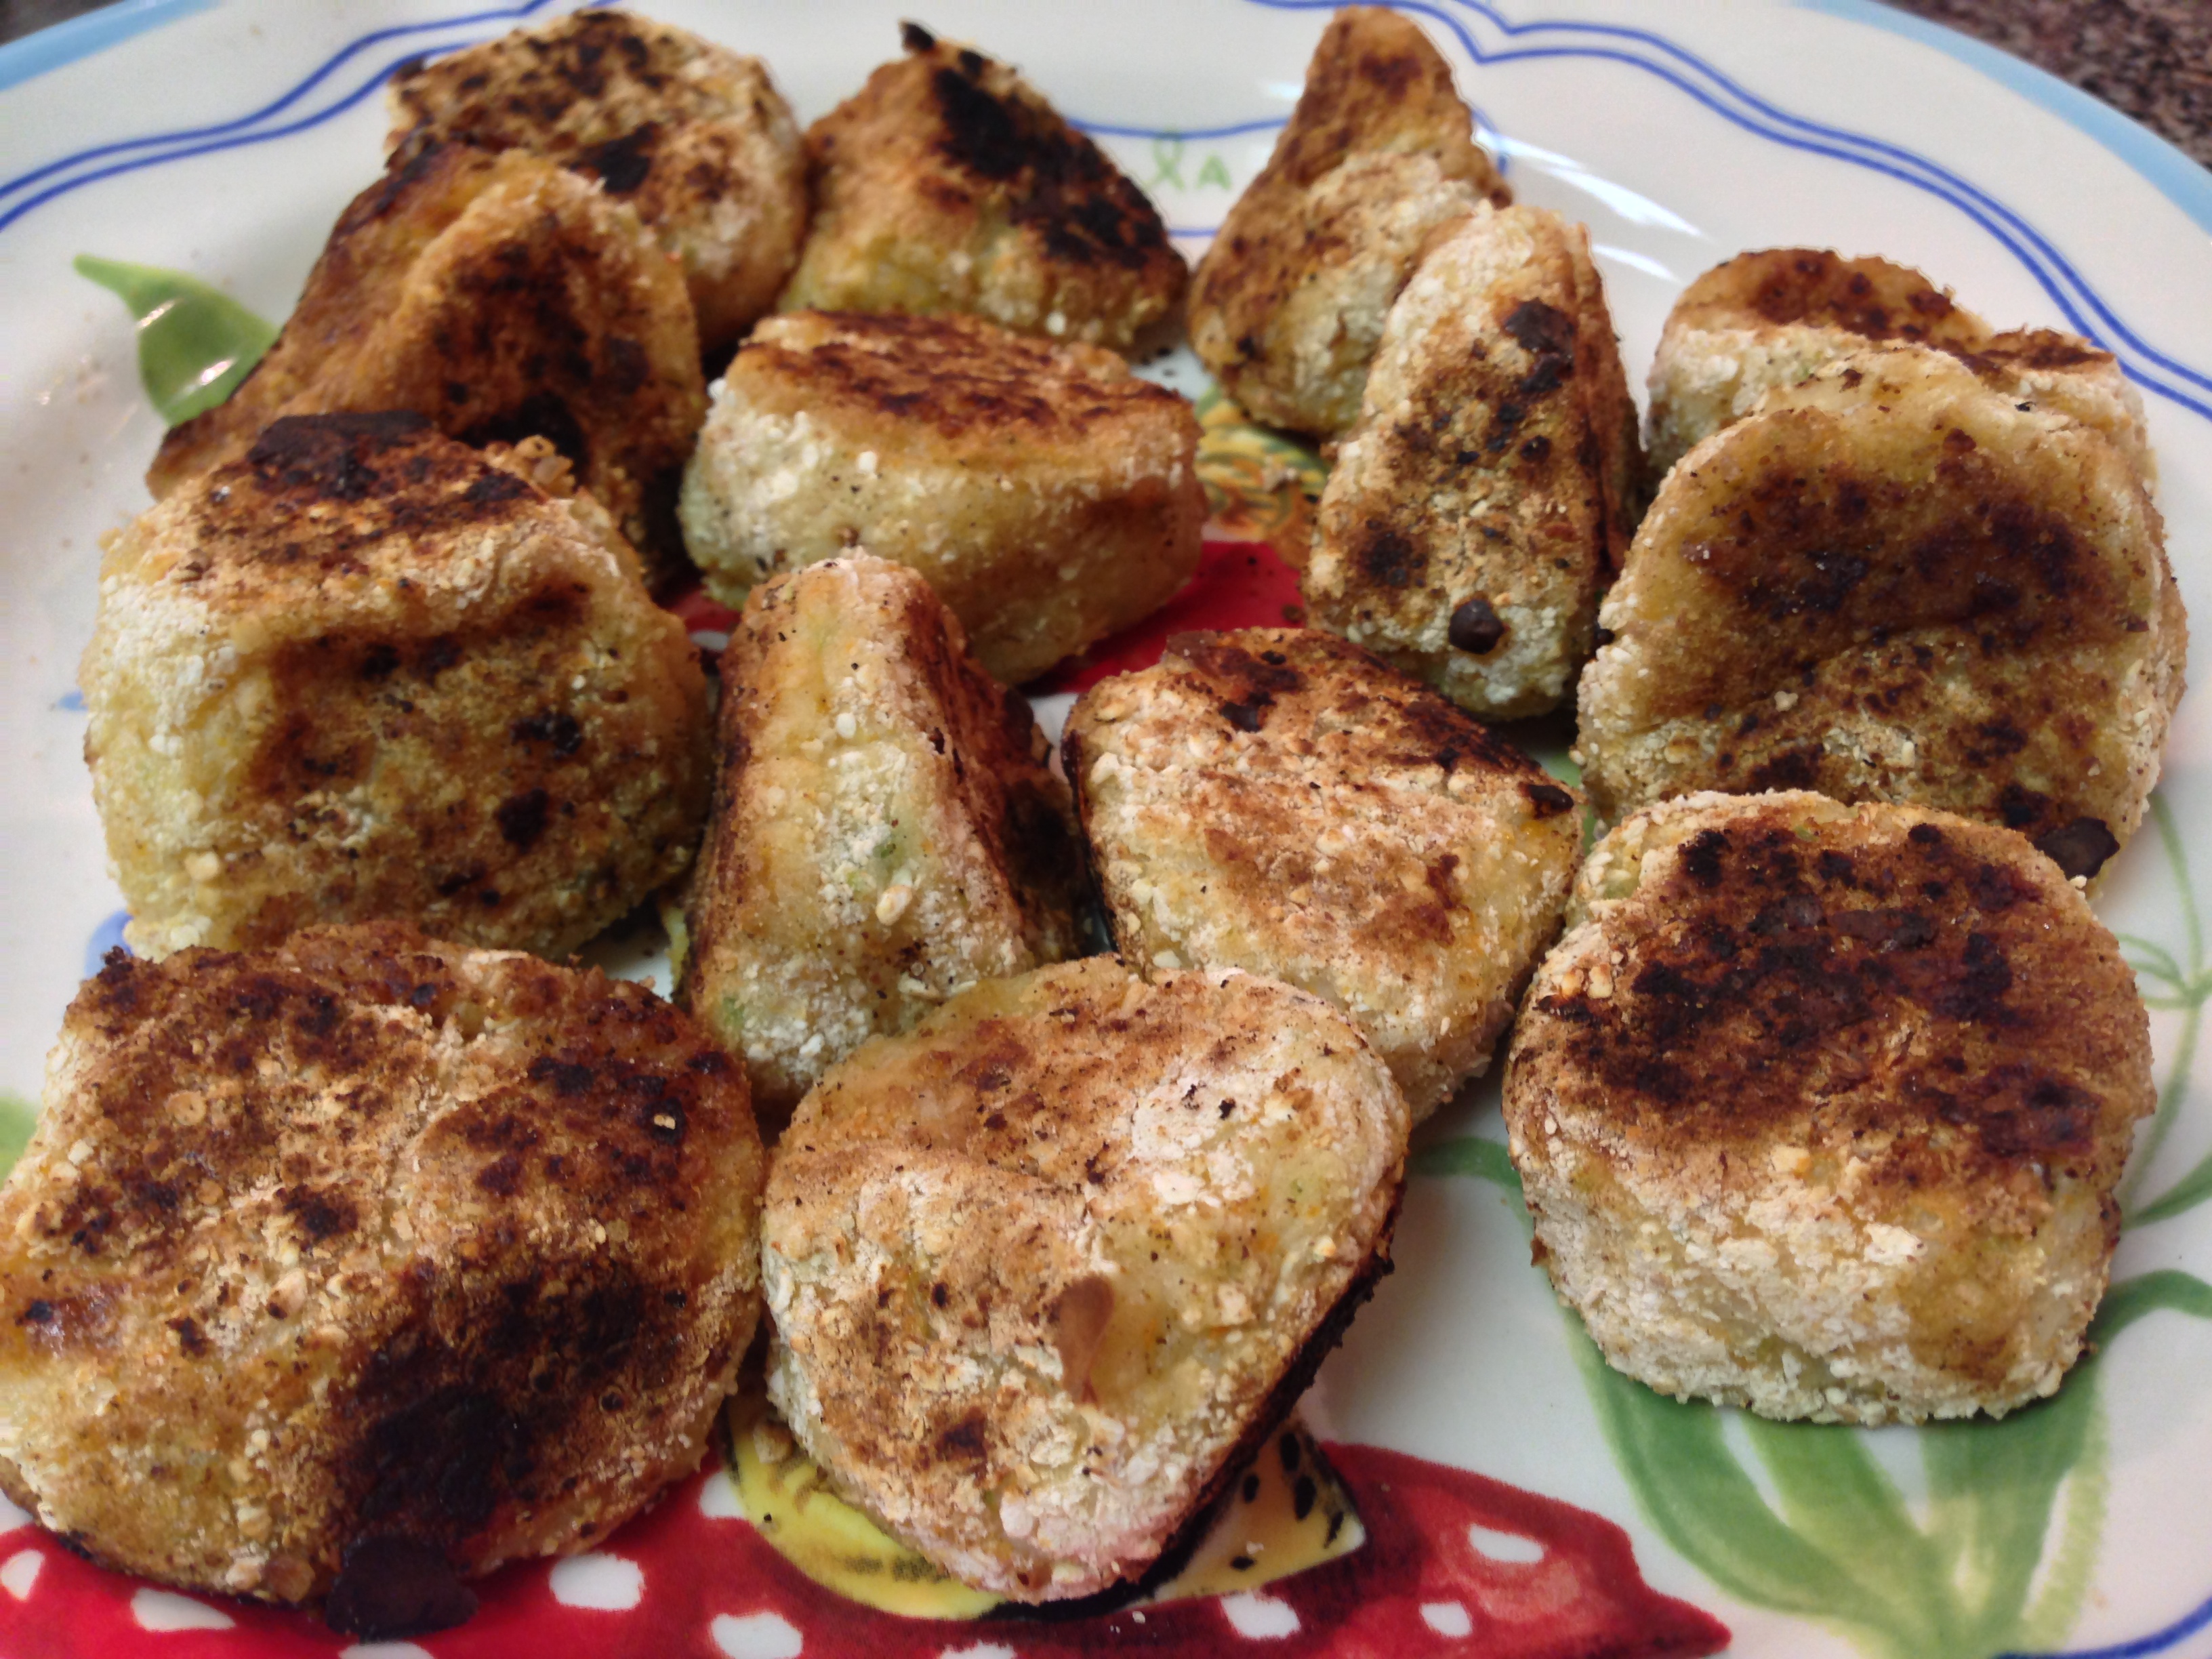
6. Once heated, place all your coated fish balls into the pan and keep rolling them around until they’re nice and crispy and a golden colour. It’s hard to make them a perfect ball. Mine kind of flattened out and became a little angular, and I may have over-browned them a bit…but they were delicious.
7. Serve them right away, with a spicy sauce. While they’re still nice and hot! I served mine with a sweet chili sauce and a horseradish ketchup (kind of like a hot cocktail sauce).

So yummy! Enjoy! xx