Make Jujube Tea, Not War.

The health benefits of dates have been well-known in China for thousands of years, They are believed to cleanse and enrich the blood, enhance immunity, promote white cell formation, reduce cholesterol and protect the liver, among many other supposed gains. Dates are rich in vitamin C, calcium and iron and are believed to be therapeutic for the elderly as well as growing children and those with anemia. Red dates (hong zao in Chinese) are also known as jujubes. For more on China’s “cure-all” fruit, click here.

20140406-171755.jpg

I’ve been drinking red date (or jujube) tea since I was a child. It was something my mother would make for my sister and I to keep our little bodies strong. Growing up, I thought of this as some sort of magical mommy-creation. I had no idea how easy it was to make! Continue reading

The Best Kale Recipe: Fritters!

IMG_5986

Kale is the new black. (At least I think it kind of still is…) I’ve never seen a leafy green so in-fashion! A few years ago, when I first heard rumours of this new “thing”, everyone was talking about it. “Kale is SO good!”, “Have you tried kale?”, “Superfood!”, “Nutrients!”, “Kale saves lives!”. It was all around me. Kale salad, kale smoothies, kale chips, sauteed kale…everyone in the world, it seemed, was being kale-ified. Of course I had to taste this veggie for myself!

Kale is a leafy green vegetable that belongs to the Brassica family, a group of veggies including cabbage and brussels sprouts. I always say it looks like huge, curly spinach. It’s a little bit tougher, and some say it has a bit more of a bitter flavour. It has been called a superfood and one of the healthiest foods in the world. It is packed with nutrients and has a ton of health benefits, while also low in calories. Here’s a top 10 list of kale health benefits.

Kale can be eaten raw or cooked. I absolutely love it (although I don’t think there’s a single vegetable that I don’t love). The problem I had with kale was that I didn’t know a lot of kale recipes. I never knew what else I could do with it, other than sauteeing it with garlic or making a salad. I mean, I love kale salad, but there’s got to be other ways to eat this stuff… And I found out that there definitely are! Here is one of my new kale favourites! Delicious kale fritters! Flavourful and full of kale (and spicy if you want). They’re so hard to resist! Continue reading

Tomato Salad In A Snap!

There is no better time than tomato season to enjoy tomatoes. Everywhere I look, my friends and family are harvesting their crop and bragging about how good their tomatoes taste. My father started a vegetable garden last year and is growing all sorts of tomato varieties. He planted so many he doesn’t even know what to do with them all! And so, of course, I have a never-ending supply of sweet, ripe tomatoes coming to me. I have to say, these homegrown tomatoes are the best I’ve ever had!

IMG_5169

Take advantage of the delicious tomatoes in season and enjoy them in a simple salad! Tomato salads have always been a staple in my home, and I have my father to thank for it. He is the man always on a quest for the freshest, ripest, sweetest tomatoes, and was the one who first showed me this recipe. (I’m sure this is how I developed my love for balsamic vinegar.)

This is the easiest salad to make. It uses only a few ingredients, and takes minutes to make. Continue reading

Wrap & Roll! Learn To Rice-Paper-Wrap Anything And Everything.

I get a lot of requests for easy, quick and healthy recipes. Here’s a recipe that can’t get any easier or quicker, and can be super duper healthy! These were inspired by Vietnamese rice paper spring rolls and can be 100% vegan or vegetarian-friendly if you want them to be. If you’ve ever tried Vietnamese food, you probably know exactly what I’m talking about.

IMG_0357

Rice paper wraps are my best friend. They’re so quick and easy to use and they don’t cost much at all! Rice paper is like thin, steamed rice crepes that have been dried out into thin, hard, round sheets. You dampen the sheets, one by one, in warm water and you’re ready for wrapping! They get nice and sticky and adhere to themselves to make a gorgeous fresh roll in one step. They’re also much healthier than fried spring rolls. Continue reading

Seriously Delicious Homemade Pizza: Easiest Recipe Ever!

When the moon hits your eye like this homemade pizza pie, it’s gonna be some serious amore. I promise.

I use a whole wheat pita for the crust. You might think this sounds crazy, but give it a chance! These are the fastest super-yummiest thin-crust pizzas I’ve ever made! And it’ll take you less time than it takes to call for delivery…and taste better.

IMG_8756

I had this brilliant idea a couple years ago, and I haven’t stopped making these pizzas since. The best thing about them is that you can customize them to your own liking. Put anything on them! Get creative!  There are no limits to the yummy creations you can make. You can make them as healthy (or not healthy) as you like. You can even use gluten-free pitas/ingredients, or make them vegan. You just pile the toppings on a pita, and bake in the oven.

The result: A deliciously crispy thin crust anything-you-like-on-it pizza pie. You’ll be super impressed, along with whoever’s eating them with you. My non-pizza-eating mother has even started eating these when I make them.

Get your toppings, and hop to it!

Easy Thin Crust Pizza

*Use gluten-free or vegan-friendly ingredients to make this work for you*

Ingredients:

  • Pita bread. Large or small. Each pita makes one pizza, so use as many as you want to make. I use the thinner, drier, whole wheat pitas that can open into a pocket, as opposed to the moister, more dough-y pitas.
  • Pizza sauce. You can buy pizza sauce, or make your own, any tomato sauce will probably work fine.
  • Cheese. I usually use mozzarella, this time around I used a blend of mozzarella, provolone, and parmesan. Play around with other cheeses as toppings too!
  • Toppings!!!

IMG_8674

1. Preheat oven to 350 degrees.

2. Line baking trays with parchment paper and lay your pitas down on top. If you’re using smaller pitas you can probably fit two pitas on one tray.

IMG_8676

3. Spread a THIN layer of sauce over your pita. I use a spoon. **Make sure you dont over do it. Just a thin layer is enough, or your pizza will be soggy.**

IMG_8678

4. Cheese it up! Sprinkle a layer of mozzarella (or whatever cheese you’re using) over top.

IMG_8683

5. Lay your toppings on.

6. Add a bit more cheese as a finishing touch if you think your pizza needs it. If I’m going to use a different cheese as a topping, like a blue cheese or brie, this is when I do it.

7. Put the pizzas in the oven and bake for about 15-20 minutes, or until you can see that it’s starting to brown and get a bit crispy around the edges. You don’t want a soggy pizza, so if it still looks wet, leave it for a bit longer. I trust you, you know what a ready pizza looks like! Sometimes I put the broiler on at the end for a couple minutes, just to get the cheese a little golden. 🙂

I made a broccoli & aged cheddar pizza, veggie pizza with zucchini, red onion, garlic, green pepper, arugula & spinach, jerk chicken pizza with mushrooms, garlic & red onion, and my meat pizza had pepperoni, hot salami, olives, garlic, mushrooms, & green peppers. (Incase you’re wondering what’s in the pictures.)

Here are some toppings I’ve used to help you get thinking:

  • zucchini
  • tomato
  • arugula
  • spinach
  • mushrooms
  • peppers
  • olives
  • garlic
  • basil
  • anchovies
  • jalapeno peppers
  • banana peppers
  • onion (red or white)
  • capers
  • broccoli
  • brie cheese
  • blue cheese
  • feta cheese
  • chicken
  • prosciutto
  • pepperoni/spicy salami
  • sausage
  • ground beef
  • You can even use leftover meat from a previous meal (roasted chicken, bbq chicken, steak). I’ve done jerk chicken pizzas a bunch of times.

IMG_8754


Cowabunga dudes! xx

Soupe A L’oignon: That’s French For Delicious!

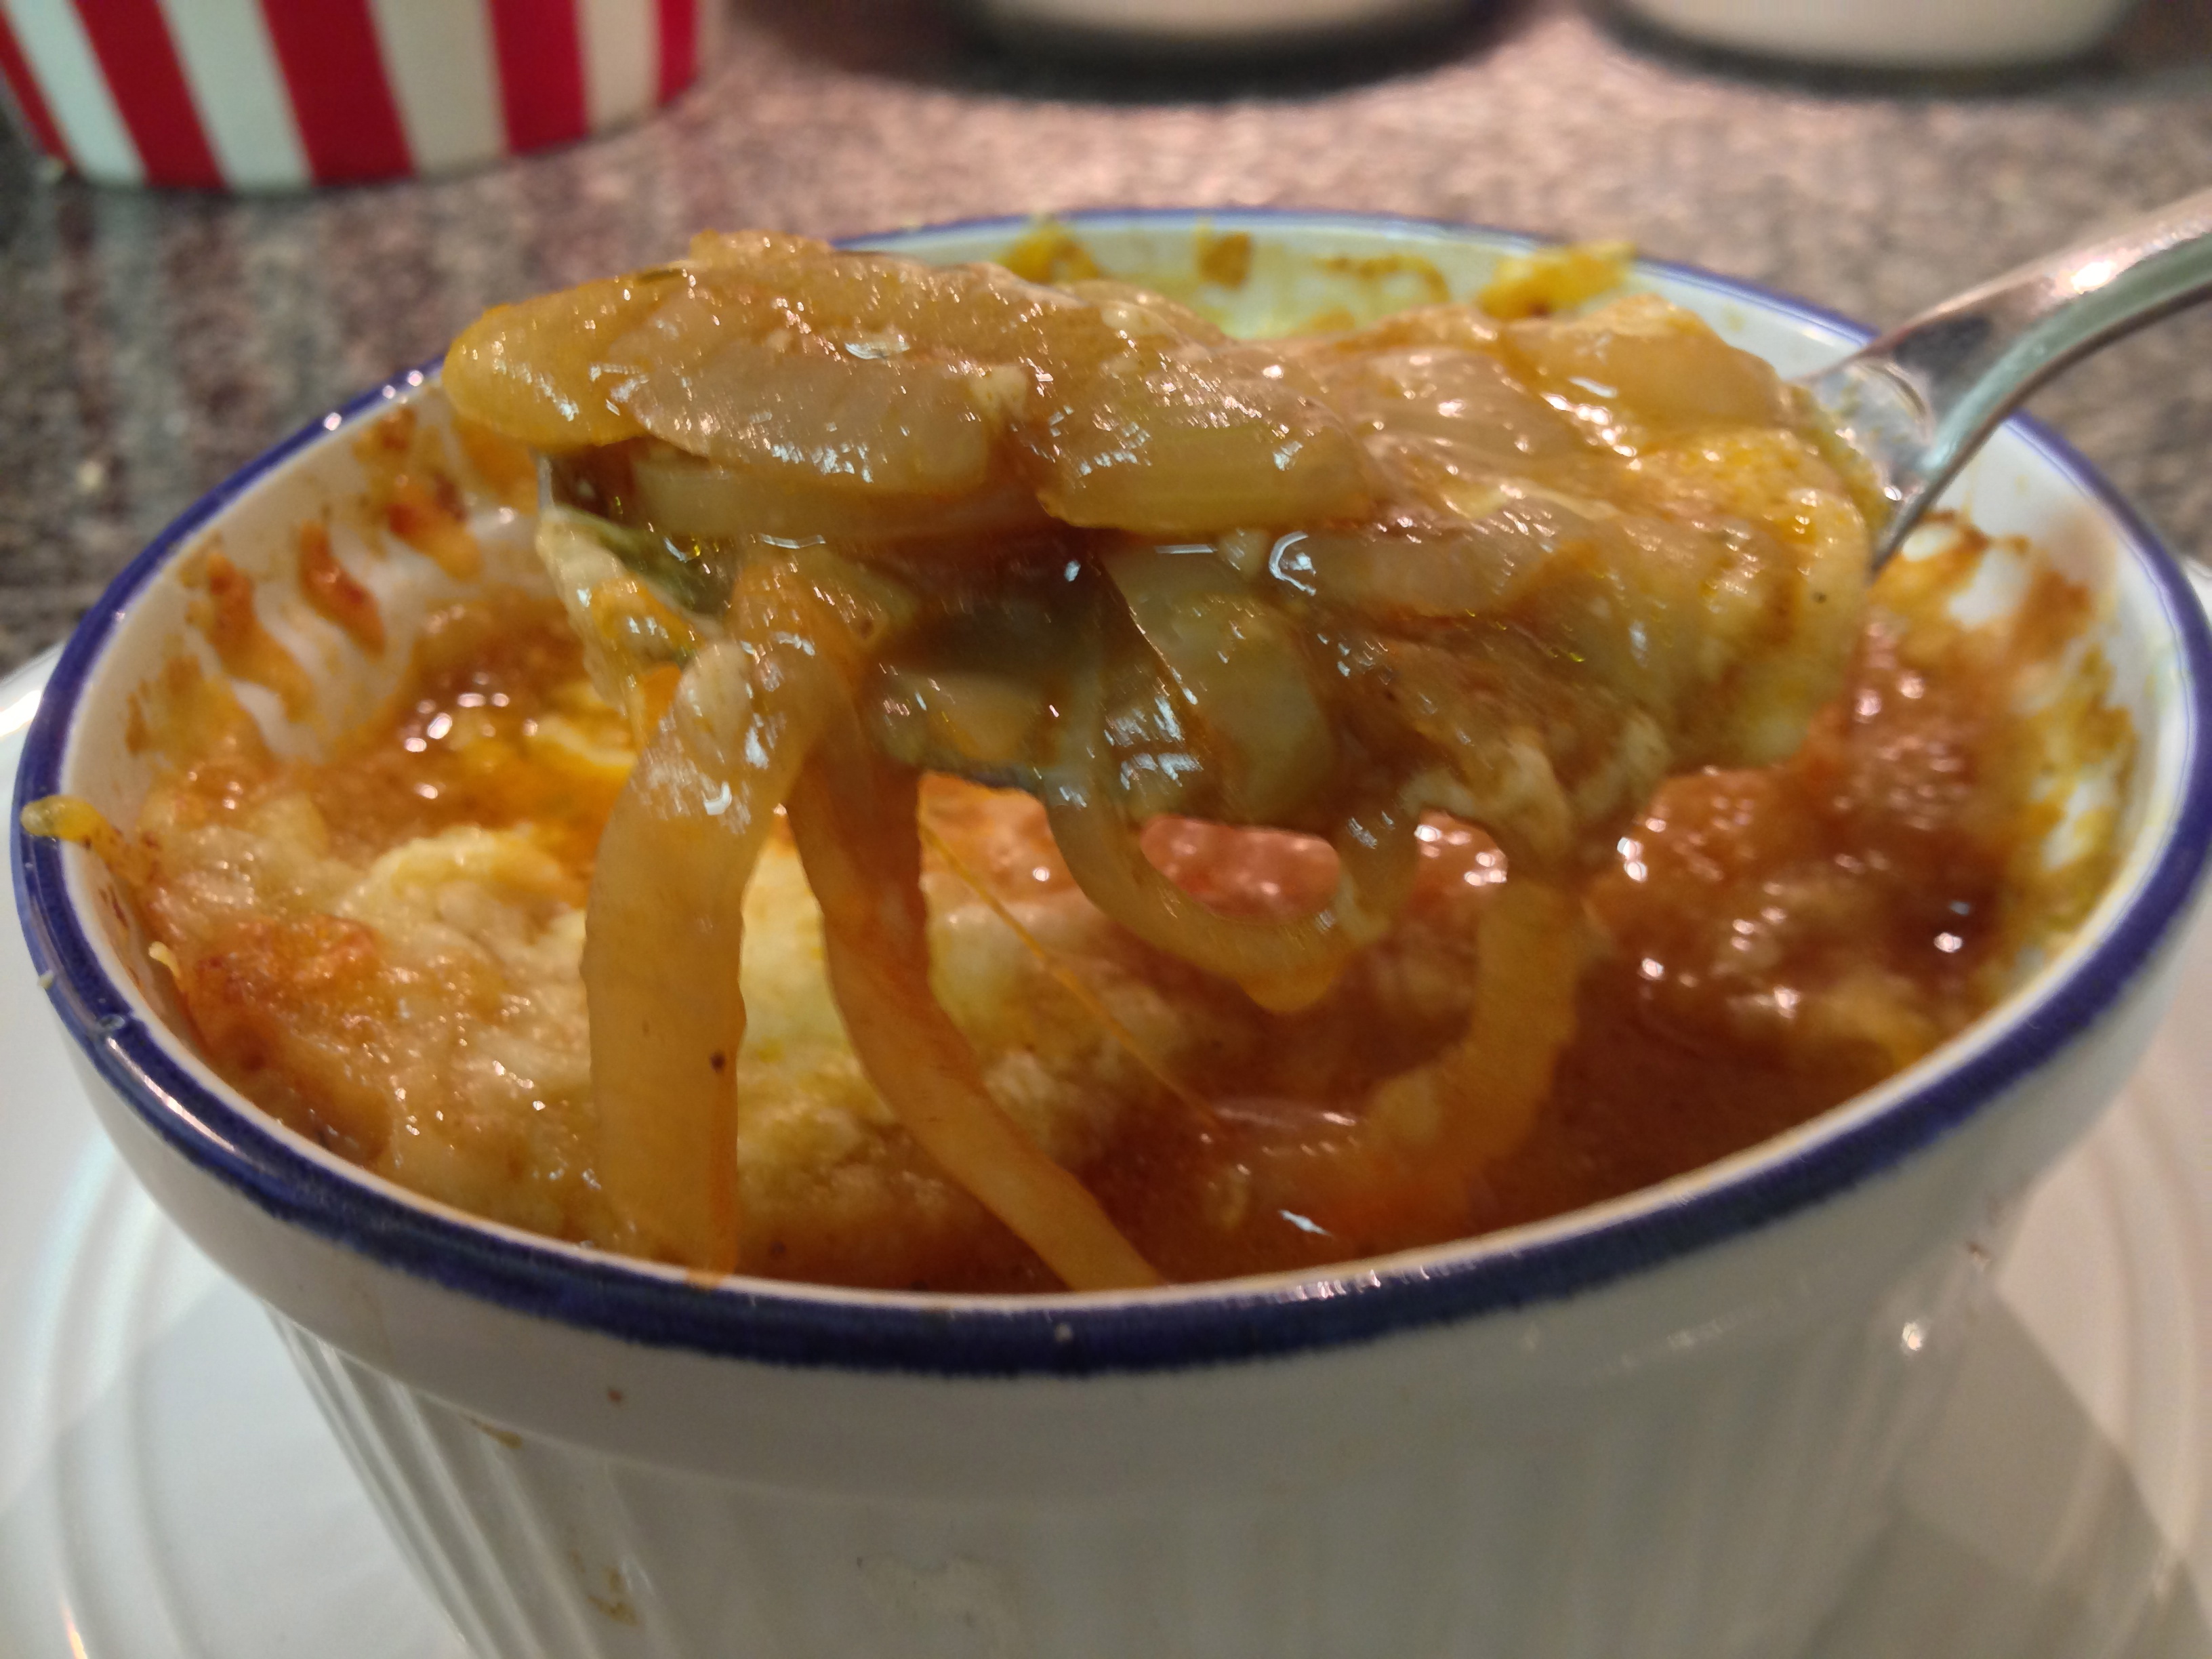
Oh gosh, where do I begin? I love French onion soup. It was love at first taste. Onions, croutons, and Swiss cheese are put into a little pot of steaming-hot goodness. I always begin by battling the mountain of bubbling cheese melted over top, trying to get a spoonful to my mouth without cheese strings hanging down my chin. (French onion cheese beard, not a good look.) Once I’ve made a path through the cheese and bread, it’s a mix of eating soup, onions, bread, and cheese until it’s all gone.

IMG_8059

“You will find this to be a more oniony soup than the usual kind but, as the cross old lady said when a stranger told her that her slip was showing, “I like it that way.”  ~Margaret Yardley Potter

I don’t know why it took me so long to think of trying to create this at home, but I finally did. And guess what, IT’S SUPER EASY!

Onion soups have been popular since…forever. They’ve been said to have been made as far back as in ancient Roman times. Onions were readily available, and easy to grow. Today, you can buy a whole bag of onions for two bucks! I read, over and over again, that the key to an amazing onion soup is TIME. The longer you cook your onions, the sweeter and more flavourful your soup will be. I found a ton of recipes with onion cooking times ranging from 20 minutes to 2 hours. So I killed two birds with one stone: let the onions cook while I took a nice long bubble bath. 🙂 P.S. You’re going to smell onions…everywhere…but it’s going to be wonderful!

I love using recipes that can easily be made vegetarian/vegan friendly or gluten-free. Classic French onion soup is made using beef broth or a combination of both chicken broth and beef broth (each made on its own, and then combined). There is flour, bread, and cheese in this recipe. However, I’ve noted substitutions you can make for a few of the ingredients to make this soup work for you.

French Onion Soup

* I used long cooking times, which makes for a really wonderful soup. However, this can be done in less time. If you’re pressed for time, you can experiment with cooking the onions for less time, and you can cut the soup-simmering time as well. But taking the extra time is definitely worth the wait. Your soup will taste amazing!
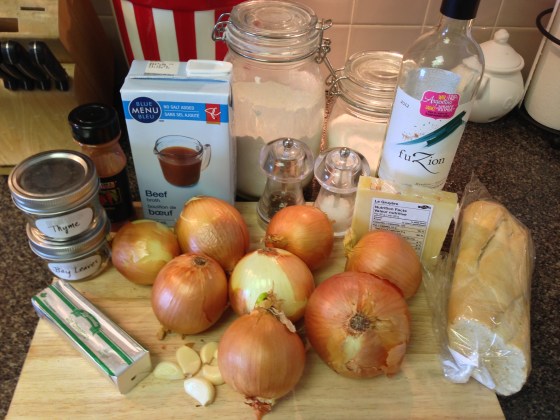
Ingredients:

  • 3 pounds of onions (I bought a 3lb bag at the store)
  • 6 tablespoons butter (3/4 of a stick) (Vegan version: use olive oil or vegan butter/margarine)
  • 1 teaspoon fresh ground black pepper (or to taste)
  • 2 tablespoons paprika
  • 1 bay leaf
  • 10 cups beef broth (Vegan/vegetarian version: use veggie broth)
  • 1 cup dry white wine (optional)
  • 1/2 cup all purpose flour (Gluten-free version: use potato flour or other flour of your choice)
  • 2 teaspoons sea salt (or to taste)
  • French baguette (or bread of choice…I used an old baguette that had gotten kind of hard.) (Gluten-free version: use gluten-free bread)
  • Swiss or Gruyere cheese (or both) (Vegan version: skip the cheese or try using vegan cheese)
  • Parmesan cheese (optional)

IMG_7961

1. Peel onions and thinly slice, about 1/8-inch thick.

2. Melt butter in a large stockpot. Add onions and cook on low heat, uncovered, for about 1 1/2 hours. The long cooking time make the onions mellow and sweet and give your soup more flavour.

3. Stir in pepper, paprika, and bay leaf. Saute for about 10 minutes.

4. Add flour to onions and stir until mixed well.

5. Pour the beef broth and wine into the pot. Add salt. Increase heat and bring to a boil.

6. Reduce heat and simmer slowly for about 2 hours. Have a little taste and add more salt or pepper, if needed.

The soup part is done! Have some right away or refrigerate overnight and serve tomorrow!

I ladled my soup into 1 cup servings and froze them in the freezer for a convenient way to have a bowl whenever I like. 🙂

Serving French Onion Soup:

*Warm it up before you pour into the bowls. I served my soup right after I had made it, so it was still hot. I don’t know if 5 minutes under the broiler will completely heat up the soup while the cheese is melting. This way you can be sure your soup will be steaming hot.

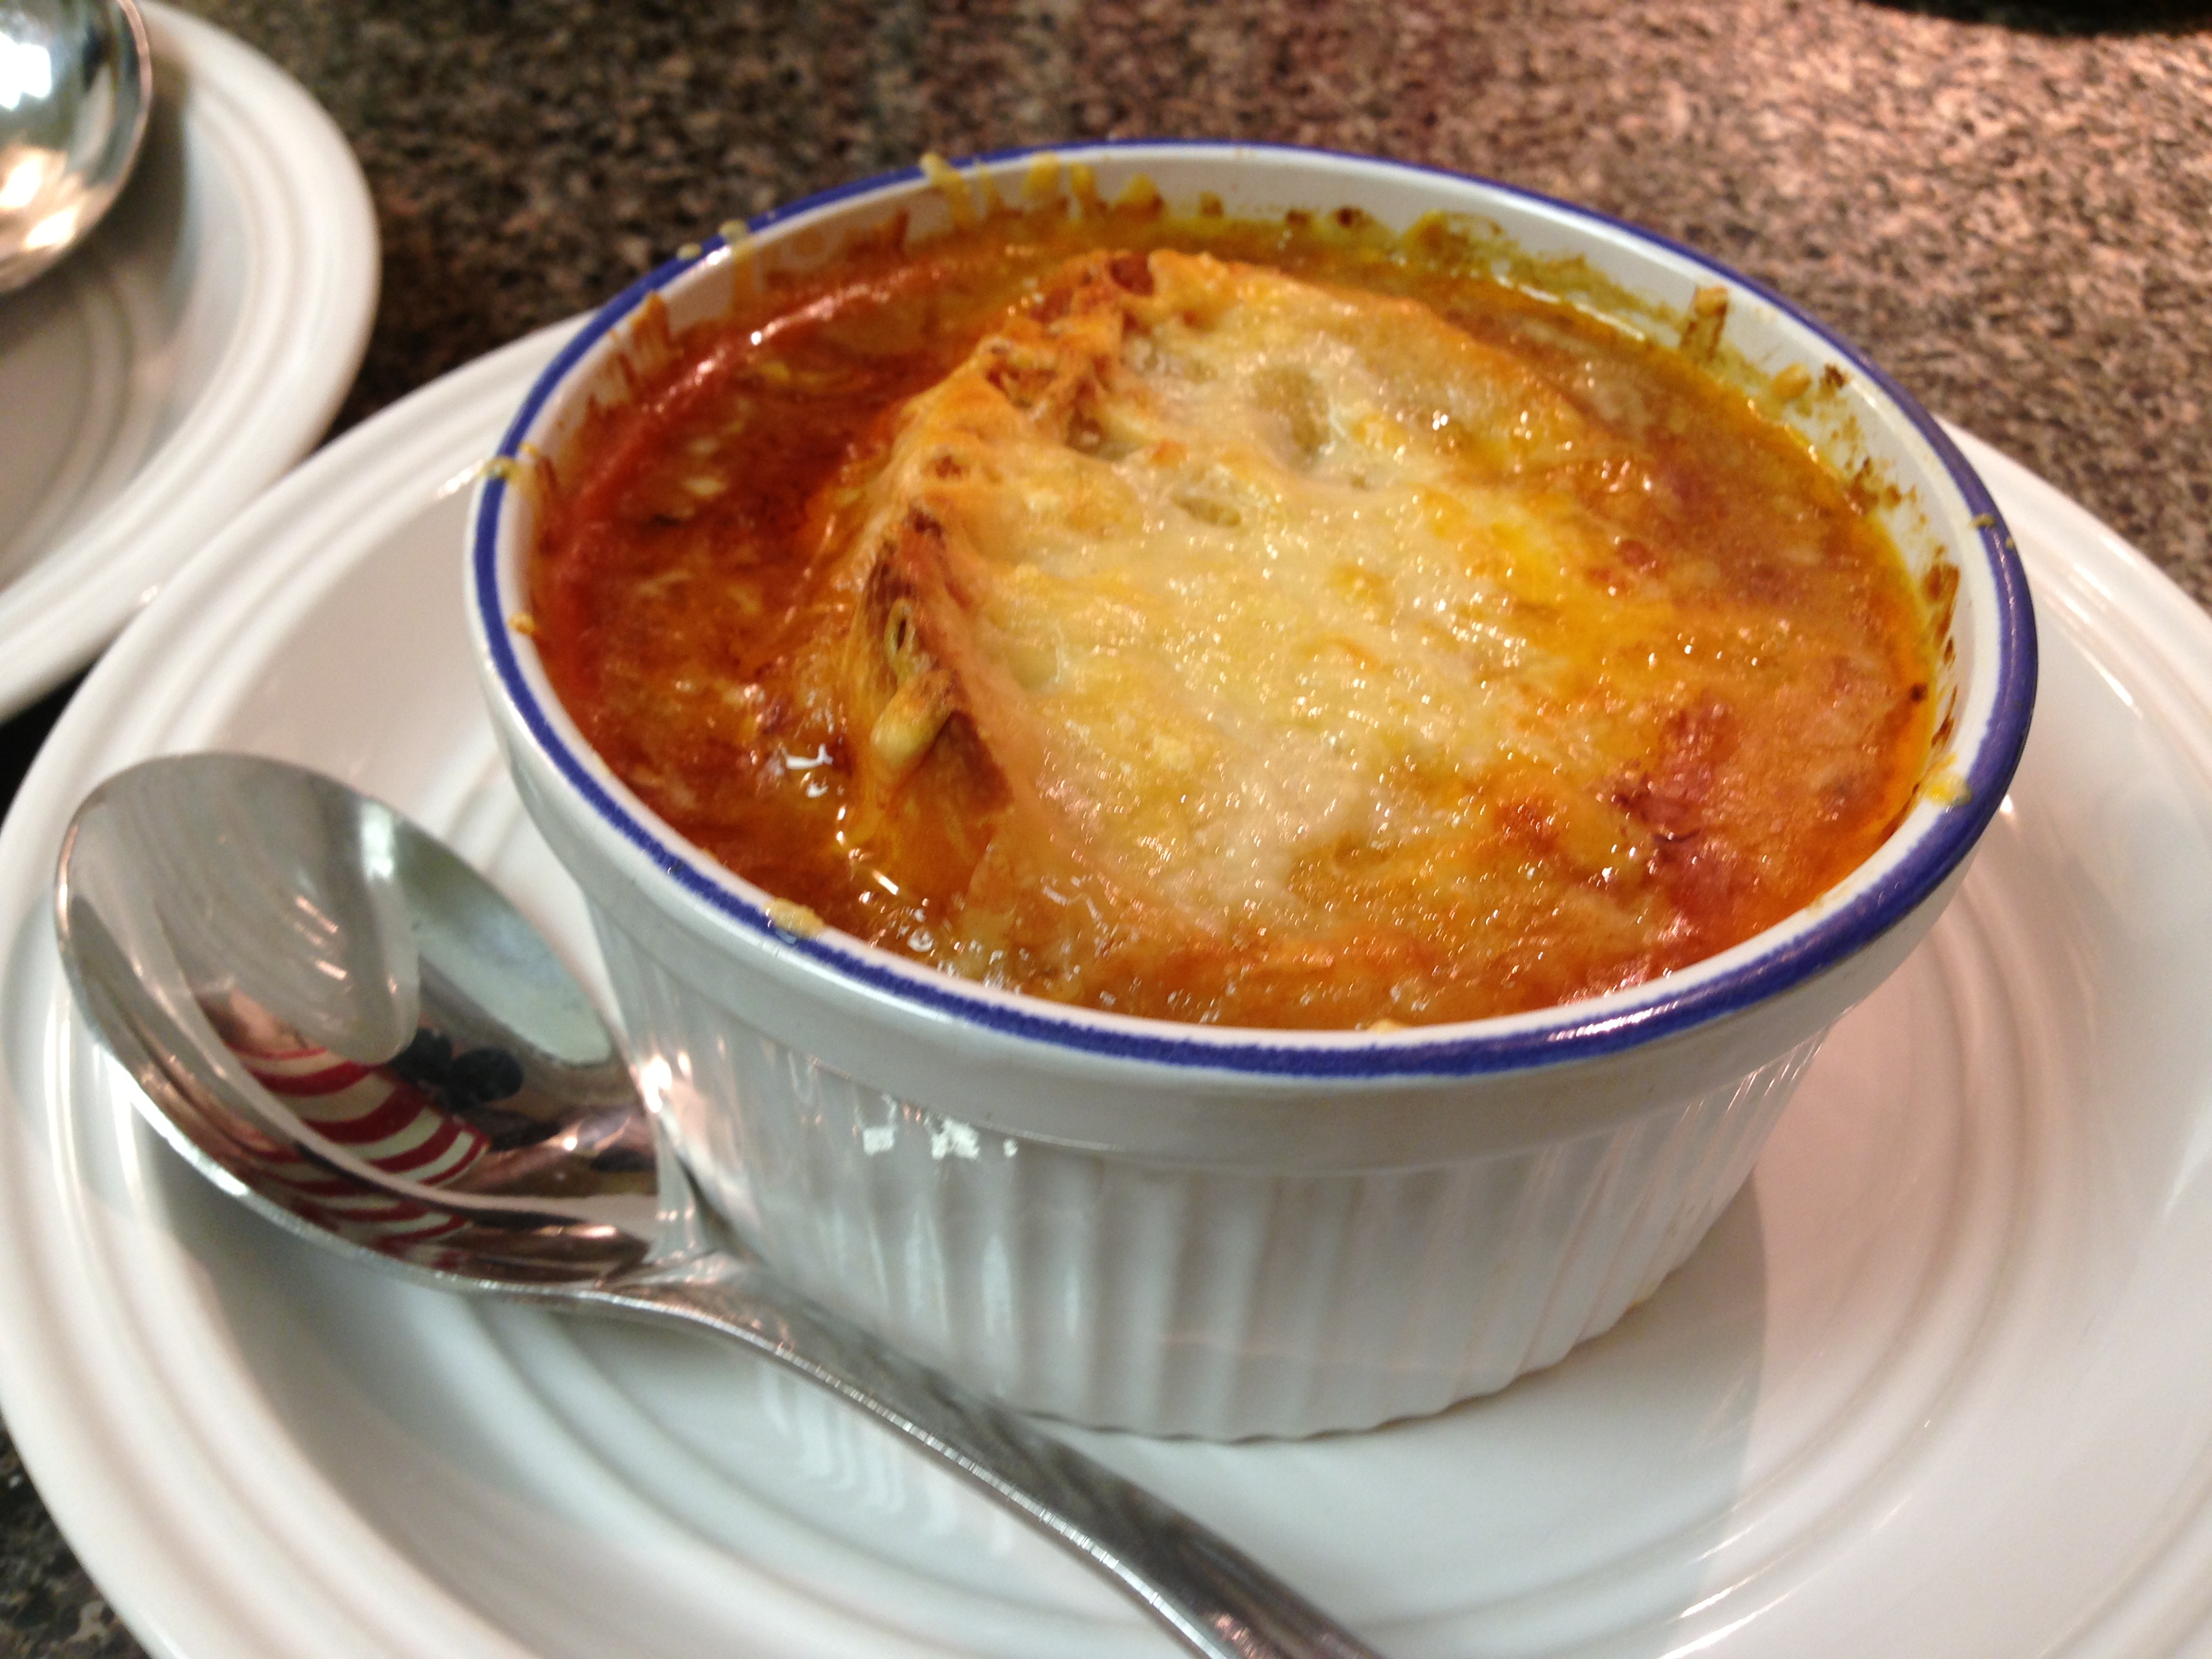
1. Pour your soup into ovenproof crocks or bowls. There are the classic French onion soup bowls with the little arms, but anything ovenproof will do. The only things I had that were the right size were ramekins, so I used those.

2. (Adding the parmesan is optional. I happened to have a bit in the fridge, so I sprinkled it over my soup for some extra cheesiness.)

3. Top with a slice of toasted bread or croutons. Slice some bread, brush with olive oil (can sprinkle with sea salt, maybe add some garlic) and toast in the oven. I used a baguette from two nights before that had hardened. This soup is a great way to use up old bread. 🙂

*If you’re doing a vegan version without cheese, this is where it ends… the soup is delicious on it’s own or topped with a yummy slice of toasted bread. 🙂

4. Now for the cheese. Sprinkle grated Swiss or Gruyere cheese, or a mixture of both, over your bowl of soup. Be generous! The more cheese, the yummier.

5. Stick your bowls in the oven under the broiler for about 5 minutes, until the cheese melts and starts to bubble.

Be careful taking the bowls out of the oven.

Get out your spoons, and enjoy!!! xx

IMG_8072

Roasted Tomato, Leek, and Fennel Soup

Soup is one of the good things in life. It warms our tummies and our souls. Each hot spoonful eases our minds and comforts us, embracing us with all its deep, rich, flavours. Soup is like a loving hug from the inside out. I’ve come to love all soups, in all the flavours and textures they come in.

IMG_8451

This a perfect day to post a soup recipe. I’m sick in bed with my sick-day crew: laptop, Puffs Plus Lotion tissues, and a cup of tea. I came across this recipe a couple weeks ago on deliciousness (re)visited and tried it out last night. It was the perfect recipe to test out while feeling under the weather because it’s simple and doesn’t require too much work (my perma-headache isn’t allowing too much brainwork). Continue reading

Peace, Love, Perfect Guacamole.

Making a perfect guacamole is a really useful (and tasty) skill to have. This delicious Mexican dip is a healthy snack, a good appetizer, and a perfect addition to a pot luck or barbeque menu. This is one of the first dips I taught myself to make, because it’s one of my favourites. It’s one of everyone’s favourites!

IMG_7460

I’ve gotten so many compliments on my guac over the years. It is time I share my secret. (Not too much of a secret…it’s pretty simple, actually.)

A few important guacamole rules I live by:
1. RIPE AVOCADOS
2. NO GARLIC
3. USE CILANTRO
4. SAVE THE PITS

Your avocados have got to be ripe for maximum sweet, creamy, delicious avocado flavour and mashing potential. You can tell an avocado is ripe when its skin has darkened and it is soft when you squeeze it.

Here are some videos I found on youtube that might help if you have avocado problems:

Despite popular belief, authentic Mexican guacamole doesn’t include garlic. When people ask me why my guac tastes different from theirs…it’s usually the garlic. So, save your garlic for something else!

Cilantro is a key ingredient in a good guacamole. Cilantro and lime are like a Mexican flavour-match made in Mexican flavour heaven.

A common problem when using avocado is that the avocado will start turning brown. This browning occurs once the avocado flesh is exposed to the oxygen in the air. (Same thing that happens with apples.) Although slightly brown avocado is still safe to eat…it’s not very nice to look at. There are  few things I do to keep my guac super green, and so far, it’s been working amazingly!
1. Lemon/lime juice slows down the browning process and is already one of the ingredients
2. Save the pits and put them back into your bowl of guacamole after you’ve made it. Food specialists claim that keeping the pit in the avocado also slows browning. It works for me!
3. If I need to store my guacamole, I use plastic wrap pressed right up onto the dip itself. Make sure there are no air bubbles. This way your guac comes in contact with as little air as possible. Refrigerate.

Perfect Guacamole

Ingredients:
I’ve made this so many times that I don’t measure my ingredients anymore. Your main ingredient is the avocado, all the other ingredients can be used to taste. Add ingredients bit by bit and taste as you go! TIP: don’t over-do the onion…may result in lethal onion breath burn.

  • 2 ripe avocados
  • 1/2 jalapeno pepper (or to taste)
  • Approx. a quarter of a red onion, not too much!
  • Fresh cilantro about 5-6 sprigs (wash and trim ends)
  • Juice of 1 lime (Can substitute with lemon juice. But lemons are bigger, you may not need to juice the entire thing.)
  • Sea salt and ground black pepper to taste
  • 1 tomato, remove all the seeds, diced (optional, I don’t always add tomatoes)

IMG_7446

1. Cut avocados in half. Remove pits and save for later. Scoop out all the avocado flesh into a bowl.

2. Finely chop red onion, cilantro, and jalapeno. I use a food processor. The processor will make sort of a paste-like mixture and your dip will be smoother. For a more chunky guac, chop with a knife. If you’re not a fan of spiciness, you can remove the jalapeno seeds. Jalapeno peppers aren’t generally too hot. I usually use half a pepper and leave the seeds in. Transfer chopped mix into the bowl with the avocado.

3. Add lime juice, salt, and pepper.

4. Mash, mash, mash, mash, mash. You avocados should be ripe enough to mash in the bowl with a fork. Continue mashing and mixing until everything is smooth and well mixed together. You can mash more or less depending on whether you like a smoother or chunkier dip.

5. Add in your chopped, deseeded tomatoes before serving. The seeds are removed to get ride of the excess water/juices. Without removing all the innards of the tomato, the juices will leak out and your guacamole will end up being really watery. If I’m bringing my guac to a friend’s, I always play it safe and keep the tomatoes on the side. Mix them in right before eating. That way you avoid watery pools forming. (I don’t have tomatoes in my photos because I didn’t add any this time around.)

6. To prevent browning, stick the pits back into the dip and lay plastic wrap right onto the top of the guacamole (no air bubbles.) Refrigerate if not serving right away.

IMG_7464

6. Serve with tortilla chips. 🙂

¡Buen apetito! xx


White Velvet Soup: Cauliflower & Lima Bean Dream

IMG_6396

I was looking for a new and tasty soup to serve at my family Passover/Easter dinner. This recipe came from Green Kitchen Stories, a wonderful vegetarian food blog full of healthy and delicious recipes. I wanted something rich, maybe even creamy, with flavour. I came across this soup and decided it was the one. The gorgeous whiteness of all the ingredients makes things in the kitchen really pretty too. It has the yummy taste of cauliflower with the richness of the lima beans. 🙂 A hot bowl of thick hearty soup is such a comfort on a chilly night. Although the weather’s slowly warming up, I thought I’d take advantage of the last of our colder days and soup it up!

This is a really simple soup to make, and so super healthy! It’s a pureed soup of roasted white veggies and lima beans. These vegetables are full of health boosting nutrients and the lima beans are high in protein and loaded with fiber.

Ingredients:

  • 1 head of cauliflower
  • 2 medium onions
  • 6-8 whole cloves of garlic (I used 10…I love garlic)
  • 3 cups of cooked lima beans (about 2 cans)
  • 2 cups water
  • 2 cups vegetable broth
  • juice of 1 lemon
  • salt to taste
  • olive oil
  • paprika (or cayenne powder if you’d like a bit of spice)
  • Truffle infused olive oil (optional)

This soup is extra easy because all your cooking is done by the oven.

*If you are using dry lima beans, remember to soak them in water overnight. I soaked mine overnight and then boiled them the next day for an hour or so…or until they are soft. Even though the skins get wrinkly while soaking, leave them on. All the fibre is in the skin.

1. Preheat oven to 400 degrees and line two baking trays with parchment paper.

2. Wash and cut your head of cauliflower into small pieces and transfer to first baking tray. Drizzle olive oil over top and sprinkle with salt.

3. Peel the onions and cut into chunks. Transfer cut onions to second baking tray along with whole cloves of garlic. Drizzle olive oil over top and sprinkle with salt.

4. Put both trays into the oven and bake for 30-40 minutes or until the edges have become a nice golden colour.

5. (I was about to start blending in a blender when I remembered I had my hand blender!) Transfer the veggies into a pot and add cooked/canned lima beans, water, vegetable broth, and lemon juice. Now blend until smooth using a hand blender. If you don’t have a hand blender, you can do your blending in a regular blender (doing smaller batches at a time if it doesn’t all fit).

IMG_5915

6. The soup probably isn’t very hot, so heat it up a touch on the stove before you serve it. If you find your soup is too thick, you can add more water (or broth) until you’re satisfied with the consistency.

7. For something a little extra, mix 1 teaspoon of olive oil with 1/8 teaspoon of paprika/smoked paprika. Drizzle over the bowl of serve before serving. I drizzled truffle infused olive oil and sprinkled a little paprika over top.

Hope you love this!! xx

Cranberry Sauce Recipe

It’s so easy to make your own delicious cranberry sauce! No preservatives like the store-bought kind, and it doesn’t plop out of the can…still in the shape of a can.

I made mine to go along with a roasted turkey. It turned out to be wonderful! You could even use it as a jam or jelly.

IMG_5900

Cranberry Sauce

Ingredients:

  • 1 1/2 cups of fresh or frozen cranberries
  • 1/2 cup orange juice (unsweetened)
  • 2/3 cup sugar
  • 1/4 teaspoon cinnamon
  • 1/8 teaspoon kosher salt

Bring all the ingredients together in a small saucepan. Bring it to a simmer. Most recipes I’ve looked at say to simmer for 20 minutes. I found the cranberries still looked quite solid. I had lots of time while my turkey was cooking, so I left the cranberries lightly simmering on low for about an hour, and sort of smashed the berries up with a wooden spoon.

It was exactly the texture I wanted. A perfect jelly. Totally worth whipping this up quickly, and the cinnamon adds a lovely touch of spice.