Gluten-Free Avocado Brownies: A Healthier Brownie Recipe

This is a recipe for the chocolate addicts, the bakers, the health-conscious eaters, the avocado lovers, and my non-gluten-eating friends. Despite the fact that I called these avocado brownies, these are regular brownies, that taste amazing. They’re not green, and the gluten-free aspect doesn’t change the texture or the taste of them. I know sometimes gluten-free baking results in a weird taste or texture you might not be used to, or like. I can assure you. These brownies are yummy!

Confession: I couldn’t wait for mine to cool before devouring…so it didn’t come too nicely out of the pan. (Note the giant holes.) It still tasted the great! 🙂

IMG_8803

Continue reading

Seriously Delicious Homemade Pizza: Easiest Recipe Ever!

When the moon hits your eye like this homemade pizza pie, it’s gonna be some serious amore. I promise.

I use a whole wheat pita for the crust. You might think this sounds crazy, but give it a chance! These are the fastest super-yummiest thin-crust pizzas I’ve ever made! And it’ll take you less time than it takes to call for delivery…and taste better.

IMG_8756

I had this brilliant idea a couple years ago, and I haven’t stopped making these pizzas since. The best thing about them is that you can customize them to your own liking. Put anything on them! Get creative!  There are no limits to the yummy creations you can make. You can make them as healthy (or not healthy) as you like. You can even use gluten-free pitas/ingredients, or make them vegan. You just pile the toppings on a pita, and bake in the oven.

The result: A deliciously crispy thin crust anything-you-like-on-it pizza pie. You’ll be super impressed, along with whoever’s eating them with you. My non-pizza-eating mother has even started eating these when I make them.

Get your toppings, and hop to it!

Easy Thin Crust Pizza

*Use gluten-free or vegan-friendly ingredients to make this work for you*

Ingredients:

  • Pita bread. Large or small. Each pita makes one pizza, so use as many as you want to make. I use the thinner, drier, whole wheat pitas that can open into a pocket, as opposed to the moister, more dough-y pitas.
  • Pizza sauce. You can buy pizza sauce, or make your own, any tomato sauce will probably work fine.
  • Cheese. I usually use mozzarella, this time around I used a blend of mozzarella, provolone, and parmesan. Play around with other cheeses as toppings too!
  • Toppings!!!

IMG_8674

1. Preheat oven to 350 degrees.

2. Line baking trays with parchment paper and lay your pitas down on top. If you’re using smaller pitas you can probably fit two pitas on one tray.

IMG_8676

3. Spread a THIN layer of sauce over your pita. I use a spoon. **Make sure you dont over do it. Just a thin layer is enough, or your pizza will be soggy.**

IMG_8678

4. Cheese it up! Sprinkle a layer of mozzarella (or whatever cheese you’re using) over top.

IMG_8683

5. Lay your toppings on.

6. Add a bit more cheese as a finishing touch if you think your pizza needs it. If I’m going to use a different cheese as a topping, like a blue cheese or brie, this is when I do it.

7. Put the pizzas in the oven and bake for about 15-20 minutes, or until you can see that it’s starting to brown and get a bit crispy around the edges. You don’t want a soggy pizza, so if it still looks wet, leave it for a bit longer. I trust you, you know what a ready pizza looks like! Sometimes I put the broiler on at the end for a couple minutes, just to get the cheese a little golden. 🙂

I made a broccoli & aged cheddar pizza, veggie pizza with zucchini, red onion, garlic, green pepper, arugula & spinach, jerk chicken pizza with mushrooms, garlic & red onion, and my meat pizza had pepperoni, hot salami, olives, garlic, mushrooms, & green peppers. (Incase you’re wondering what’s in the pictures.)

Here are some toppings I’ve used to help you get thinking:

  • zucchini
  • tomato
  • arugula
  • spinach
  • mushrooms
  • peppers
  • olives
  • garlic
  • basil
  • anchovies
  • jalapeno peppers
  • banana peppers
  • onion (red or white)
  • capers
  • broccoli
  • brie cheese
  • blue cheese
  • feta cheese
  • chicken
  • prosciutto
  • pepperoni/spicy salami
  • sausage
  • ground beef
  • You can even use leftover meat from a previous meal (roasted chicken, bbq chicken, steak). I’ve done jerk chicken pizzas a bunch of times.

IMG_8754


Cowabunga dudes! xx

Soupe A L’oignon: That’s French For Delicious!

Oh gosh, where do I begin? I love French onion soup. It was love at first taste. Onions, croutons, and Swiss cheese are put into a little pot of steaming-hot goodness. I always begin by battling the mountain of bubbling cheese melted over top, trying to get a spoonful to my mouth without cheese strings hanging down my chin. (French onion cheese beard, not a good look.) Once I’ve made a path through the cheese and bread, it’s a mix of eating soup, onions, bread, and cheese until it’s all gone.

IMG_8059

“You will find this to be a more oniony soup than the usual kind but, as the cross old lady said when a stranger told her that her slip was showing, “I like it that way.”  ~Margaret Yardley Potter

I don’t know why it took me so long to think of trying to create this at home, but I finally did. And guess what, IT’S SUPER EASY!

Onion soups have been popular since…forever. They’ve been said to have been made as far back as in ancient Roman times. Onions were readily available, and easy to grow. Today, you can buy a whole bag of onions for two bucks! I read, over and over again, that the key to an amazing onion soup is TIME. The longer you cook your onions, the sweeter and more flavourful your soup will be. I found a ton of recipes with onion cooking times ranging from 20 minutes to 2 hours. So I killed two birds with one stone: let the onions cook while I took a nice long bubble bath. 🙂 P.S. You’re going to smell onions…everywhere…but it’s going to be wonderful!

I love using recipes that can easily be made vegetarian/vegan friendly or gluten-free. Classic French onion soup is made using beef broth or a combination of both chicken broth and beef broth (each made on its own, and then combined). There is flour, bread, and cheese in this recipe. However, I’ve noted substitutions you can make for a few of the ingredients to make this soup work for you.

French Onion Soup

* I used long cooking times, which makes for a really wonderful soup. However, this can be done in less time. If you’re pressed for time, you can experiment with cooking the onions for less time, and you can cut the soup-simmering time as well. But taking the extra time is definitely worth the wait. Your soup will taste amazing!

Ingredients:

  • 3 pounds of onions (I bought a 3lb bag at the store)
  • 6 tablespoons butter (3/4 of a stick) (Vegan version: use olive oil or vegan butter/margarine)
  • 1 teaspoon fresh ground black pepper (or to taste)
  • 2 tablespoons paprika
  • 1 bay leaf
  • 10 cups beef broth (Vegan/vegetarian version: use veggie broth)
  • 1 cup dry white wine (optional)
  • 1/2 cup all purpose flour (Gluten-free version: use potato flour or other flour of your choice)
  • 2 teaspoons sea salt (or to taste)
  • French baguette (or bread of choice…I used an old baguette that had gotten kind of hard.) (Gluten-free version: use gluten-free bread)
  • Swiss or Gruyere cheese (or both) (Vegan version: skip the cheese or try using vegan cheese)
  • Parmesan cheese (optional)

IMG_7961

1. Peel onions and thinly slice, about 1/8-inch thick.

2. Melt butter in a large stockpot. Add onions and cook on low heat, uncovered, for about 1 1/2 hours. The long cooking time make the onions mellow and sweet and give your soup more flavour.

3. Stir in pepper, paprika, and bay leaf. Saute for about 10 minutes.

4. Add flour to onions and stir until mixed well.

5. Pour the beef broth and wine into the pot. Add salt. Increase heat and bring to a boil.

6. Reduce heat and simmer slowly for about 2 hours. Have a little taste and add more salt or pepper, if needed.

The soup part is done! Have some right away or refrigerate overnight and serve tomorrow!

I ladled my soup into 1 cup servings and froze them in the freezer for a convenient way to have a bowl whenever I like. 🙂

Serving French Onion Soup:

*Warm it up before you pour into the bowls. I served my soup right after I had made it, so it was still hot. I don’t know if 5 minutes under the broiler will completely heat up the soup while the cheese is melting. This way you can be sure your soup will be steaming hot.

1. Pour your soup into ovenproof crocks or bowls. There are the classic French onion soup bowls with the little arms, but anything ovenproof will do. The only things I had that were the right size were ramekins, so I used those.

2. (Adding the parmesan is optional. I happened to have a bit in the fridge, so I sprinkled it over my soup for some extra cheesiness.)

3. Top with a slice of toasted bread or croutons. Slice some bread, brush with olive oil (can sprinkle with sea salt, maybe add some garlic) and toast in the oven. I used a baguette from two nights before that had hardened. This soup is a great way to use up old bread. 🙂

*If you’re doing a vegan version without cheese, this is where it ends… the soup is delicious on it’s own or topped with a yummy slice of toasted bread. 🙂

4. Now for the cheese. Sprinkle grated Swiss or Gruyere cheese, or a mixture of both, over your bowl of soup. Be generous! The more cheese, the yummier.

5. Stick your bowls in the oven under the broiler for about 5 minutes, until the cheese melts and starts to bubble.

Be careful taking the bowls out of the oven.

Get out your spoons, and enjoy!!! xx

IMG_8072

Roasted Tomato, Leek, and Fennel Soup

Soup is one of the good things in life. It warms our tummies and our souls. Each hot spoonful eases our minds and comforts us, embracing us with all its deep, rich, flavours. Soup is like a loving hug from the inside out. I’ve come to love all soups, in all the flavours and textures they come in.

IMG_8451

This a perfect day to post a soup recipe. I’m sick in bed with my sick-day crew: laptop, Puffs Plus Lotion tissues, and a cup of tea. I came across this recipe a couple weeks ago on deliciousness (re)visited and tried it out last night. It was the perfect recipe to test out while feeling under the weather because it’s simple and doesn’t require too much work (my perma-headache isn’t allowing too much brainwork). Continue reading

Spicy Creole Shrimp

This is a really quick, really simple, really tasty, really spicy, recipe. I LOVE spicy food, but I know that not everyone does, so I’m giving you the warning now: spice alert! That being said, you can adjust the recipe however you like to make it work for you. A simple solution: use less cayenne pepper and don’t add the deathly pepper from hell!

IMG_7663

While I’ve sadly never been to New Orleans myself, although we’re planning a possible trip in JUNE! (Excitement!), I can certainly appreciate the wonderful flavours that it has to offer the food world. Creole cooking involves a beautiful mix of everything I love. If you’ve never tried this southern deliciousness, it’s hard for me to put into words. Creole cuisine is a combination of Caribbean, African, French, and Spanish flavour influences. Hot pepper, seafood, butter, citrus, tomato, onion, celery, rice, bean explosion of taste! It’s real comfort food.

Anyway, this is a quick recipe I found from a blog called Tummy Travels. I tried it with my tiger shrimp last weekend as part of a huge seafood feast I unintentionally put together. I wouldn’t say it’s a classic Shrimp Creole. I think that involves more veggies, a tomato base, a nice saucy gravy-ness and it’s traditionally served over rice. This shrimp could be a main served with French bread or a good addition to any meal. It’s got nice Southern flavour and a good kick to it!

Cooking shrimp makes me think of Bubba from the movie Forrest Gump (hope you’ve seen it). Bubba knows a million ways shrimp, “the fruit of the sea”, can be cooked. I love this clip! 🙂

The tiger shrimp I used were headless, but I cooked them with the shells on. Heads on, ever better! You can find whole shrimps at most Asian grocery stores if you don’t see any at your usual store or market. Cooking shrimp with the heads and shell intact add so much more flavour! All the juices are kept inside. In New Orleans, crawfish and shrimp are always cooked whole. The best part is pulling off the heads and sucking all the delicious juices and seasonings out of there before eating the rest of it. I know the heads freak some people out, but they’re delicious, I promise. In my half-Asian household, I grew up eating shrimps with heads. My sister and I discovered the next best thing to press-on nails…wearing the pointy/spiky shrimp head shells on our finger tips. It kept us entertained, and super stylish, at family dinners. (Cute…minus the shrimpy fingers afterwards.)

Spicy Creole Shrimp

Ingredients:
The spicy stuff is optional…switch it up to keep things at the spice level you want.
This recipe called for 8 tablespoons of butter (a whole stick). I cut the butter amount in half. I didn’t want to go too butter crazy, but by all means, use more butter. More butter = more sauce, and a richer sauce.

  • 1- 1 1/2 pounds shrimp (I recommend doing them with shells and heads, but you can do headless, or peeled if you like)
  • ~1/2 – 1 tablespoon olive oil, to saute garlic
  • 5 cloves garlic, chopped
  • 2 tablespoons worcestershire sauce
  • Juice of 1 lemon (my large lemon gave about 1/4 cup)
  • 2 teaspoons fresh ground black pepper
  • 1 teaspoon garlic powder
  • 1 teaspoon paprika
  • 1 habanero or scotch bonnet pepper (optional)
  • 1 teaspoon cayenne powder (optional)
  • 4-5 tablespoons butter (just cut butter into cubes and keep cold)
  • Sea salt, to taste

1. Heat olive oil in a pan, add garlic, and saute until garlic has softened.

2. Add all other ingredients except butter and shrimp. Allow this mixture to reduce for a couple minutes on medium heat. There wasn’t too much liquid and it reduced quite quickly. Don’t let it burn!

3. Add your shrimp into the pan, cooking one side and then flipping to cook the other. Two minutes on each side should be sufficient. The shrimps are cooked when they turn pink.

4. Turn to low heat and begin slowly incorporating cubes of butter.

5. When well mixed you should have a gorgeously rich, amber, shrimp creation.

6. Plate and serve!

Enjoy! xx

Parsnip Puree: A Mashed Potato Alternative To Die For

I love mashed potatoes! Garlic mashed potatoes? Even better. But I have to admit that sometimes while I’m mashing I feel like maybe there’s something a little more exciting or different I could be making. Something with the same texture and the same satisfying creaminess.

Well, I found the something! The something is REALLY GOOD. The something is PUREED PARSNIPS (plus a little potato). This is most definitely worth a try! It’s a slightly sweeter play on mashed potatoes, with the same satisfying richness. I seriously love this. Continue reading

Beef Short Ribs Braised In Red Wine

This was dinner a few nights ago. Delicious short ribs slow-cooked in red wine. This was my first time braising beef short ribs. I braise oxtail more often, which I think would also work well with this recipe. I’m an oxtail addict. The meat is much softer and juicier, although it’s probably a little fattier than the ribs. I found this recipe on cbc.ca, I liked it best out of a few that I read through.

IMG_7340

The meal consisted of these yummy saucy ribs, pureed parsnips (recipe here), and a kale salad with sweet potato, carrots, and beets. It was a perfect combo. The pureed parsnips were REALLY good. A great alternative to classic mashed potatoes. I’ll be posting that recipe soon. 🙂

Beef Short Ribs Braised In Red Wine
Serves 4-5 people

*I cooked my ribs in a slow cooker, but you could try doing this in a pot on the stove if you don’t have a slow cooker. I slow-cooked the ribs for eight hours, you could probably let them cook on the stove for about three. Continue reading

Peace, Love, Perfect Guacamole.

Making a perfect guacamole is a really useful (and tasty) skill to have. This delicious Mexican dip is a healthy snack, a good appetizer, and a perfect addition to a pot luck or barbeque menu. This is one of the first dips I taught myself to make, because it’s one of my favourites. It’s one of everyone’s favourites!

IMG_7460

I’ve gotten so many compliments on my guac over the years. It is time I share my secret. (Not too much of a secret…it’s pretty simple, actually.)

A few important guacamole rules I live by:
1. RIPE AVOCADOS
2. NO GARLIC
3. USE CILANTRO
4. SAVE THE PITS

Your avocados have got to be ripe for maximum sweet, creamy, delicious avocado flavour and mashing potential. You can tell an avocado is ripe when its skin has darkened and it is soft when you squeeze it.

Here are some videos I found on youtube that might help if you have avocado problems:

Despite popular belief, authentic Mexican guacamole doesn’t include garlic. When people ask me why my guac tastes different from theirs…it’s usually the garlic. So, save your garlic for something else!

Cilantro is a key ingredient in a good guacamole. Cilantro and lime are like a Mexican flavour-match made in Mexican flavour heaven.

A common problem when using avocado is that the avocado will start turning brown. This browning occurs once the avocado flesh is exposed to the oxygen in the air. (Same thing that happens with apples.) Although slightly brown avocado is still safe to eat…it’s not very nice to look at. There are  few things I do to keep my guac super green, and so far, it’s been working amazingly!
1. Lemon/lime juice slows down the browning process and is already one of the ingredients
2. Save the pits and put them back into your bowl of guacamole after you’ve made it. Food specialists claim that keeping the pit in the avocado also slows browning. It works for me!
3. If I need to store my guacamole, I use plastic wrap pressed right up onto the dip itself. Make sure there are no air bubbles. This way your guac comes in contact with as little air as possible. Refrigerate.

Perfect Guacamole

Ingredients:
I’ve made this so many times that I don’t measure my ingredients anymore. Your main ingredient is the avocado, all the other ingredients can be used to taste. Add ingredients bit by bit and taste as you go! TIP: don’t over-do the onion…may result in lethal onion breath burn.

  • 2 ripe avocados
  • 1/2 jalapeno pepper (or to taste)
  • Approx. a quarter of a red onion, not too much!
  • Fresh cilantro about 5-6 sprigs (wash and trim ends)
  • Juice of 1 lime (Can substitute with lemon juice. But lemons are bigger, you may not need to juice the entire thing.)
  • Sea salt and ground black pepper to taste
  • 1 tomato, remove all the seeds, diced (optional, I don’t always add tomatoes)

IMG_7446

1. Cut avocados in half. Remove pits and save for later. Scoop out all the avocado flesh into a bowl.

2. Finely chop red onion, cilantro, and jalapeno. I use a food processor. The processor will make sort of a paste-like mixture and your dip will be smoother. For a more chunky guac, chop with a knife. If you’re not a fan of spiciness, you can remove the jalapeno seeds. Jalapeno peppers aren’t generally too hot. I usually use half a pepper and leave the seeds in. Transfer chopped mix into the bowl with the avocado.

3. Add lime juice, salt, and pepper.

4. Mash, mash, mash, mash, mash. You avocados should be ripe enough to mash in the bowl with a fork. Continue mashing and mixing until everything is smooth and well mixed together. You can mash more or less depending on whether you like a smoother or chunkier dip.

5. Add in your chopped, deseeded tomatoes before serving. The seeds are removed to get ride of the excess water/juices. Without removing all the innards of the tomato, the juices will leak out and your guacamole will end up being really watery. If I’m bringing my guac to a friend’s, I always play it safe and keep the tomatoes on the side. Mix them in right before eating. That way you avoid watery pools forming. (I don’t have tomatoes in my photos because I didn’t add any this time around.)

6. To prevent browning, stick the pits back into the dip and lay plastic wrap right onto the top of the guacamole (no air bubbles.) Refrigerate if not serving right away.

IMG_7464

6. Serve with tortilla chips. 🙂

¡Buen apetito! xx


Turkey Pot Pie

I definitely found the right recipe at the right time. After making my first turkey for Passover/Easter, I had a ton of turkey left over and didn’t know what to do with it. I decided to freeze it. Leftover turkey will stay fresh in the refrigerator for 3-4 days, but freezing it will extend it’s shelf life by months. So, I packed it into neatly labelled ziploc freezer bags to use for future meal planning.

I came across a chicken pot pie recipe from My Healthy ‘Ohana, a blog full of yummy recipes (go have a look and try some of them). I thought turkey would work wonderfully with this recipe as well. It turned out to be a great way to use up leftover roasted turkey, and the recipe is not hard at all. I’m so proud of my first pot pie! 🙂

Turkey Pot Pie (or chicken)

Ingredients:

  • 1 medium sweet potato peeled and cubed
  • 2 medium carrots peeled and chopped
  • ~ 2 cups homemade turkey broth (or 1 can chicken broth)
  • 3 sprigs fresh thyme
  • 2 bay leaves
  • Half a large onion chopped
  • 1 tablespoon butter
  • 1/3 cup flour
  • 1/2 teaspoon salt
  • 1/2 teaspoon ground black pepper
  • 1 teaspoon paprika
  • 2/3 cups milk
  • ~ 3 cups of leftover roast turkey chopped into large cubes (you can substitute with chicken)
  • 1/2 cup frozen or canned peas
  • 1 9-inch pie crust (I was pressed for time, I used a pre-made crust)
  • 1 egg, beaten

IMG_6844


Preheat oven to 425 degrees.

Place the chopped carrots and sweet potato in a small saucepan, cover with broth, and add thyme leaves and bay leaves. I used homemade turkey broth I had made from my roast turkey bones. Cover and bring to a boil. Cook until the carrots and potatoes are just tender. It’s easy to overcook the sweet potatoes, you don’t want them mushy.

In a separate pan, fry onions in butter until translucent.

Add flour, salt, pepper, and paprika and cook for a couple minutes, until the onions are well coated and everything’s mixed together nicely.

Next, add the milk in and stir until the mixture becomes a thick paste.

IMG_6861


Remove the bay leaves from your pot of vegetables. Add the onion/flour paste to your vegetables and broth and continue cooking and stirring until the broth thickens to become a creamy sauce. (It doesn’t take long.) Fold in peas and leftover turkey (or chicken).

Place this mixture into a 9-inch pie dish. I used a round glass casserole dish that was a bit bigger than a pie tray, there was a lot of filling. You can also use individual ramekins if your want to make smaller pies. Sprinkle a bit of salt and pepper over the mixture before you put the crust over top.

IMG_6883

Cover your filling with pie crust, making sure to seal the edges well. Remove the excess crust. You can shape this extra crust into fun decorative shapes to make your pie look extra special. I had a lot of extra crust, so I made an edge around my pie…and a heart. Next, brush the top of your pie with the beaten egg and cut several vents in the top to let steam escape. You’re ready to bake!

Bake the pie for 20-25 minutes at 425 in the oven (or until the crust is golden and crispy). I baked mine for 25 minutes.

IMG_6911


I am so happy I tried this recipe. It was delicious! The sweet potatoes add a sweet creaminess that is really nice. My pie was done with one crust over top, but you can also use the same filling with two crusts. Line your pie tray with the bottom crust, fill, and then seal with the top crust. Play around with different spices too!

Enjoy! xx

Roasting My First Turkey: How To Clean, Brine, Roast A Turkey And Make Gravy

I roasted my first turkey last night and was really happy with the results! It’s hard to keep your turkey moist and juicy inside. I’ve had so many dry turkeys over the years, people tend to overcook them. I learned so many new things while making this turkey. There may be a few things I’d do differently next time. I’ll share my learnings with you of course!

IMG_6161

I sort of left it to the last minute to buy my ingredients (the day before), which was not a smart thing to do. I really wanted to buy my turkey at the St. Lawrence Market, but timing didn’t work out and I had no choice but the go to the grocery store down the street. I wanted an organic, free-range turkey, but the only ones they had were frozen. I bought a frozen one.

IMG_5818

Big mistake. Apparently the best way, and only safe way, to defrost a frozen turkey is to do it in the refrigerator. But a 15 pound turkey would take 3-4 days to fully defrost. I had one day. Being a microbiologist, I know all about the dangers of leaving meat out at room temperature. Leaving meat unrefrigerated (above 4 degrees Celsius), you risk having harmful bacteria grow that could potentially make you sick. To speed up the thawing process, my only option was to thaw my turkey in a sink full of cold water. And the water must be COLD. Technically, you should be keeping the water at 4 degrees, changing it often. Nothing more fun than pulling a turkey all-nighter waiting for the bird to defrost! I put it in the sink and constantly changed the water. So within a couple of hours of buying my bird, I had already learned something about turkey roasting. Lesson #1: If buying a frozen turkey, buy days in advance (3-4) to properly defrost, or buy a fresh one (or defrosted).

First step to preparing your turkey is to clean it (once it’s defrosted).

Cleaning/prepping your turkey

This is pretty straightforward. It being my first time cleaning a turkey, I had no idea what to expect, or what I was supposed to do. To be honest, I was SCARED. The two drumsticks were held together by securing them under a flap of the turkey skin. I wriggled them loose without breaking the skin loop.

I read that I was supposed to remove the neck and giblets. My initial reaction was “How am I supposed to do that!?” “Who wants to stick their hands in a turkey butt!?” “I can’t even see inside the hole, what if there’s something IN THERE?” I pulled myself together and found a youtube video on how to roast a turkey. When the woman said to remove the neck and bag of giblets, I thought “Bag? There’s a bag in there?”. Low and behold, I reached in (with a gloved hand because I was still nervous) and pulled out a small paper bag of giblets! How convenient! The neck is also detached and put into the bird. I set the neck and giblets aside. I know some people use the giblets for gravy or stuffing. And If you’re going to make turkey soup later, the neck will come in handy.

Next, just wash the turkey with water and pat it dry with paper towel, inside and out. Careful! They’re slippery!

IMG_5837

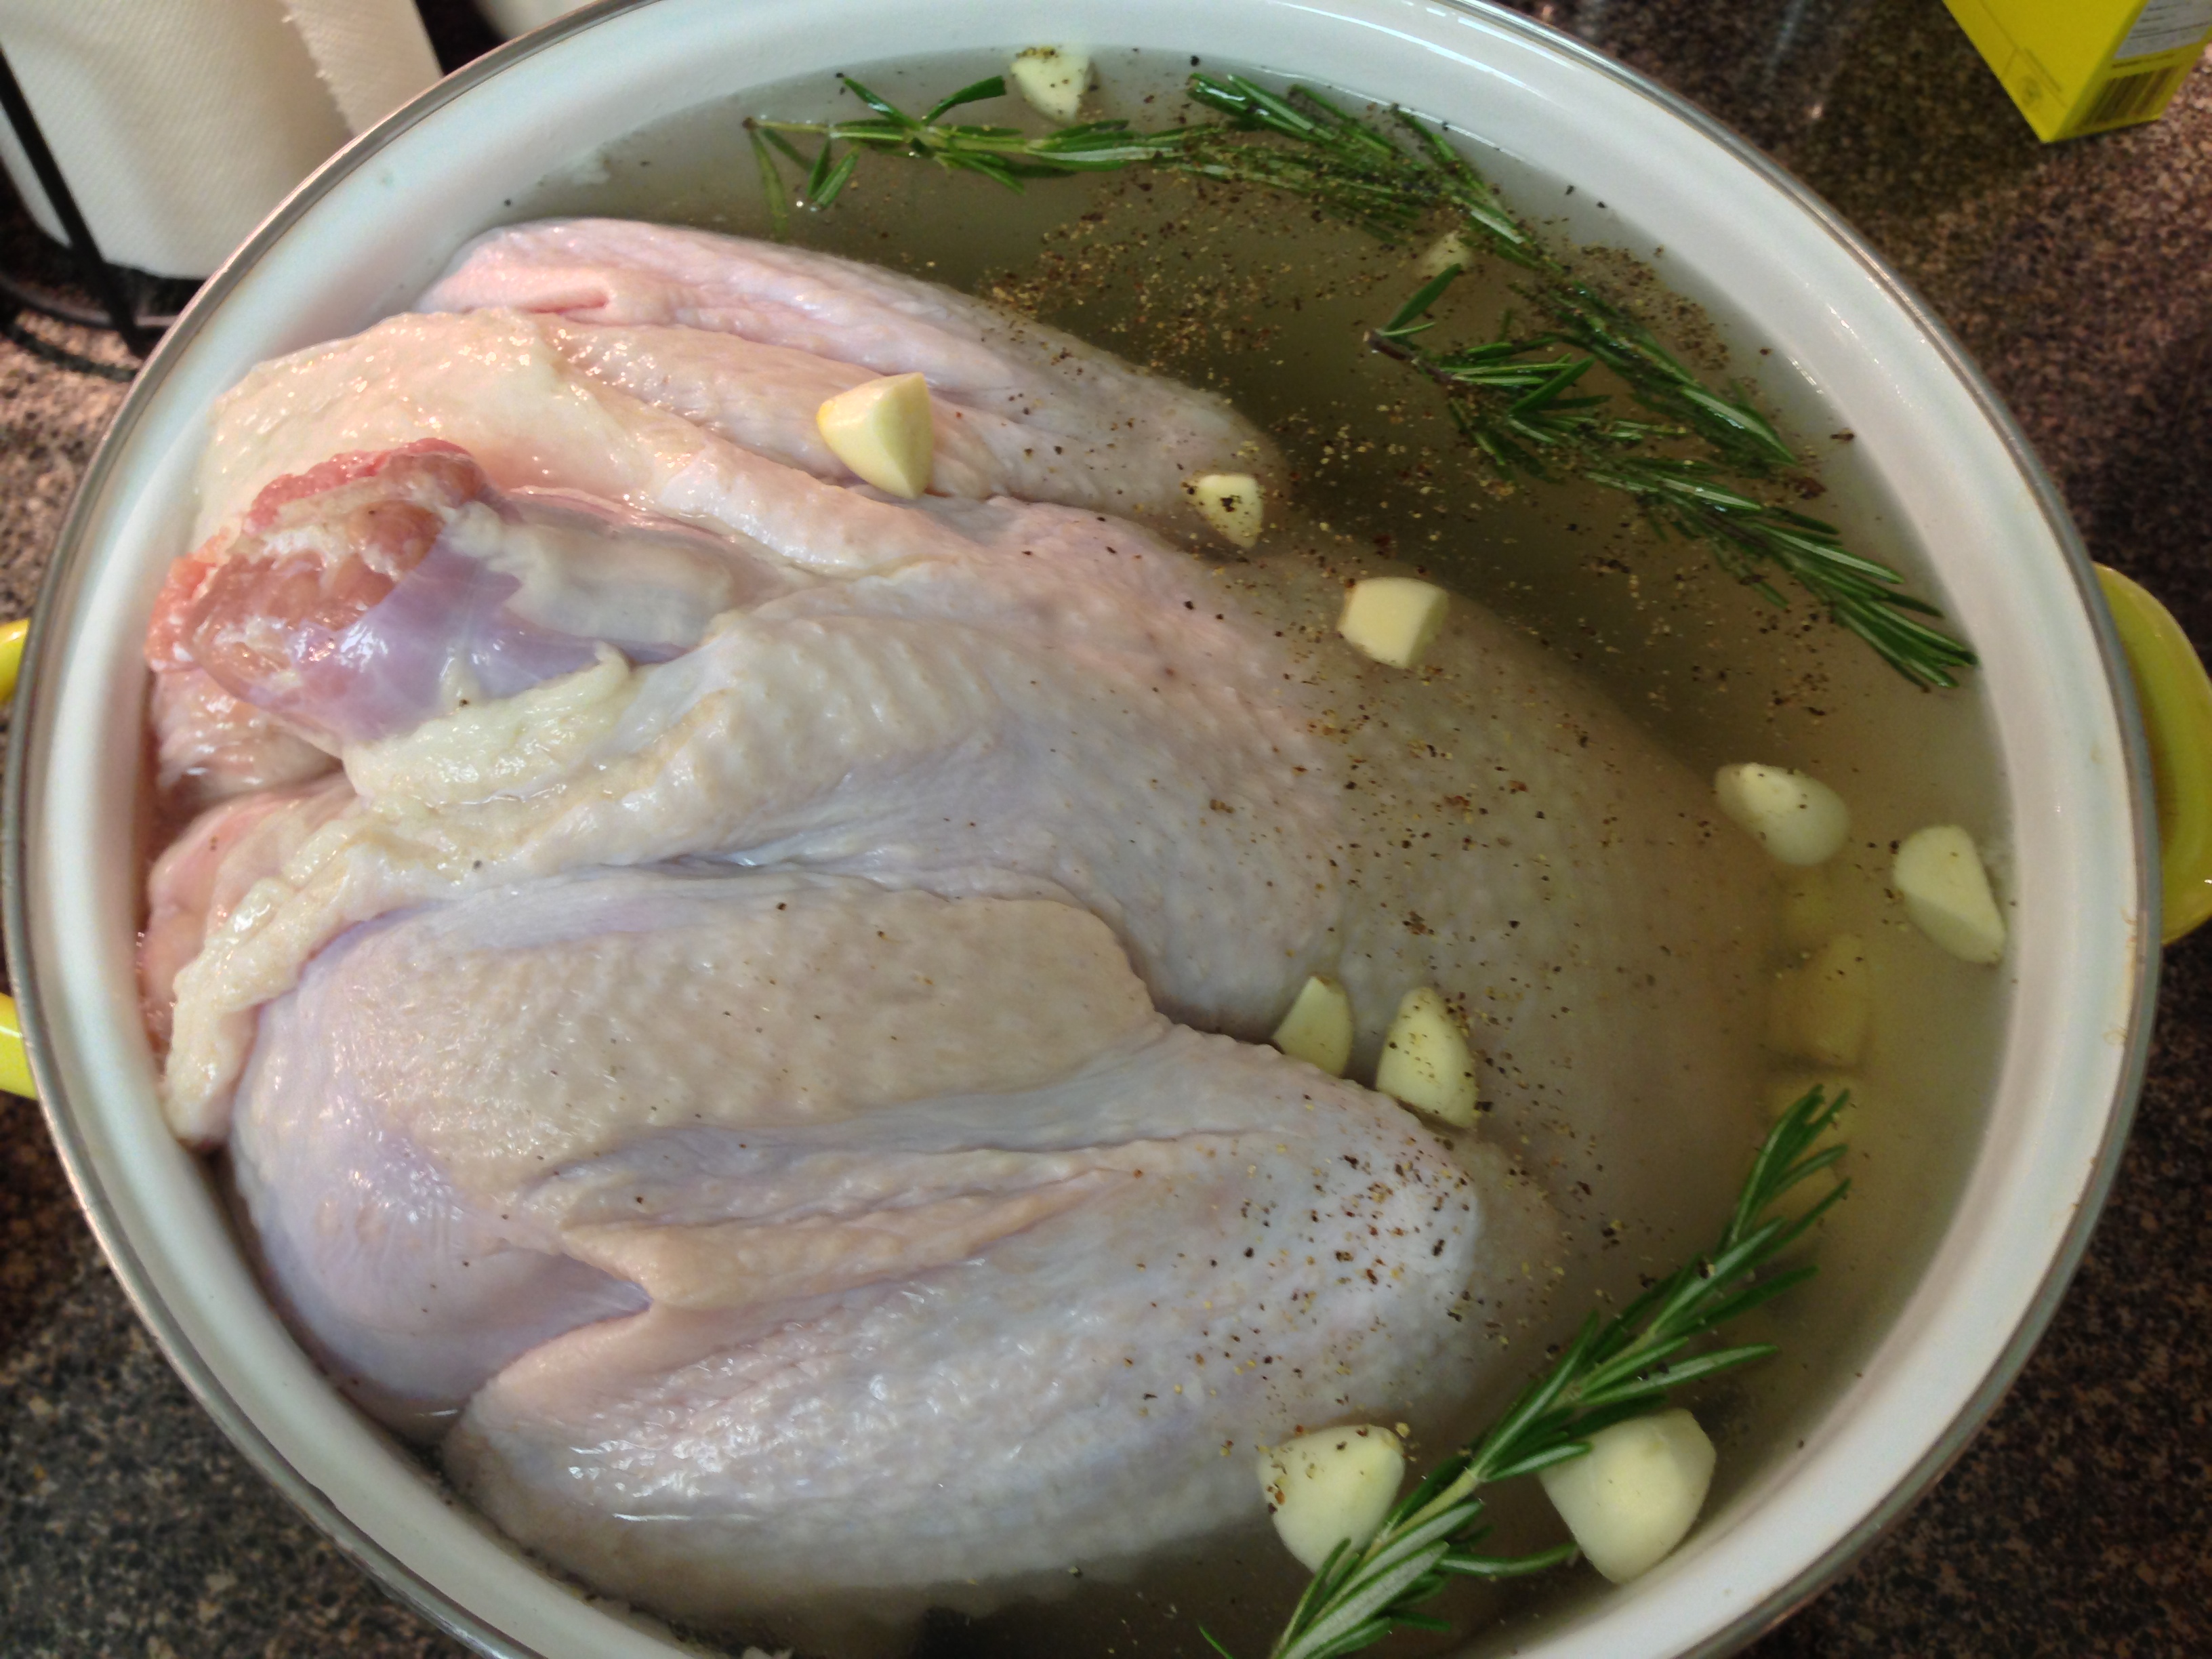
I decided on making a brine for my turkey. I looked up a million different recipes. They’re all pretty similar, but chose one I liked best and stuck with it. I used a brine recipe by Greg Blonder. You can find the recipe and read all about brining here. Brining hydrates the cells in the meat you are cooking and makes the meat moister by allowing the cells to hold on to the moisture while it’s being cooked. Brining solutions are usually a mixture of water with equal parts salt and sugar (there are different variations).

Turkey Brine

What You’ll Need:

  • 2 cup (or more) measuring cup
  • Pot big enough to submerge your turkey. (Get creative if you don’t have one.)
  • Water
  • Kosher salt (or regular table salt)
  • Sugar
  • Ground black pepper
  • 2 sprigs rosemary
  • 5 or 6 cloves of garlic, cut in halves

I brined my turkey in a large pot. My 15-pound bird fit perfectly inside of it. I doubled this recipe and it made just enough brine (with a little leftover) to fill my pot and submerge my turkey.

1. Fill your measuring cup with 1 cup of hot water.

2. Pour salt into the water until the water rises to the 1 1/2 cup mark.

3. Pour this salt water into your big pot and add 1/2 cup of sugar.

4. Add 16 cups of water, garlic, rosemary, and 1 or 2 tablespoons of ground pepper.

You turkey should be washed and dried. Place in the pot of brine. I let my turkey soak overnight and turned it upside down in the morning, so that the bit of the bird that wasn’t quite submerged would get a chance to soak as well. A common rule is to brine for one hour per pound of meat. My turkey soaked overnight for about 14 hours.

IMG_5967

After soaking, remove the turkey from the brine and rinse off all the brining solution with cold water. Make sure you rinse the inside and outside of the turkey well. The brining liquid is very salty, you don’t want to leave a lot of that on your meat. After rinsing, pat dry with paper towel. I stuffed some paper towel into the turkey to get out as much moisture as possible.

You’re almost ready to roast.

Some more key things I learned:

Do not stuff your turkey. Health Canada recommends cooking stuffing outside your turkey. When the stuffing is inside the bird, it’s hard to cook it evenly. Raw poultry products get mixed in with the stuffing and not cooked properly. Cook your stuffing separately in a pan or casserole dish.

Roasting Your Turkey

IMG_5979

Preheat your oven to 325. My fifteen pound turkey ended up taking about 4 1/2 hours to cook. This was longer than I expected. Maybe all the potatoes and veggies slowed the cooking. (I might experiment with cooking at 350 next time.)

What You’ll Need:

  • 1 brined, rinsed, and dried turkey
  • Roasting pan
  • Kitchen twine (optional)
  • Baster
  • Oven-safe thermometer
  • Baby potatoes enough to lie in a single layer on the bottom of your pan
  • 10 garlic cloves, halved or roughly chopped into large pieces
  • 2 onions, quartered
  • 2-3 carrots, peeled cut in 2-inch pieces
  • 4 celery stalks, washed and cut into 2-inch pieces
  • Vegan butter (I was avoiding dairy in my recipes for Passover purposes, but you can use regular butter or oil as well)
  • 5 sprigs rosemary
  • Ground black pepper
  • 5 bay leaves
  • Onion powder
  • Garlic powder
  • Paprika
  • Chicken broth (optional for basting)

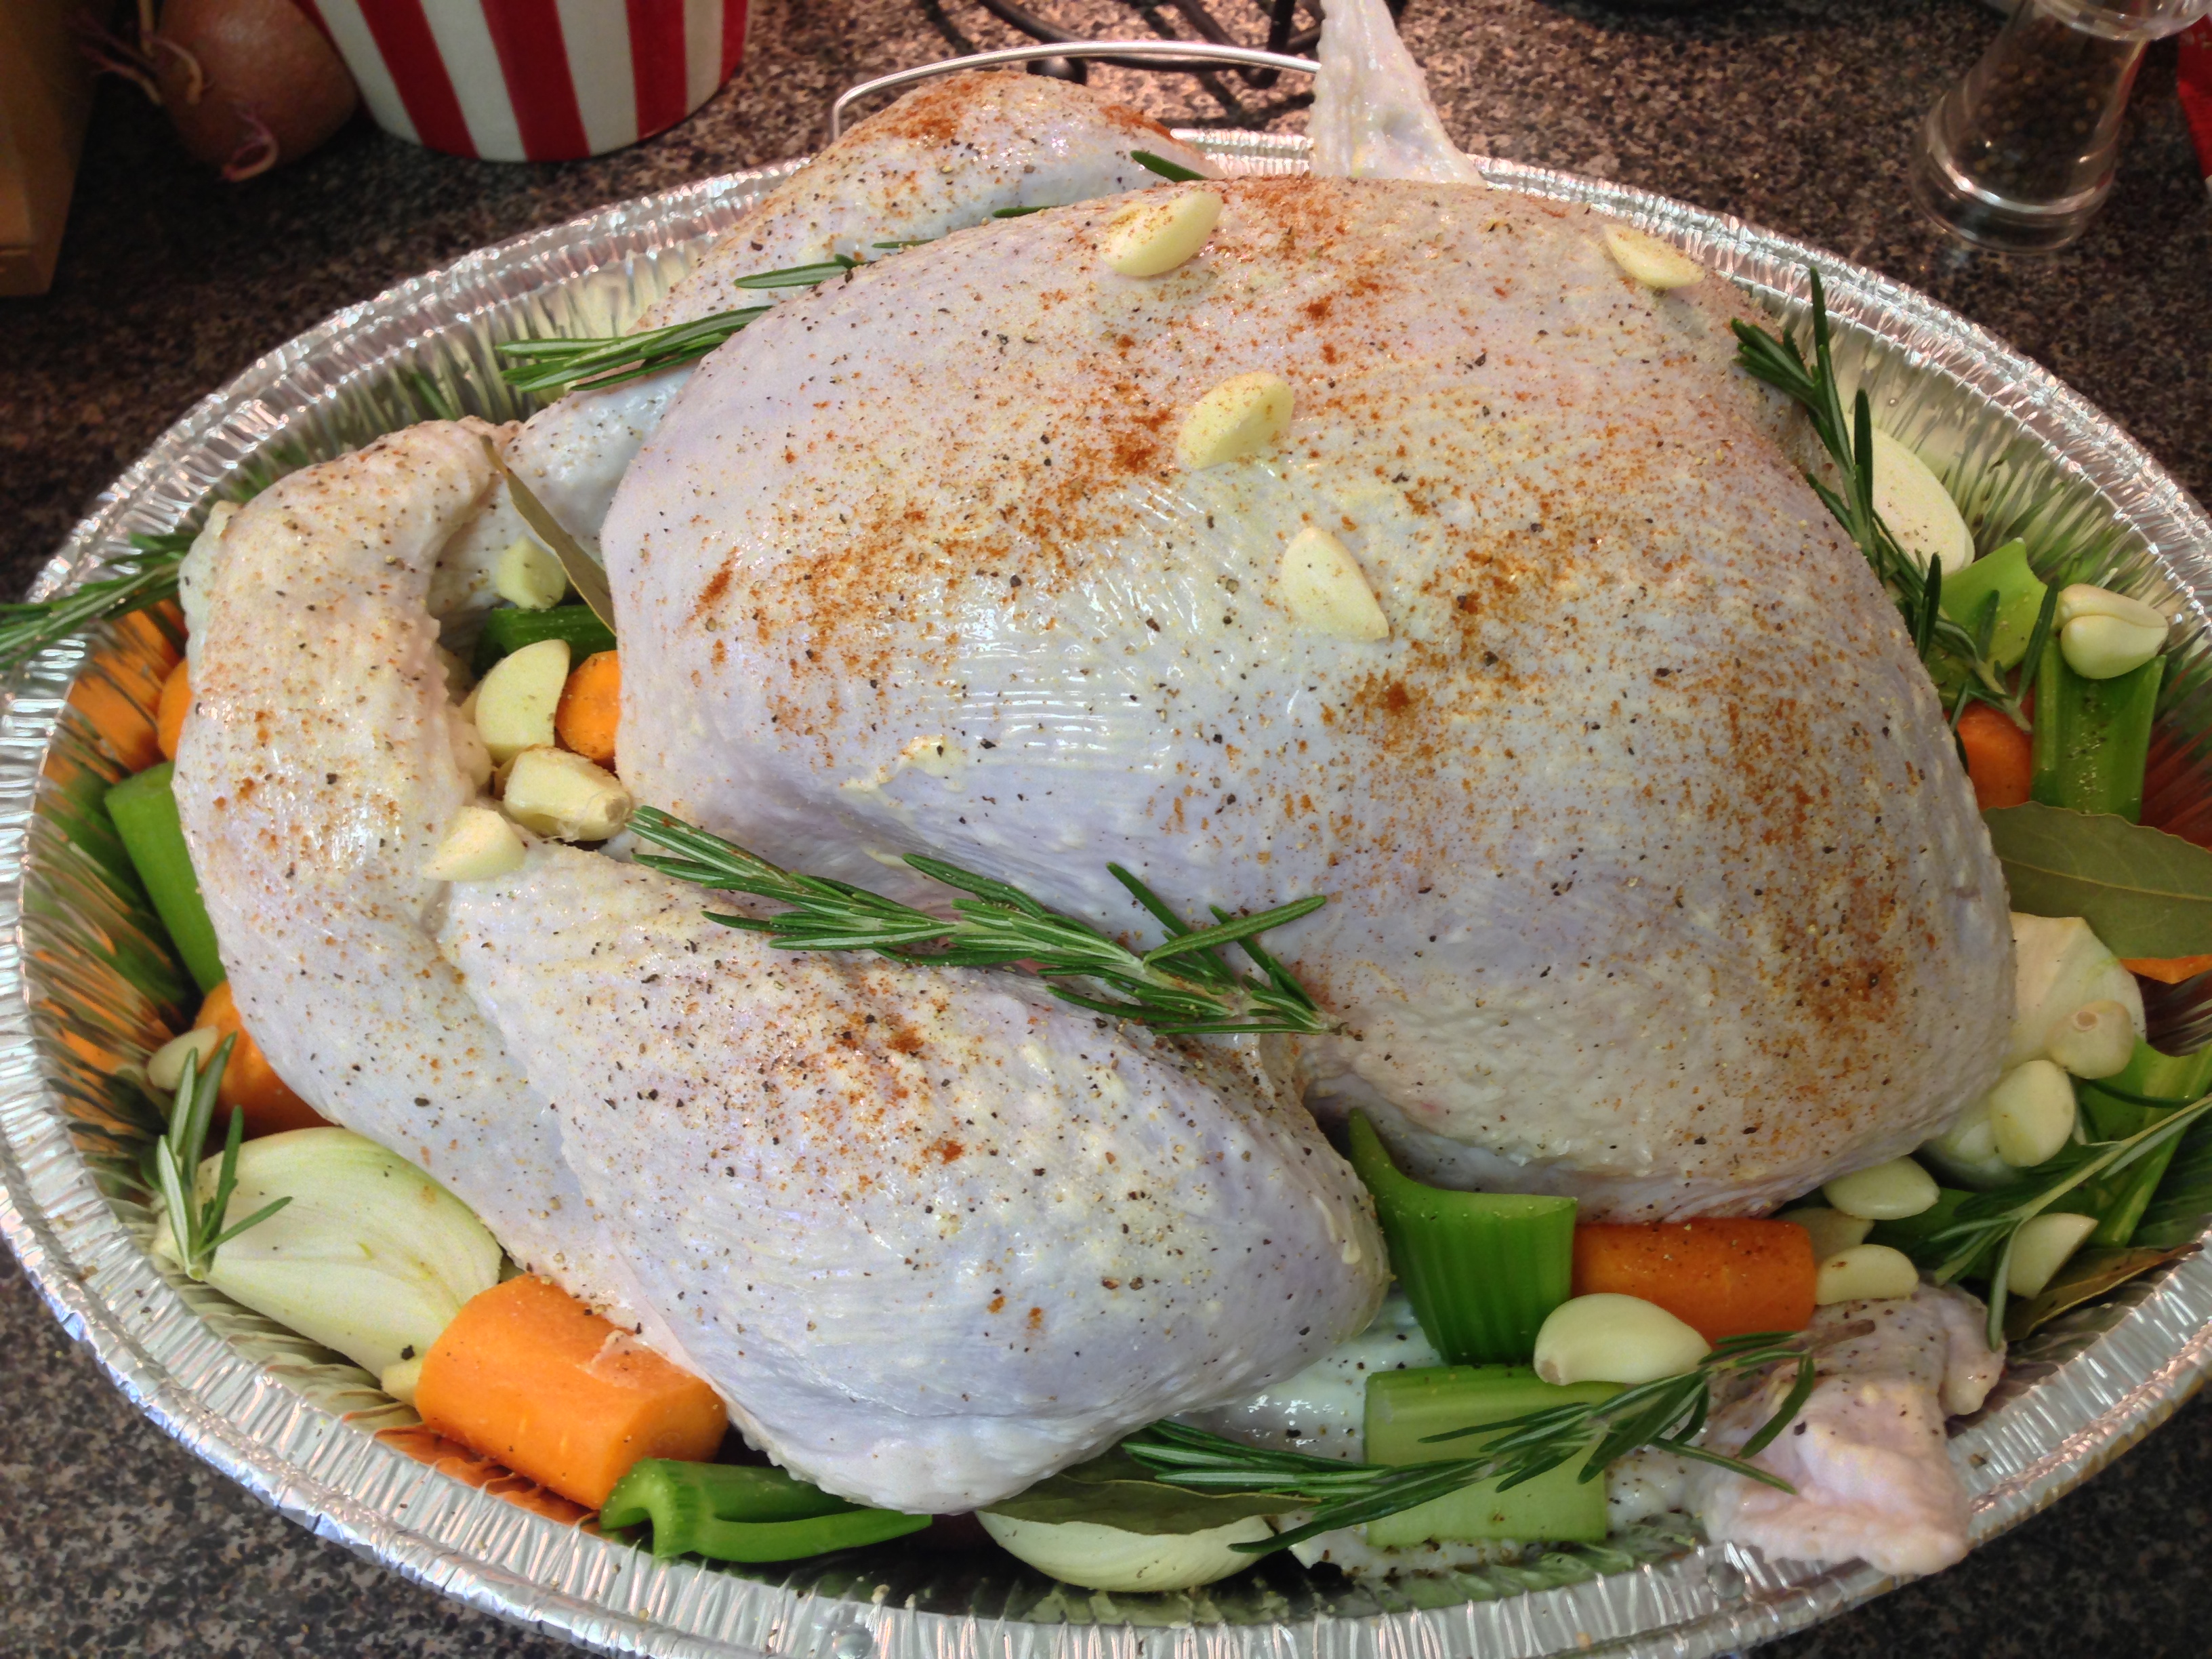
I roasted my turkey on a bed of baby red, yellow, and blue potatoes and surrounded it with vegetables. The potatoes keep the bird from being directly on the pan and allow space for hot air to circle more evenly around it. They also allow room for drippings to collect without soaking the bird. And you can eat them! The veggies make for a tasty bird and even tastier gravy!

1. Fill the bottom of your pan with the potatoes.

2. Place your turkey breast-side down on top of potatoes. Tie the drumsticks together with kitchen twine. I didn’t have twine so I pushed and secured both legs back under the flap of skin. This is how it was secured when I bought it. If you don’t know what I’m talking about check out the pictures.

3. Brush the turkey with butter or oil to help it brown nicely and keep the skin from drying out.

4. Place the cut up carrots, celery, onions, and garlic around the turkey in the pan, I stuffed a couple onion quarters, some celery, and carrots into the cavity too. This will help flavour the turkey from the inside out. The veggies will help flavour the drippings. Scatter your rosemary and bay leaves around the turkey too.

5. Season your turkey with ground pepper, garlic powder, onion powder, and paprika. I just sprinkled it all over the turkey and veggies. I didn’t add any salt. The brine adds enough saltiness.

6. Stick an oven-safe thermometer into the thickest part of the turkey thigh.

7. Cover with foil and put her in the oven! Cooked covered for an hour and then remove the foil and continue cooking uncovered.

8. You should baste the turkey every half hour. I used some of my extra vegan butter and some homemade chicken broth to baste. You can also use oil. Once drippings start collecting in the bottom of the pan you can use your baster to suck up the liquid and squeeze it back over the turkey. Basting will keep your meat moist and add flavour.

9. I did not turn my turkey over. Keep checking the thermometer. When it reads 165-170 degrees in the thickest part of the thigh, your turkey is done. It should be a nice golden colour. Paprika is also a good browning agent. You can always sprinkle a little more on.

10. Take the turkey out of the oven and cover with foil. Let it rest for at least 20 minutes before carving.

Gravy

Ingredients:

  • Turkey drippings
  • Cornstarch, potato starch, or other thickening agent
  • Water (optional)
  • Salt or pepper (if needed)

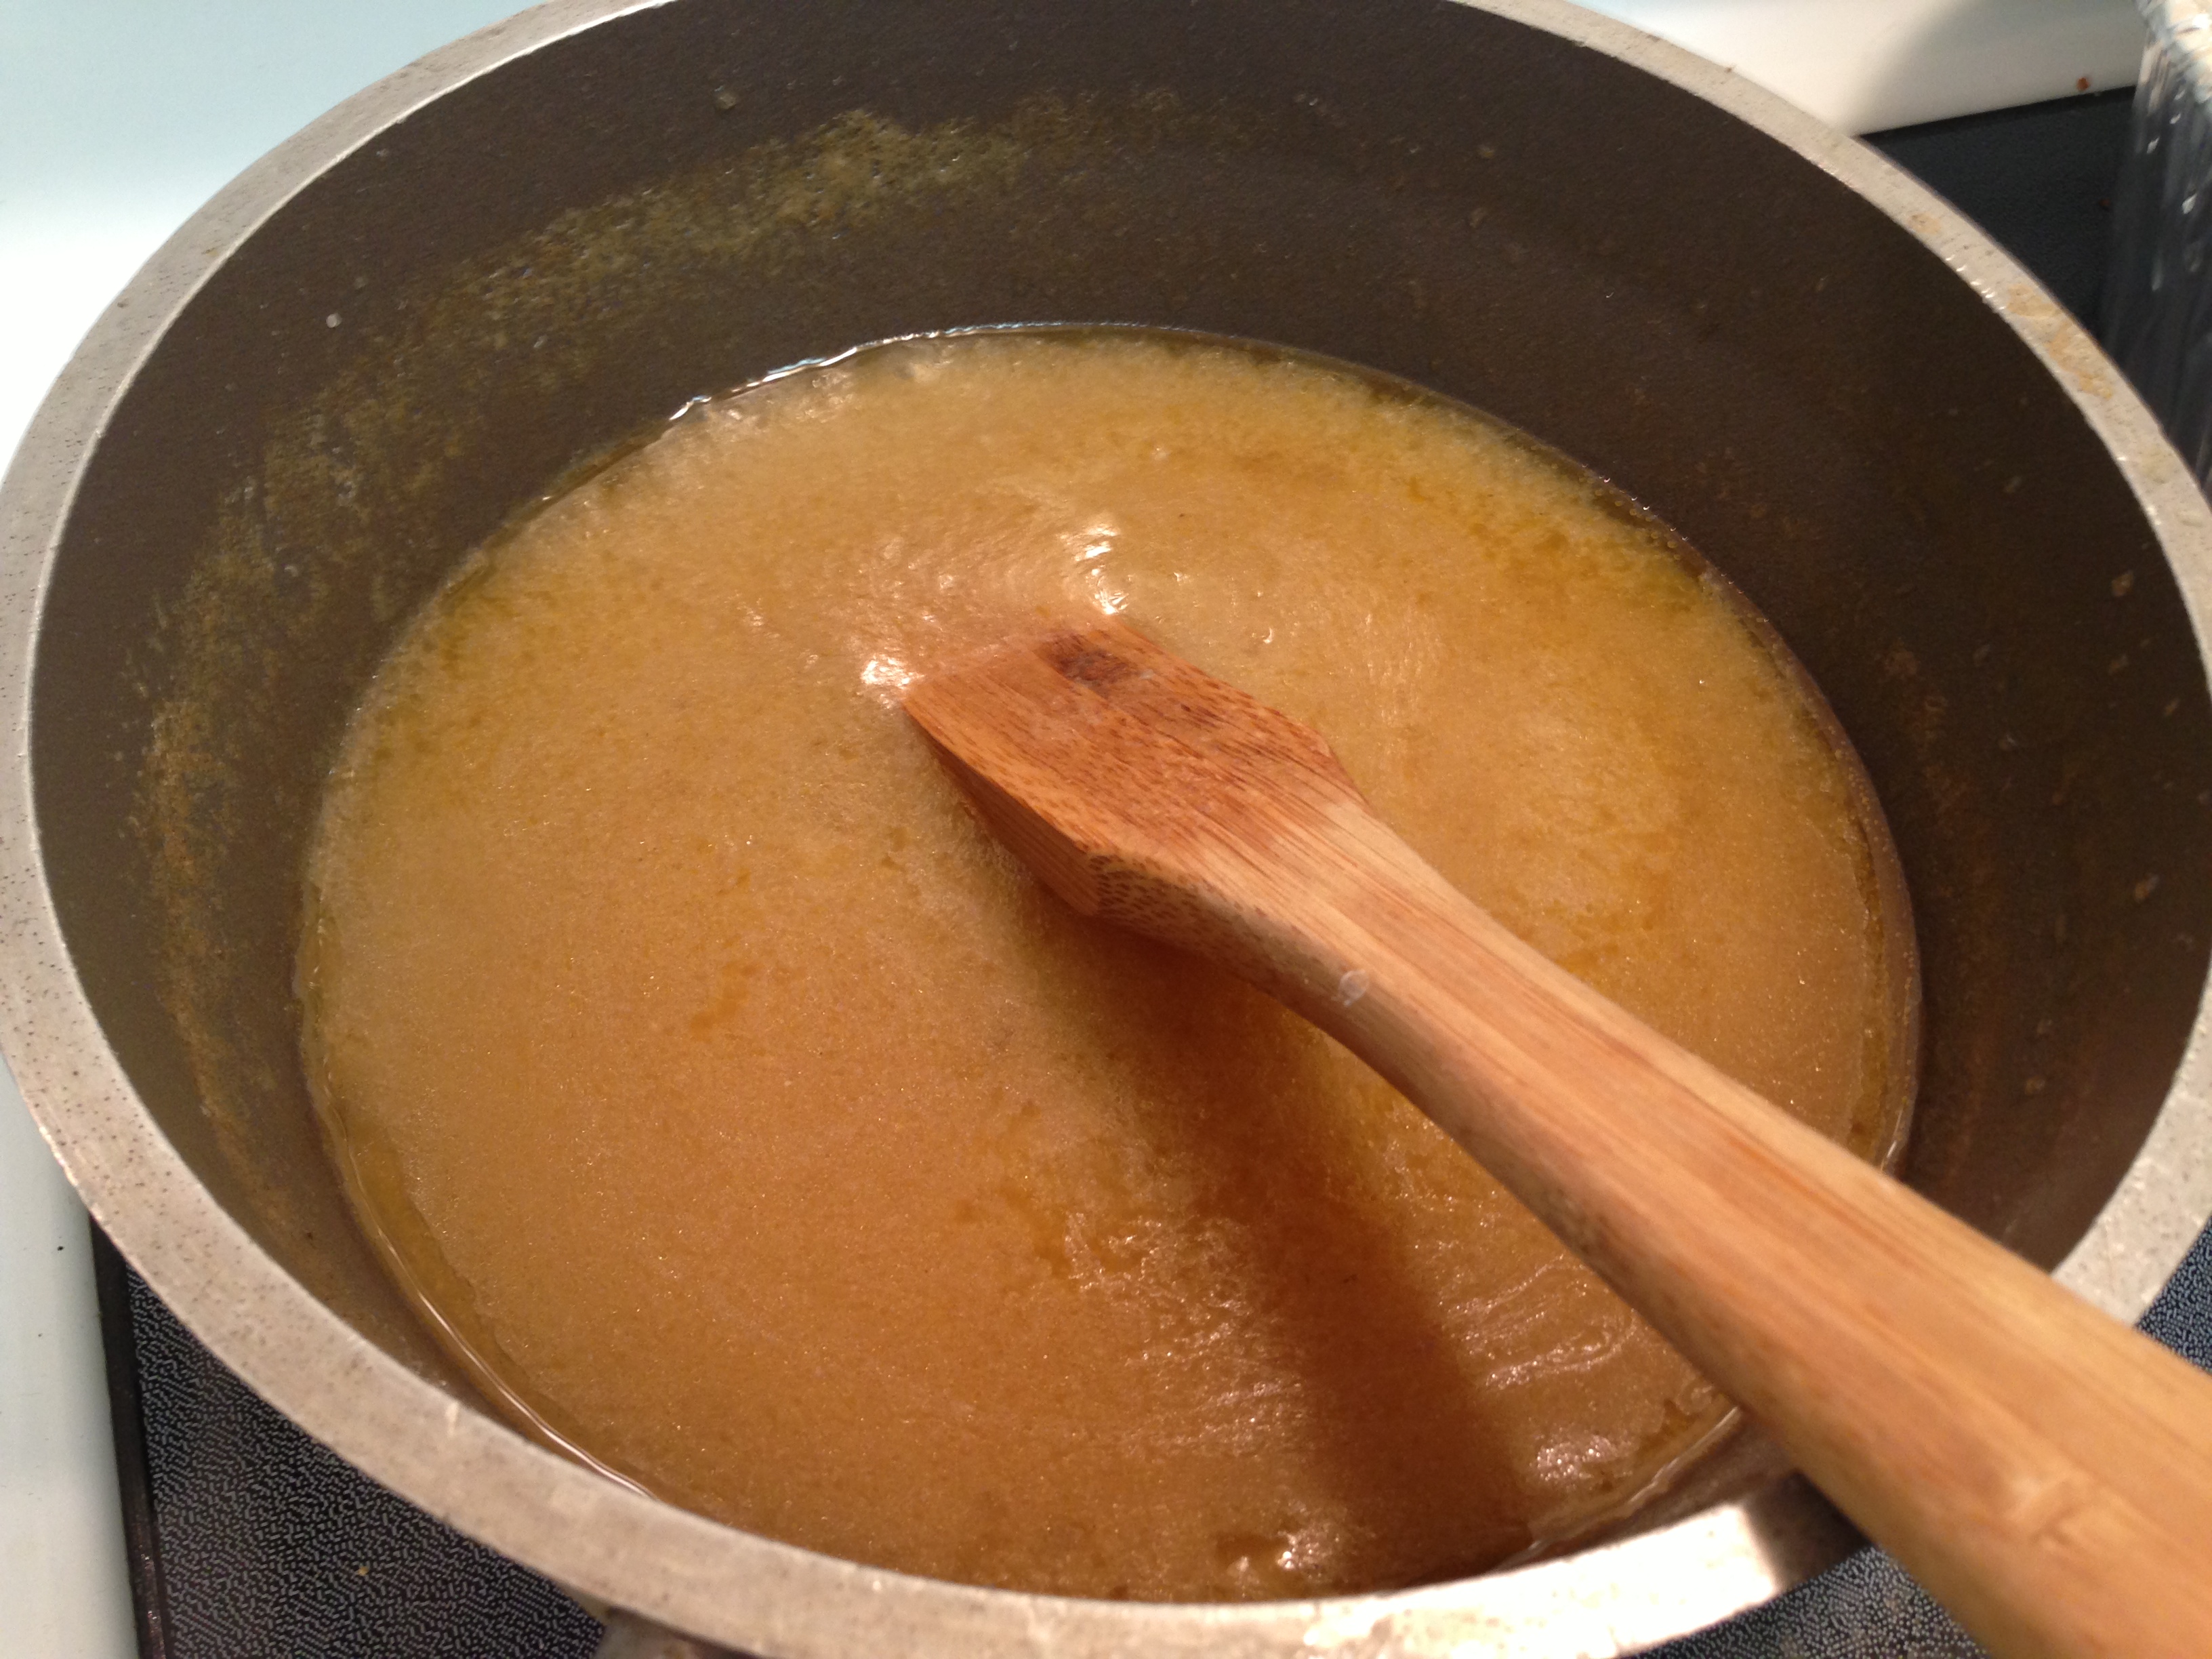
Making the gravy is so simple! Transfer your turkey to a platter. I collected the potatoes and threw out the other vegetables. Use your baster to suck all the liquid from the bottom of your roasting pan and transfer. I had tons of drippings. If there are browned bits on the bottom of your pan, you can use a bit of water and scrape all the flavourful browned bits and add that to the pot as well. I did not use the giblets in my gravy.

IMG_6211

You can always use a gravy separator or a cheesecloth to remove extra oil/fat. Heat up your drippings and slowing add starch or your thickening agent of choice until you’ve reached a consistency that you are satisfied with.

If you find there isn’t enough liquid in your pan, you can add water to increase the volume. Don’t dilute it too much. My gravy was perfect as is, but you can season with salt or pepper as needed. Having the veggies roasting in the pan with your turkey makes a big difference in the flavour of your gravy.

You’re all set! Enjoy! xx

I also made a homemade cranberry sauce to go with my turkey. You can get the recipe here.