Tea Party For Two: The Windsor Arms Tea Room

I started off my week with a marvelous belated birthday treat! Afternoon tea with one of my best girls at one of my favourite buildings in the city, the Windsor Arms Hotel.

IMG_4889

The hotel is beautiful. It dates back to 1927, when it was first built. However, it was rebuilt in the late 90’s, keeping some of the old features and incorporating a 1920’s French style, along with some modern touches. Something about the building makes me happy. Its high ceilings in the main lobby and courtyard, dark mahogany hallways, and the warm textures of drapes, rugs, and other decor relaxes me. I love the bookshelves in the walls of the elevator. It’s a fun building to explore. There’s an old-world tranquility to the hotel, with a modern feel.

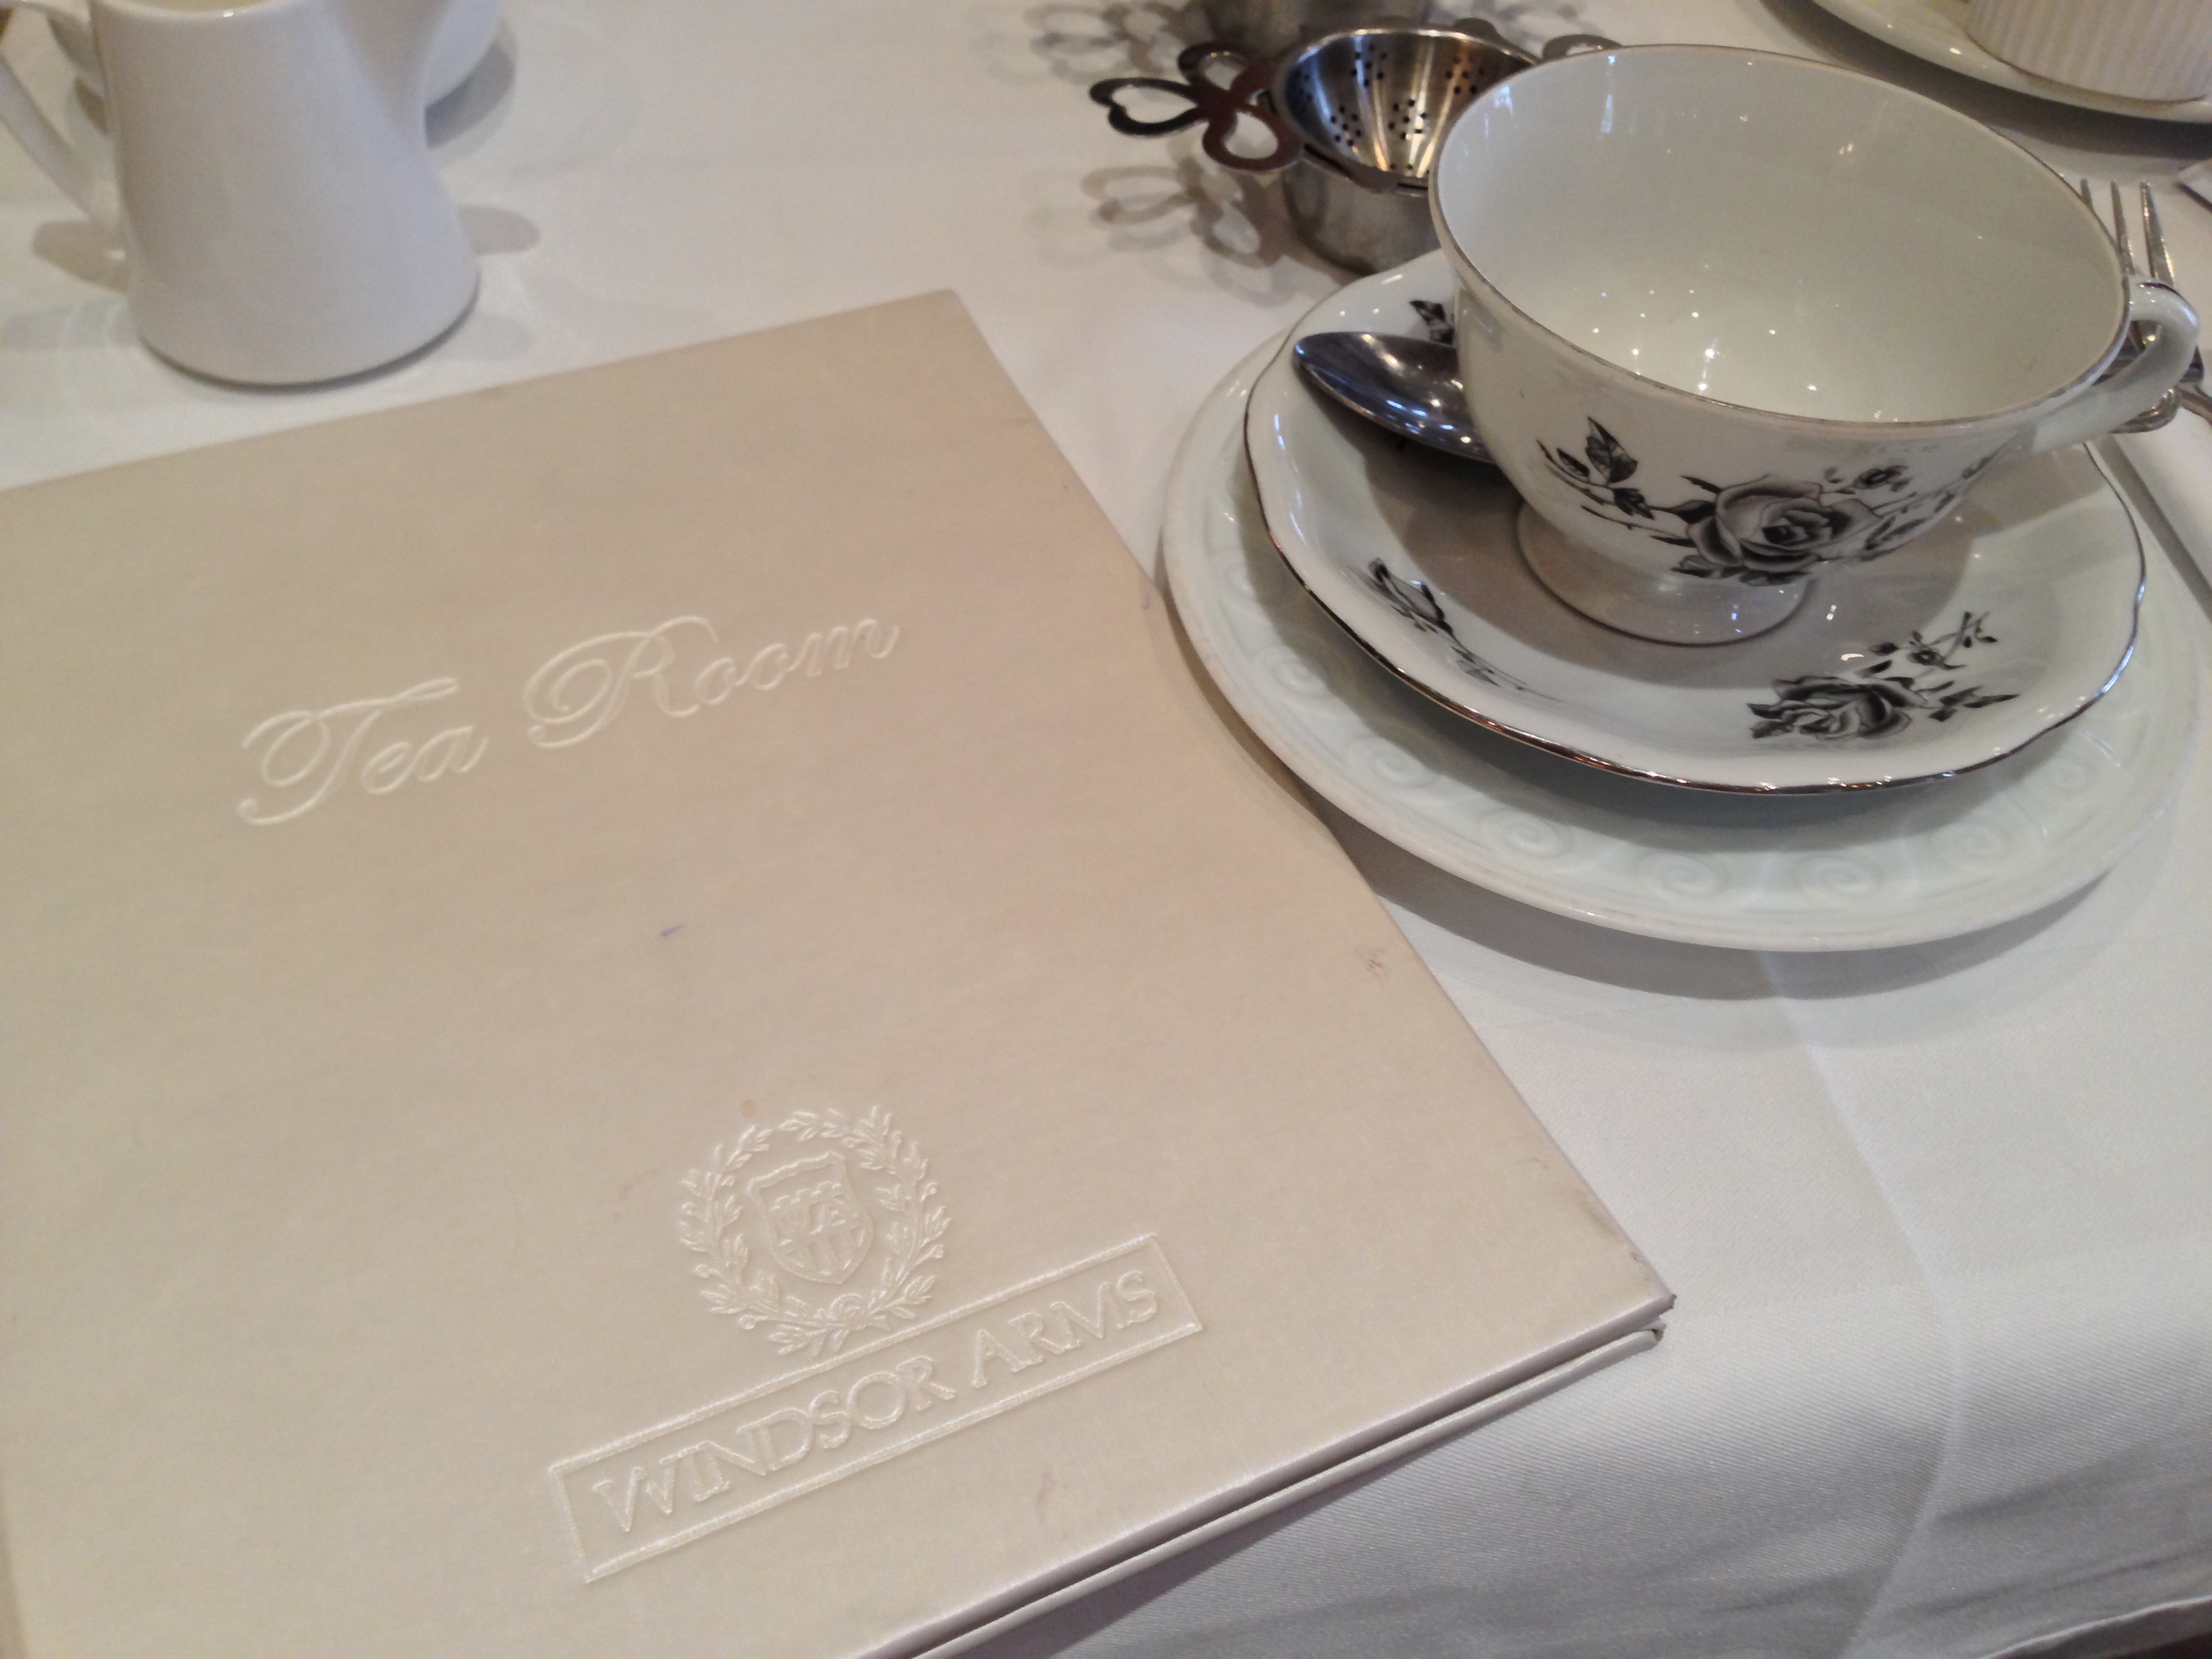
It was my first afternoon tea experience, and hers too. We didn’t really know what to expect. The french-styled lobby tea room was clean, bright, had mirrored walls and small tables, was full of pretty tea cups, and had a collection of ornate hats on a stand in one corner. (You can give a $5 donation to wear a fancy hat. Proceeds go to the Look Good Feel Good program.) After being seated at a cute little table, we sat staring at our menus for a while, enjoying the new environment and analyzing all the objects on our table. I was part in awe, like a little girl in a life-sized dollhouse ready to serve tea to her dollies, and part confused and slightly embarrassed because I didn’t know where to begin.

IMG_4879

IMG_4881

IMG_4883

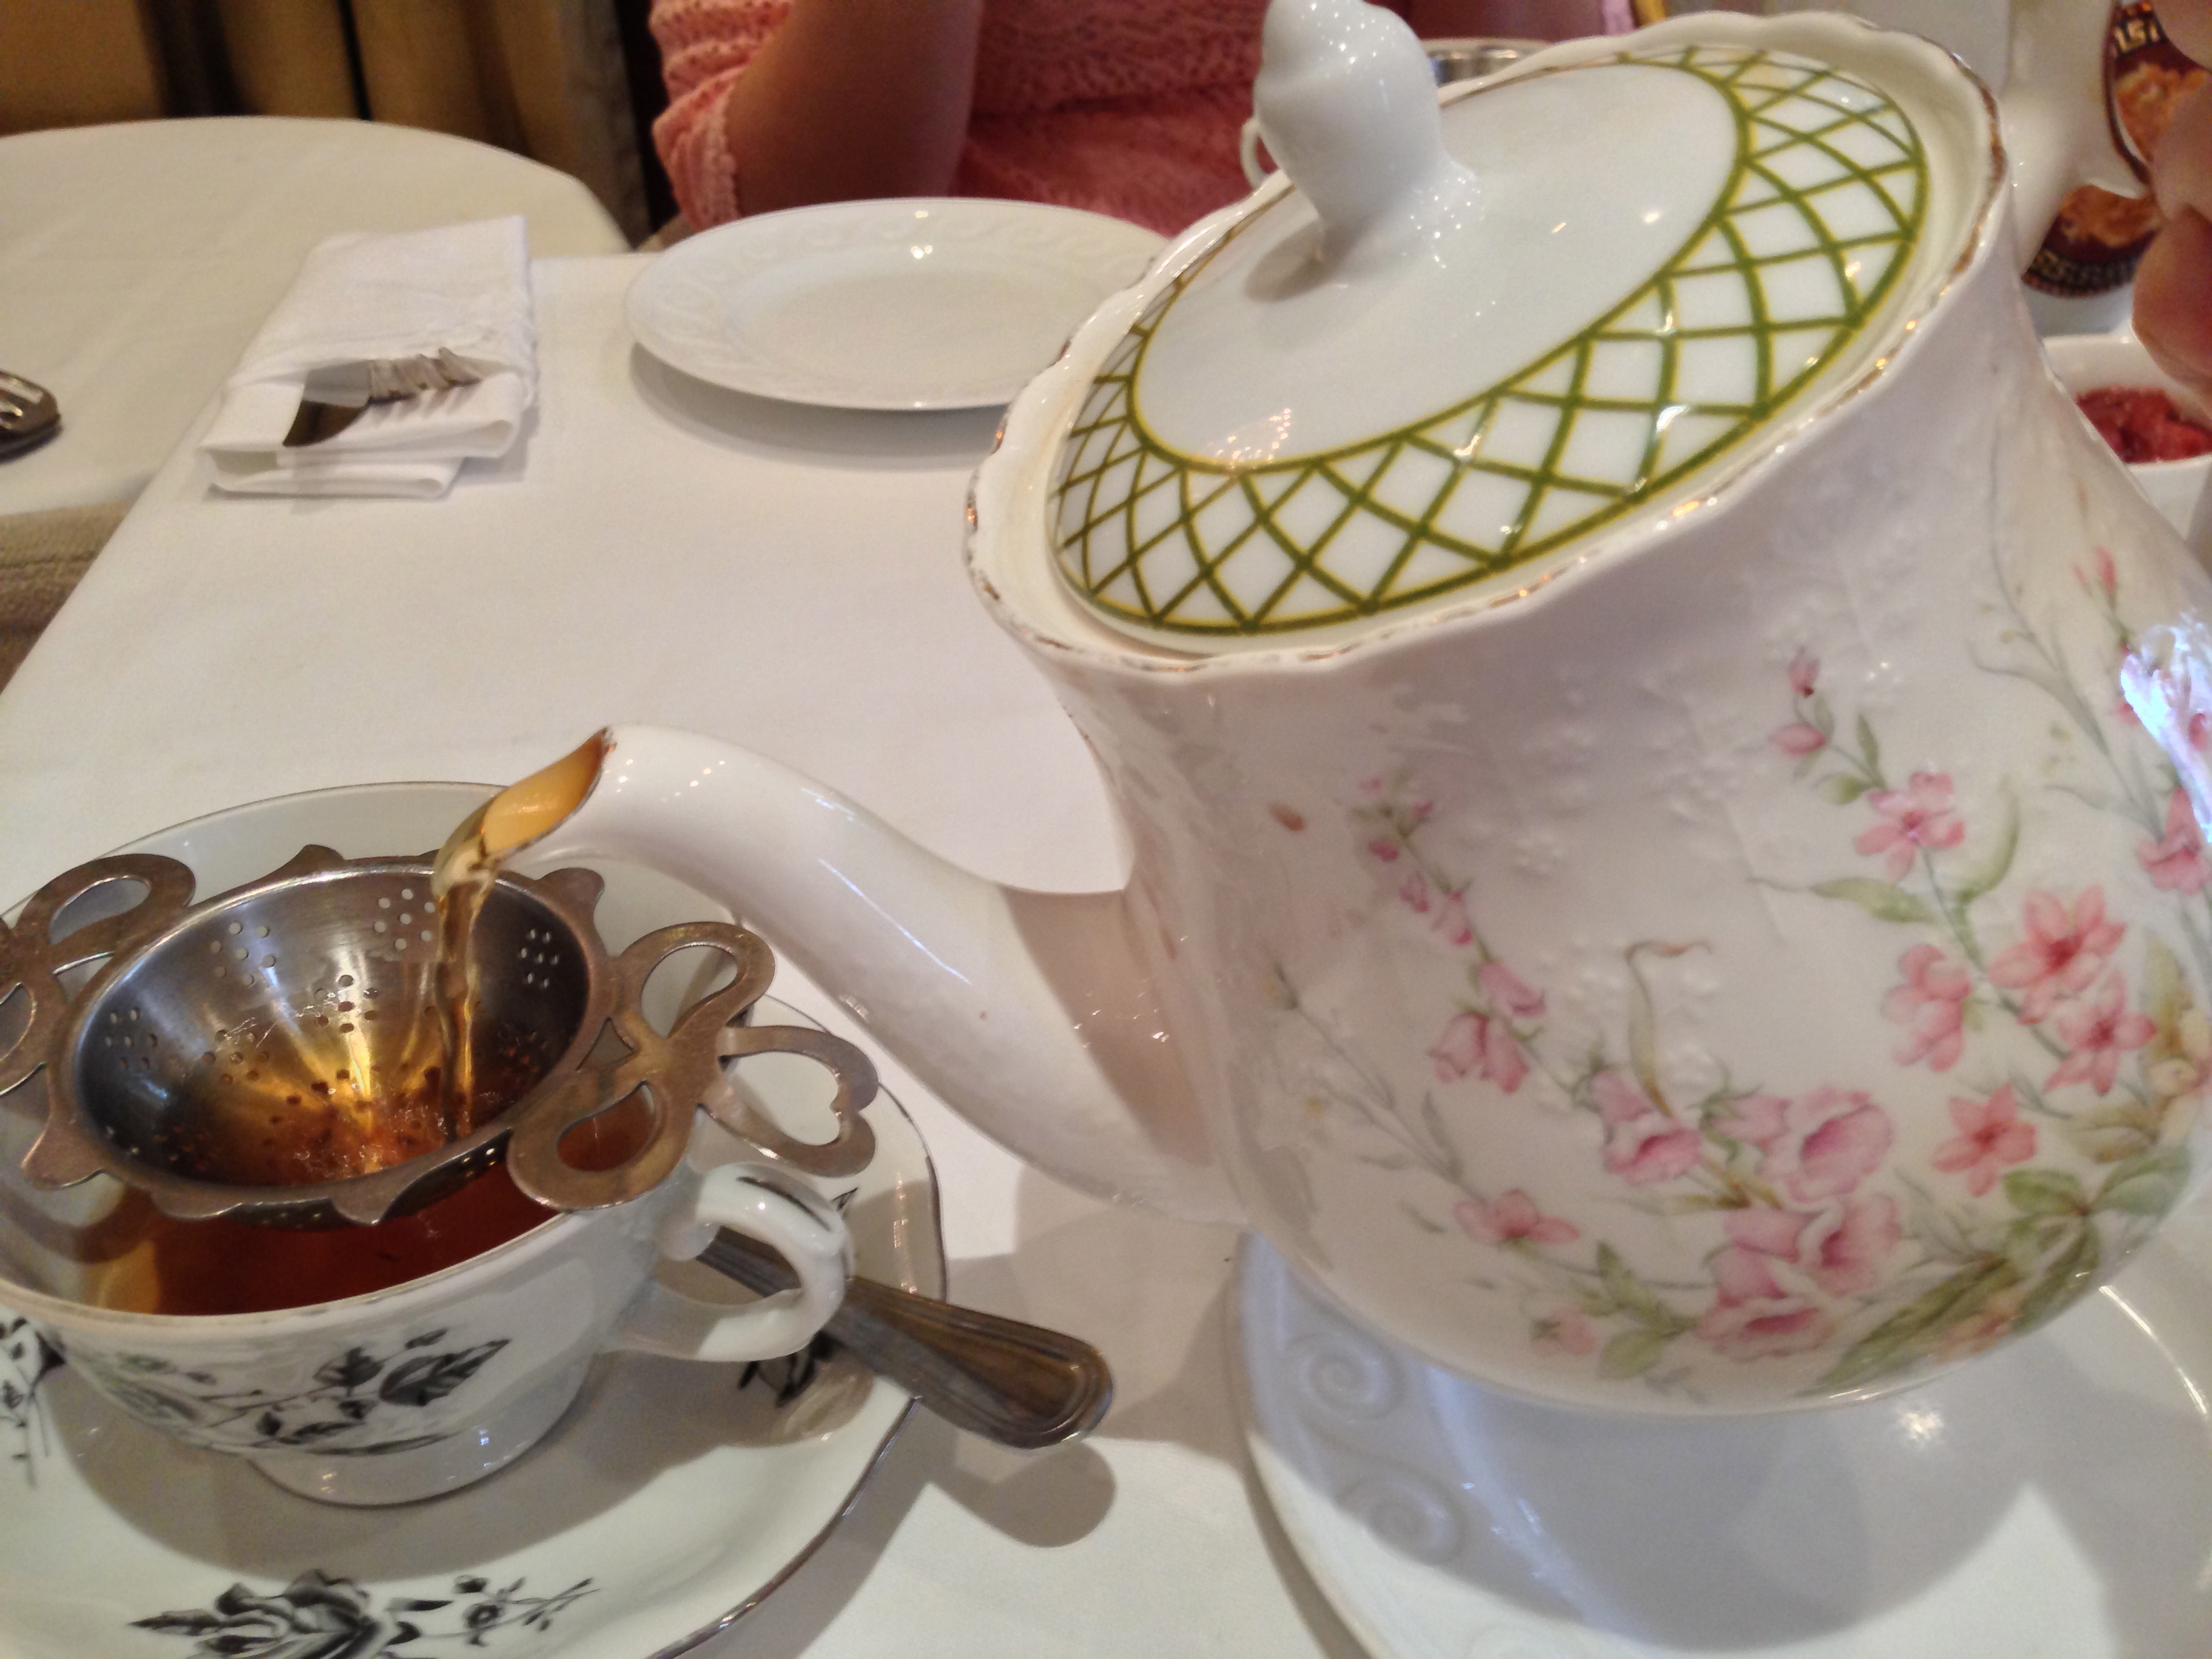
Our waiter explained to us that we didn’t have to worry about food, our “most important decision was to choose our tea”. There was a wide selection of loose leaf teas to choose from (http://www.windsorarmshotel.com/tearoom/our_teas). It was so hard to decide. White? Black? Chai? Fruit blends? I am the worst decision maker. I finally decided on the Earl Grey with Blue Flowers, with organic lavender flowers. She opted for the Chai Arms, a blend of cardamom, cinnamon, clove, ginger, pepper, and organic black tea. I was so happy with my decision. It was delightful. I love the scent of lavender, and when my pot arrived I was instantly engulfed in the wonderful aroma. I decided not to add cream or sugar to my tea, it was so good on it’s own. We sat chatting and sipping, and of course happily taking pictures (how could we resist?).

IMG_4891

IMG_5269

Next, our tower of scones, sandwiches, quiche, and sweets arrived.

IMG_4901

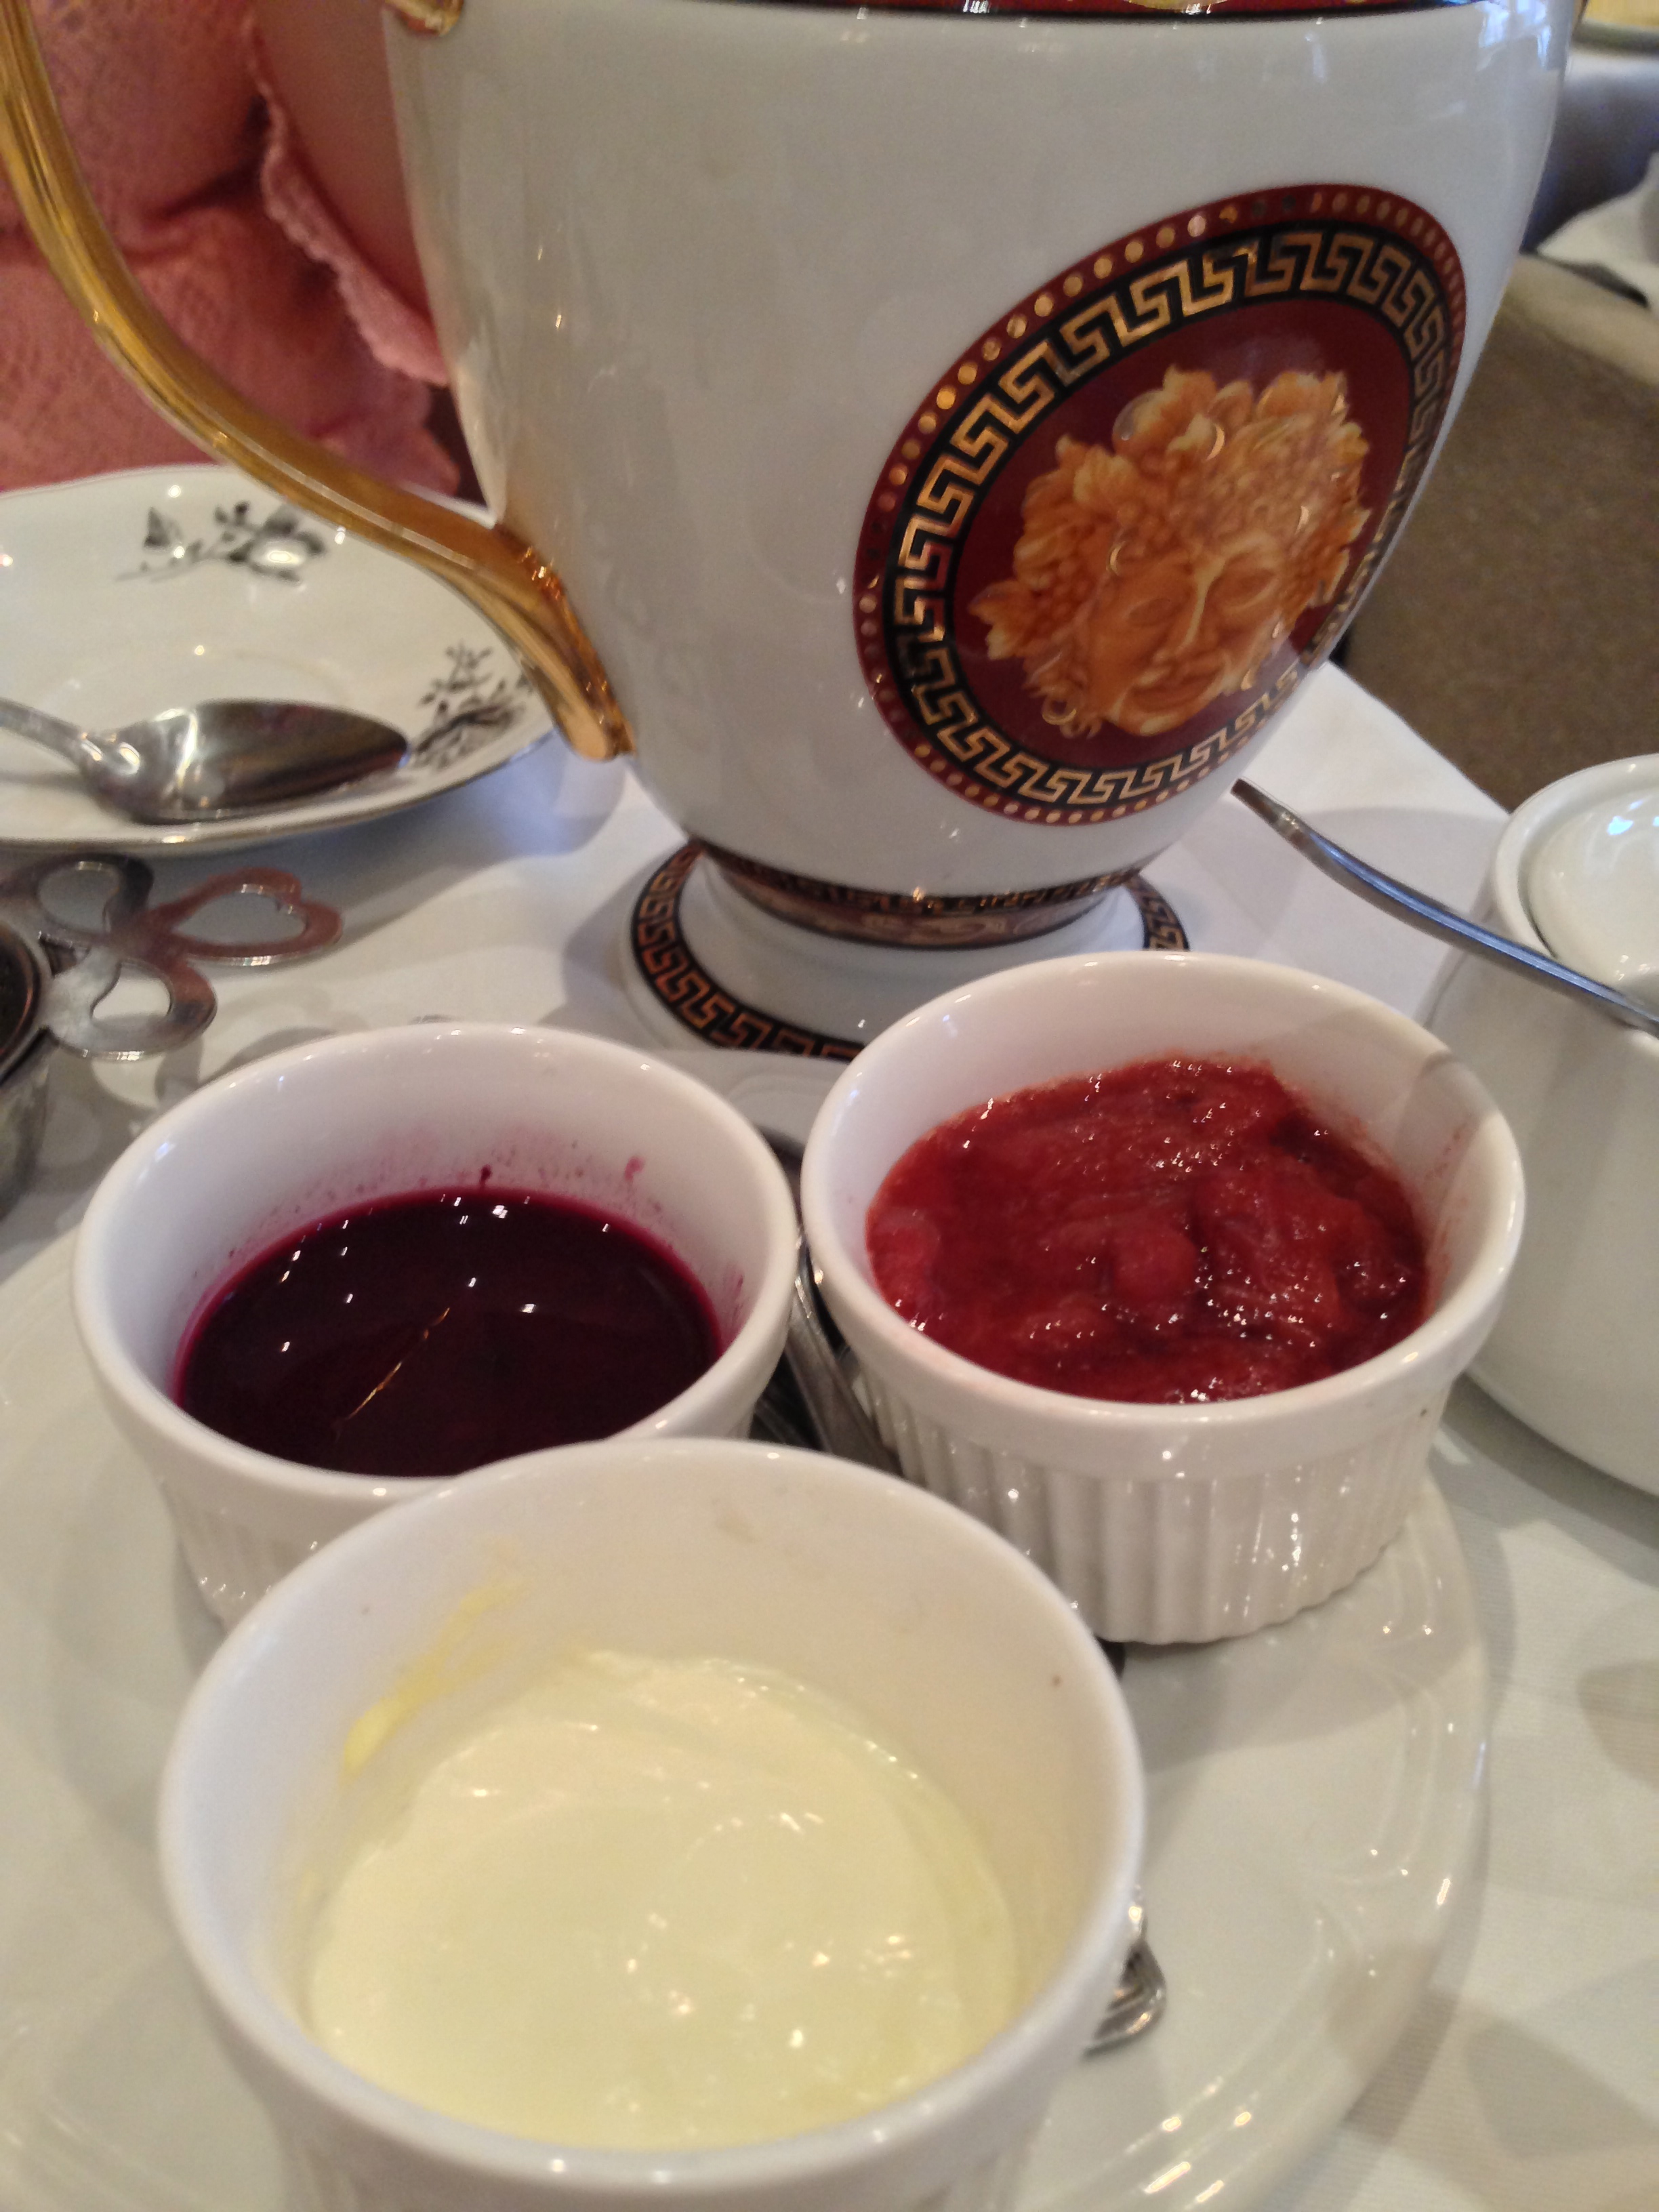
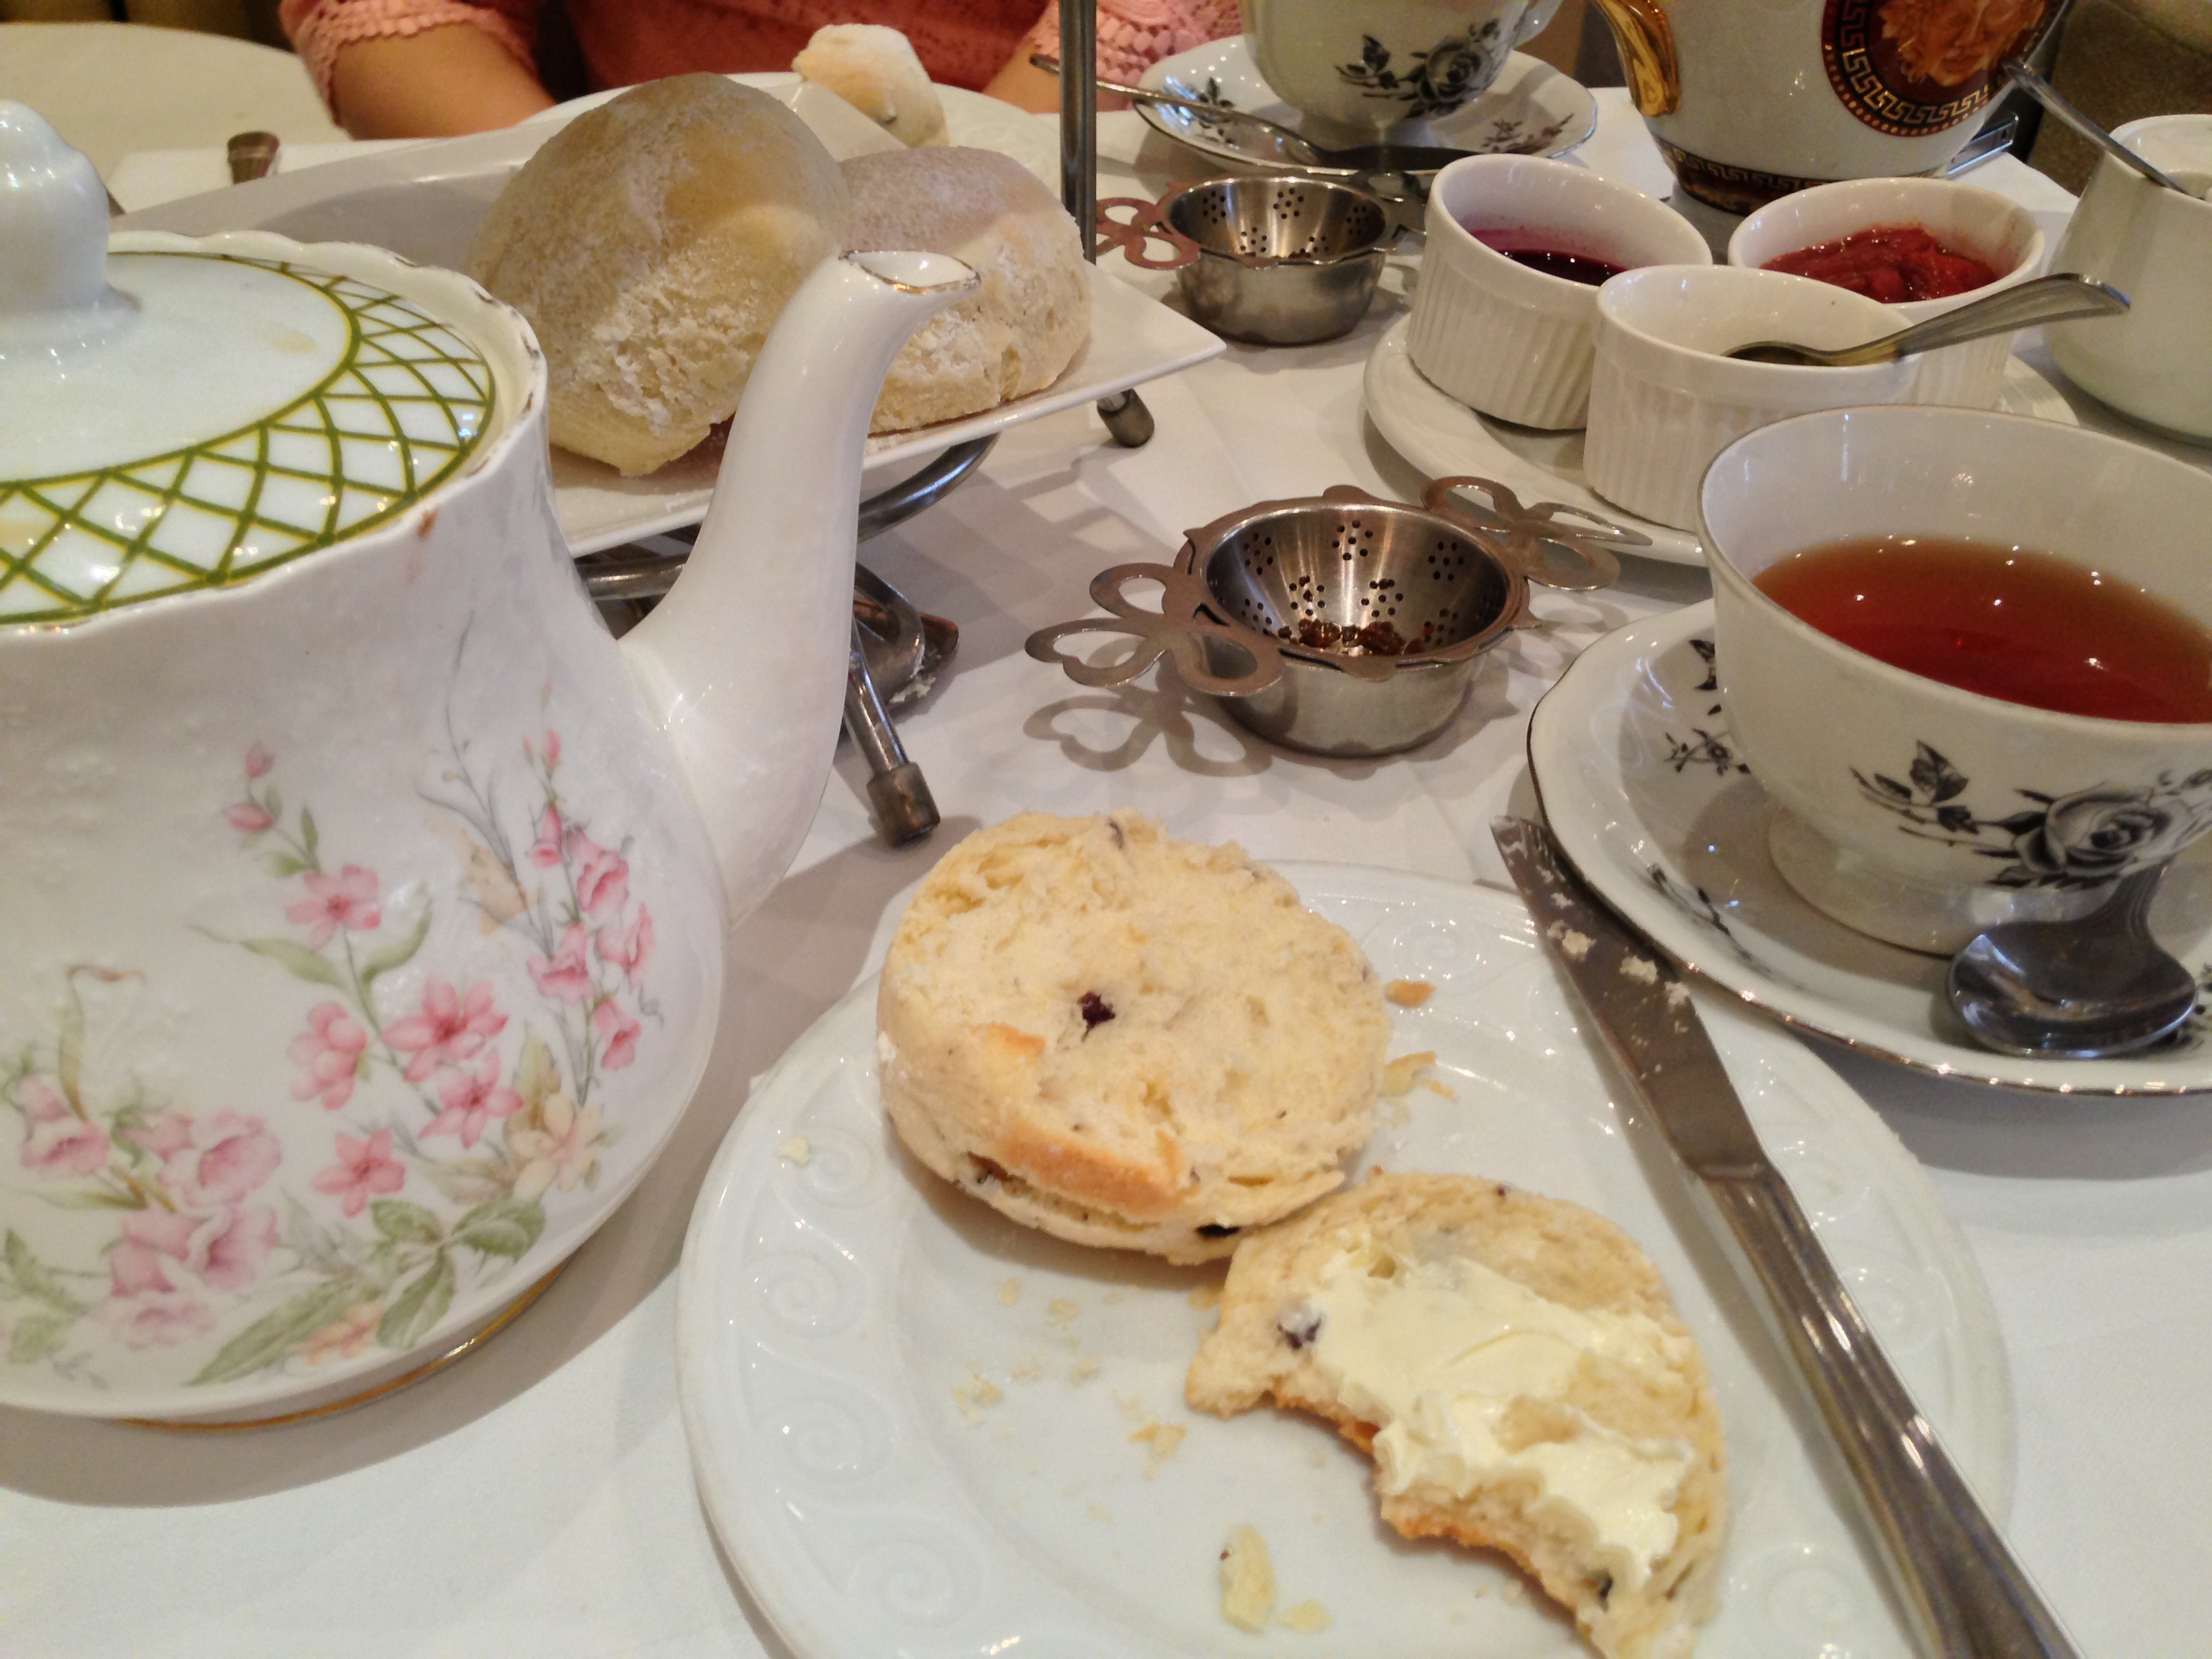
We started with the goat cheese and caramelized shallot quiche tart which was pretty tasty. We also had a selection of raisin and plain scones. They were warm, fluffy, dusted with powdered sugar, and served with housemade jams and Devonshire cream. Yum.

IMG_4897

IMG_4899

IMG_4907

IMG_4912

Our selection of pinwheel sandwiches included smoked salmon and wasabi sour cream with salmon caviar, cucumber with sundried tomato paste and dill cream cheese, and grilled chicken, granny smith apple citrus mayonnaise with Greek yogurt and chives.

IMG_4905

IMG_4910

By this time we were stuffed with scones, sammies, and tea. There was still cake to eat. We had a selection of pretty little petits fours including chocolate cakes, a white chocolate cake, and a raspberry cheesecake.

IMG_4903

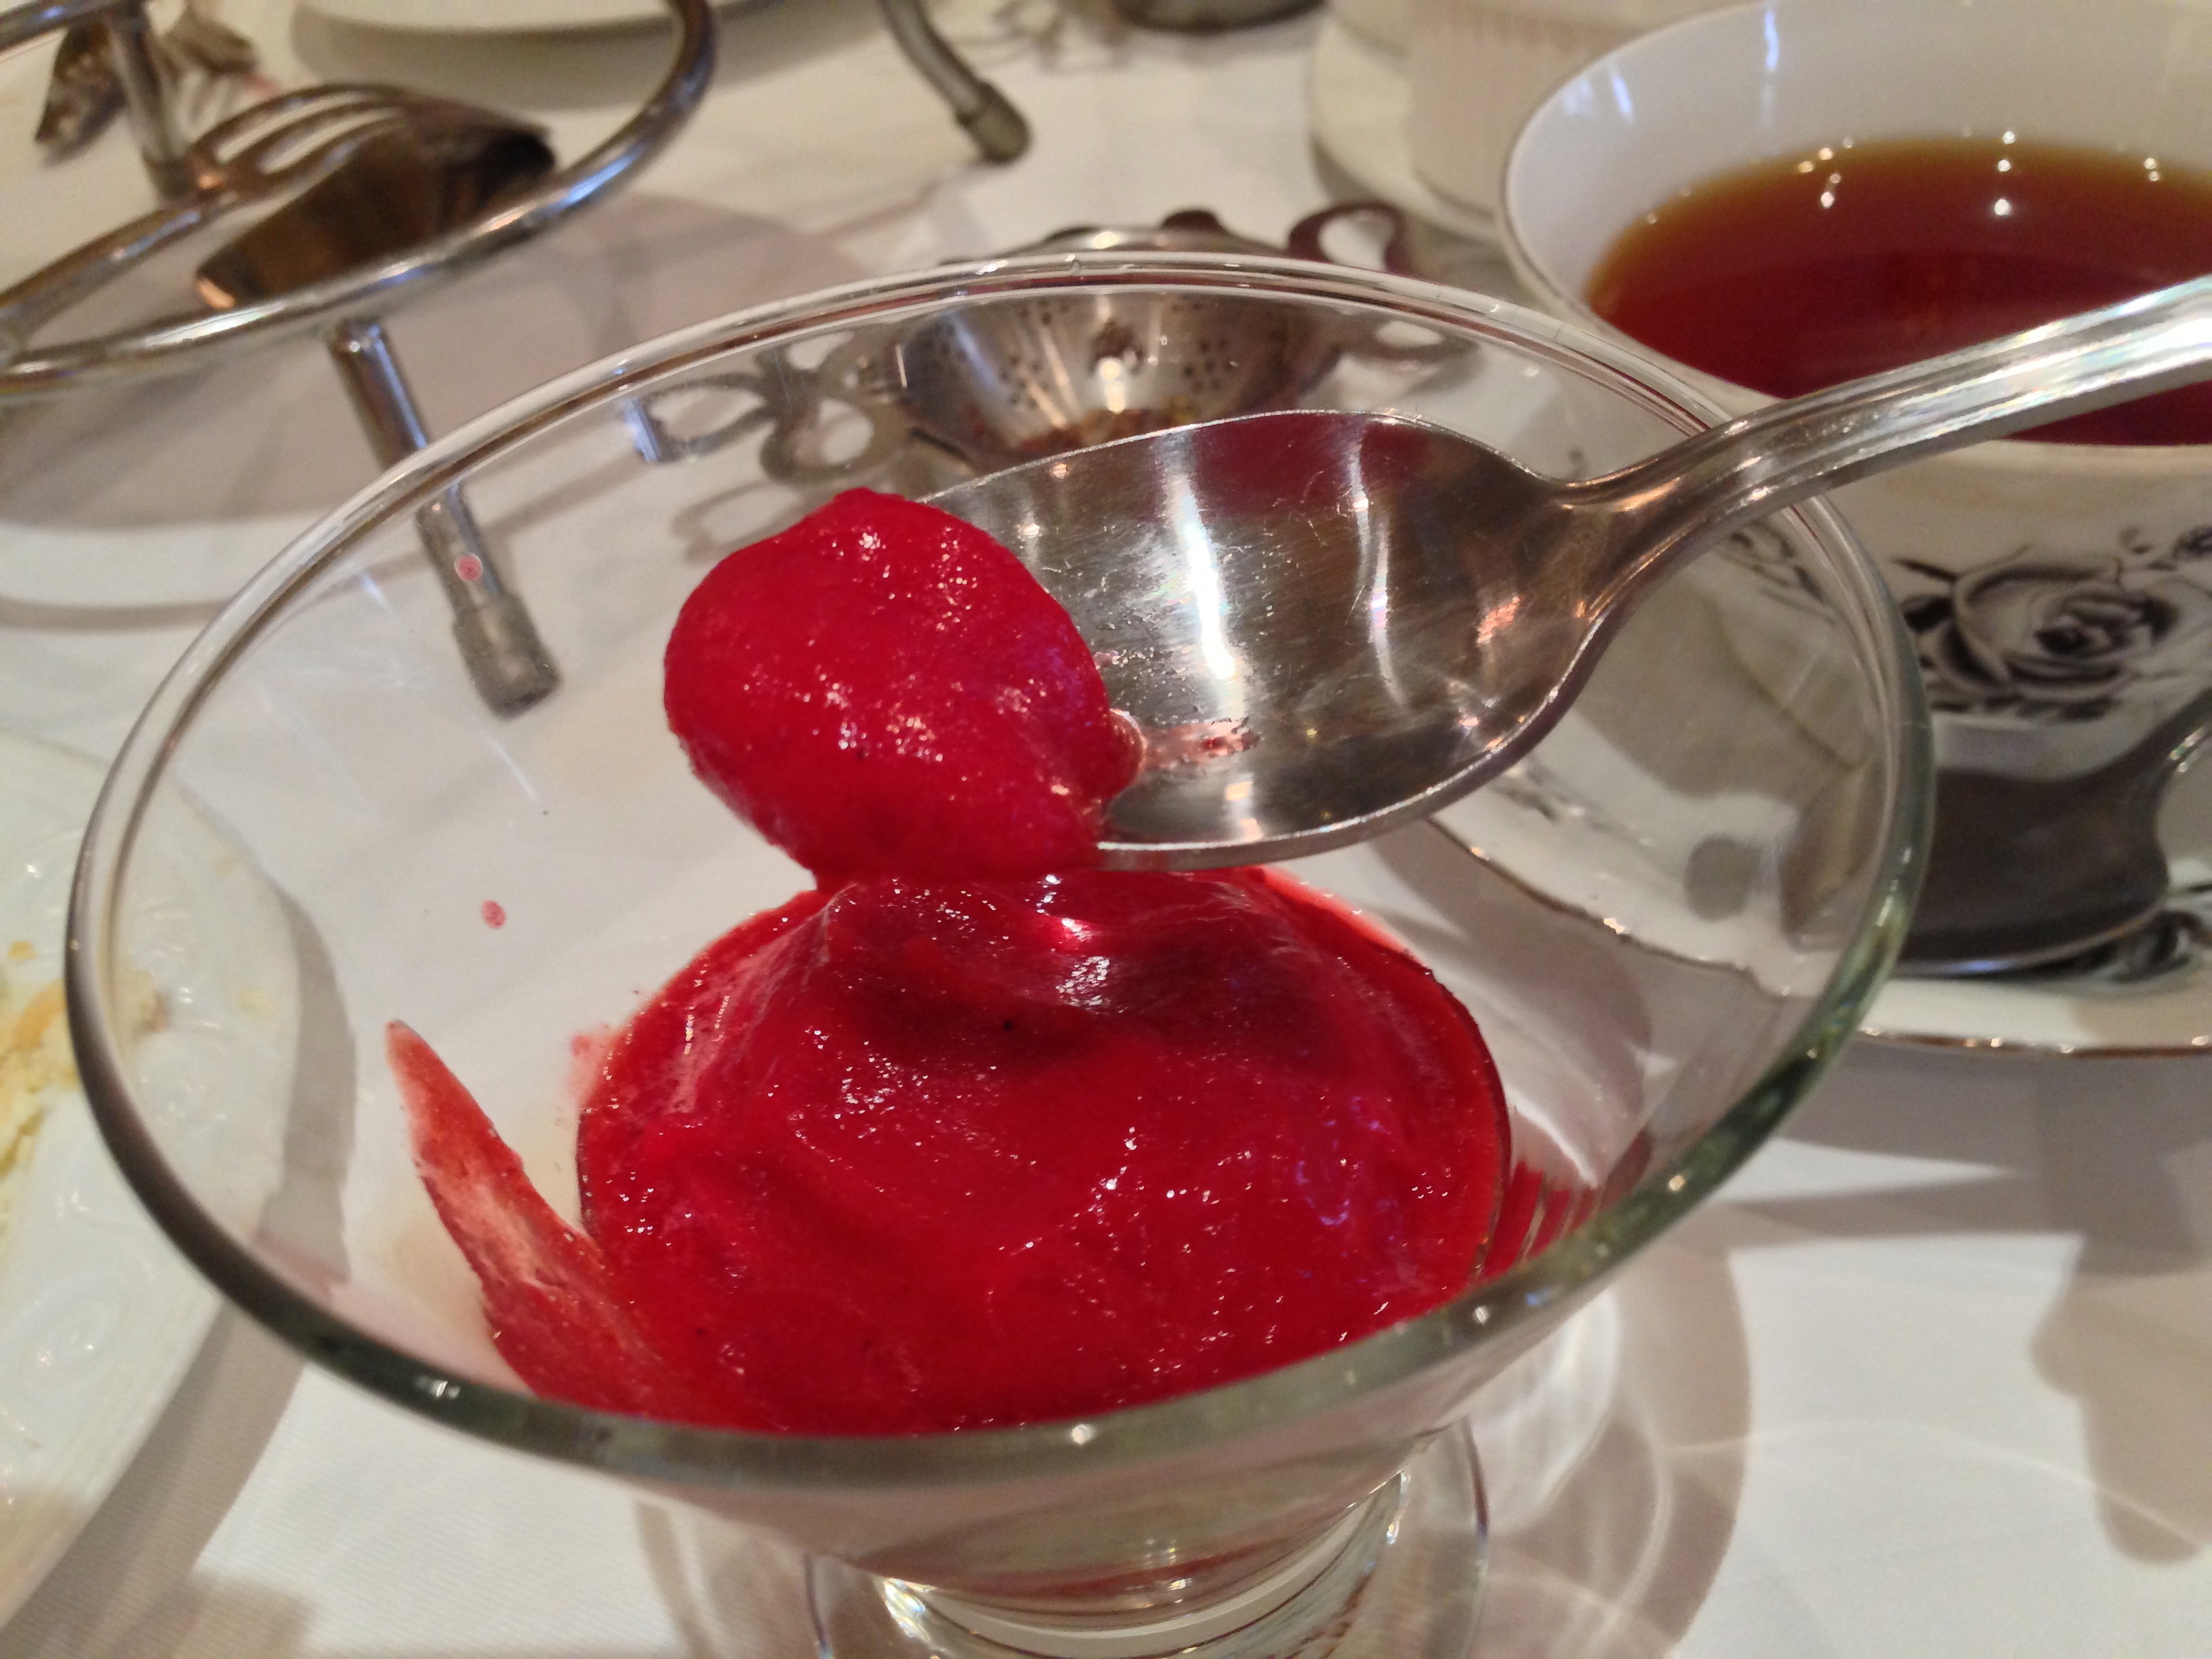
We finished off with a sparkling raspberry sorbet, which was quite sweet, but I love sorbet (or anything frozen and yummy) so I enjoyed it.

IMG_4922

I was quite happy with the Tea Room at the Windsor Arms, although it was my first time having afternoon tea so I don’t have much to compare it to. I thought the scones were delicious, possibly the best I’ve ever had, however the sandwiches and tarts didn’t seem as fresh as they could have been. I sort of got the sense that everything had been prepared ahead of time and pre-plated. I’ve actually read quite a few bad reviews about the food at the Windsor Arms Hotel. The hotel has a long standing reputation as a luxurious destination for tea, Sunday brunch, or a hotel stay (the rooms are gorgeous!). It’s so upsetting to me that the current staff don’t seem to want to keep this tradition alive! For the price you pay, and the posh surroundings, I would definitely expect the food to be equally spectacular. The tea was wonderful and I loved the elegant, traditional atmosphere. It’s a lovely way to spend the afternoon, maybe catch up with an old friend, chit chat over hot tea and a light meal. (I say light meal, but I was surprisingly full when I left.)

I loved my first tea party. Can’t wait to do it again! 🙂

IMG_4877

Check out the Tea Room website for menus, hours, and more details if you’re interested: http://www.windsorarmshotel.com/tearoom

Lobster & Shrimp Linguine in a White Wine Sauce

As promised, here’s the second half of the heavenly dinner I created last night. Of all the different pasta I’ve made, this is definitely one of my favourites. The recipe is really simple and outrageously delicious.

IMG_4990

I like to keep my pasta recipes simple. The fresher the ingredients, the less seasoning you need. Only add what you must. You want all the flavours to stand out, but also compliment one another. Keep it simple.

As we all know, I LOVE seafood. I was in the mood for shrimp linguine, but on my way to pick up the shrimp I noticed lobster tails were on sale. Why not make this pasta twice as good? I did.

Lobster & Shrimp Linguine in a White Wine Sauce
(Serves 2)

Ingredients:

  • 10 white tiger shrimps, peeled and deveined (I used 5 shrimps per person, you can use more or less. You can also use any type of shrimp you like)
  • 2 lobster tails, de-shelled and cut into 1-inch cubes (My tails were not too big. Again, use more or less if you like.)
  • 3 or 4 cloves of minced garlic (I like lots of garlic.)
  • truffle salt/sea salt
  • black pepper
  • 1/4 cup of butter
  • 1-2 tablespoons of butter or olive oil
  • 1/2 cup white wine (I used a chardonnay…it’s what I had at home.)
  • 2-3 tablespoons fresh chopped parsley (Use dry if you don’t have fresh.)
  • Linguine (enough for 2 servings)

I chose to cut my lobster tails in half, remove the meat, and then cut the meat into smaller cubes.

IMG_4985

IMG_5002

In a large saucepan of boiling salted water cook the linguine until al dente. You don’t want your pasta mushy, it should be firm but not hard. You should add about 1/2 a teaspoon of salt for every 8 cups of water. Don’t get salt-crazy.

Melt some butter in a pan at medium low heat. This is to cook the shrimp and lobster in. I mentioned, in the ingredients, that you could also use olive oil for this step if you prefer using less butter, just make sure the pan is well coated. Add in your garlic and some pepper (to taste). Let the garlic saute for 1-2 minutes. Don’t burn it, just let it sizzle a bit.

IMG_5001

Next add the shrimp and lobster. Spread the pieces out in the pan.

IMG_4999

You want to cook the shrimp until they’re just pink. Cooking them for about 2 minutes per side should be enough, depending on the size. Shrimp cooks fast! Don’t overcook! The lobster will cook quickly as well. It will be firm, white, and opaque when it’s done.

IMG_4998

Once cooked, move them quickly from the heat of the pan to a bowl or plate. In the same pan, add the butter and wine. Add some salt (I used truffle salt :)) and more pepper to taste. Let this simmer until the sauce starts to thicken a little.

IMG_4997

Next, add your shrimp and lobster back into the sauce along with 2 tablespoons of parsley and stir a bit. Everything’s cooked, you just want to warm it up and get everything to the same temperature. Add your cooked pasta into the pan and toss it all together.

IMG_4995

Now plate your pasta, you can add a bit of extra parsley on top, and dig in!!! This recipe is so simple and it tastes so good! Let me know how it turns out.

Happy eating! xx

A Proper Caesar Salad.

Last night’s dinner was AMAZING. I’m so excited about how well it turned out I don’t even know where to begin. So I’ll begin with a photo…

IMG_4991

We decided it would be a Caesar salad kind of night. When I got to the grocery store, I decided it was also going to be a shrimp and lobster kind of night too! Lobster tails were on sale…I can’t say no to lobster.

IMG_4939

Have you ever wondered about the origin of Caesar salad? (I do wonder about these things.) No, Julius Caesar did not invent this salad in ancient times. The salad is named after Caesar Cardini, an Italian immigrant and chef in the United States and Mexico. The earliest documentation of these salads was in the 1940’s. Chef Cardini never used anchovies in his original dressing, the anchovy flavour came from the Worcestershire sauce. I love a good Caesar salad with anchovies. If you’re going to make a Super Caesar, it has got to have the little fishies.

I’ve always wanted to make Caesar salad dressing from scratch, but never really got around to it. I wanted to find the best recipe to use. Tonight, I found it! I’ve heard such good things about the Caesar salads at Jacobs & Co. Steakhouse (Toronto, Ontario, Canada.). They do tableside Caesars right at your table, dressing and all! If you’ve ever been there, you must know what I’m talking about. I was determined to find Jacobs’ recipe. During my search, I came across this fantastic video on YouTube. (Watch it.)

There were no exact measurements in the video for the ingredients so I used my own judgement, and the salad turned out exactly how I wanted it! It’s a garlic-y vinaigrette Caesar dressing. My favourite kind. You must try this for yourself, it’s terrific! Here’s my take on the Jacobs & Co. recipe:

How To Make A Caesar Vinaigrette & A Great Caesar Salad (Jacobs & Co. Steakhouse Recipe)
(Serves 4)

Ingredients:
(You can totally adjust the amounts of these ingredients to your own liking/taste. Adding more olive oil will make it a bit creamier.)

  • 1/2 tablespoon black pepper
  • 1/2 tablespoon sea salt
  • 2 anchovy fillets
  • minced garlic (1 or 2 cloves, depending on how much you like garlic. I used 2 cloves.)
  • 2 egg yolks
  • 1 or 2 splashes Tabasco hot sauce (out of the bottle)
  • 1 teaspoon Worcestershire sauce
  • 2 1/2 tablespoons red wine vinegar
  • 1 tablespoon lemon juice (I used fresh lemon juice)
  • 1/3 cup extra virgin olive oil
  • 2 tablespoons grated Parmesan cheese (some extra to sprinkle on top if you like)
  • bacon bits (I made my own using 2 slices of smoked side bacon)
  • 1 cup croutons
  • 1 head of romaine lettuce (Judge by your amount of dressing how much lettuce you want to use.)

If you’re going to make your own bacon bits, start by frying the bacon in a pan until it’s nice and crispy. Then chop it up. (It may even just sort of crumble if it’s crispy enough.)

IMG_4941

IMG_4951

Wash, dry and cut your lettuce. Have it ready to mix into the dressing later on.

Use a large salad bowl. Start by grinding your pepper into this bowl. Next, add your sea salt, anchovies and garlic.

IMG_4955

IMG_4961

Using a fork or spoon smash it all together. Your goal to mash the anchovies into a paste.

IMG_4965

Add in the 2 egg yolks, Tabasco sauce, Worcestershire sauce, red wine vinegar and lemon juice. Mix, mix, mix.

IMG_4975

IMG_4977

Add the olive oil SLOWLY, bit by bit, while mixing. You want to emulsify all the flavours. The faster and longer you mix, the creamier the dressing will get. (If you’d like your dressing to be creamier, add more olive oil.) Mix in the 2 tablespoons of parmesan cheese, bacon bits, and croutons into the dressing.

IMG_4983

You did it! Now mix in the romaine lettuce and you’re done! Add more or less lettuce depending on how much dressing you have. Don’t overdress the leaves, but make sure they’re well coated. This is going to be the best Caesar salad you’ve ever had. You can add a little more parmesan on top of your salads once you’ve plated them.

IMG_4994

The lobster & shrimp linguine recipe shall follow! xx

Simple Oven-Roasted Asparagus

Oven-roasted veggies are always a super easy addition to any meal. I roasted some asparagus tonight. Asparagus is full of nutrients, anti-oxidants and fiber. A quick and healthy recipe!

IMG_4841

Preheat the oven to 350 degrees F. Now wash and trim your asparagus. I always snap the end off with my hands. This gets rid of the tough parts.

IMG_4838


Lay the asparagus on a baking tray lined with parchment paper (or foil). Drizzle olive oil over top, add some minced/pressed garlic (however much you like, I love tons of garlic) and season with salt and pepper.

IMG_4843


Bake the asparagus for about 10-15 minutes (until just tender). Baking time varies depending on how think your asparagus is.

IMG_4845


Ready to eat! Wasn’t that easy? You can do this with tons of different veggies! Sometimes I sprinkle a little lemon juice over top after baking.

Happy and healthy eating! xx


The Verdict On My Key Lime Pie

Got to try my key lime pie tonight! It was delish! Definitely recommend making it. 🙂 See my previous post for the recipe.

IMG_4869IMG_4867IMG_4873

Key Lime Pie In The Sky!

I made a spur of the moment decision that tonight was a good night to bake my first pie. And for some reason, right after I thought pie…I thought key lime. I didn’t even realize until just now how fitting it is to make a lime pie over the St. Patty’s Day weekend (limes…green…get it?). So I looked up the simplest recipes I could find, picked one that seemed foolproof, and picked up a few things from the store on the way home. I stuck to a simple recipe just to be safe. I always start simple when I’m trying something for the first time. Everything was going smoothly until I discovered that the recipe I was trying to follow, that was supposed to be for one pie, actually made enough filling for two. So I had to save half the filling and make a second crust. (Who wants a free key lime pie?!) Despite the fact that I try to be Chef Vanessa: Master Chef of the Universe in the kitchen, things don’t always go as planned. Most of the time they do not. But that’s what keeps things exciting, right?

A fresh chilled key lime pie is so refreshing. I love it’s tart, sweet, creaminess. Here’s how I made mine. Hope you find this recipe useful. It was really easy. You can do it! 

Key Lime Pie (makes one pie)

Ingredients:

  • 1 1/2 cups graham cracker crumbs (I smashed them in a ziploc bag with a rolling pin)
  • 1/2 cup sugar
  • 4 tablespoons softened butter (1/2 a stick of the small butter sticks)
  • 1 (14 ounce) can of sweetened condensed milk (that’s about 420 mL…I couldn’t find a 14 oz can at the store)
  • 1/2 cup of key lime or regular lime juice
  • 1 whole large egg
  • 1/2 tablespoon lime zest
  • 1/2 cup sour cream (about half of those small half-size sour cream tubs…about 125 mL)
  • 1 tablespoon powdered sugar (icing sugar)

Let’s Bake!

Preheat the oven to 375 degrees F.

Image

This part’s fun! In a bowl, mix the graham cracker crumbs, sugar and butter with you hands! Just keep squishing til the butter’s all mixed in. You’ll have a crumbly playdough kind of texture.

IMG_4781

IMG_4784

IMG_4785

Take this crust mixture and press it firmly into a 10-inch pie pan. Really pack it down. And then bake until the crust is brown, about 20 minutes.

IMG_4804

IMG_4805

Crust done! Remove it from the oven and let it cool to room temperature. Lower the oven temperature to 325 degrees F.

Now in a separate bowl, you will make the filling. Combine condensed milk, lime juice, egg, and lime zest. Whisk until well blended.

IMG_4794 IMG_4802

Place the filling into the cooled pie shell and bake in the oven for 15 minutes (at 325 degrees).

IMG_4809

IMG_4810

IMG_4814

The pie won’t look any different then it did when you put it into the oven. The filling is baked and solidified now. Chill it in the refrigerator for at least 2 hours. I chilled mine overnight because it was so late.

Once your pie is chilled, mix the sour cream and icing sugar and spread the mixture over the top of the pie with a spatula. I added a little lime zest on top to make it pretty. Serve chilled!

IMG_4817

IMG_4818

IMG_4819

Mission complete! So proud of my first pie! Happy St. Patrick’s Day! And happy baking! xx

(Maybe I’ll add to this post when I’ve eaten the pie later tonight.) 🙂

May your glass be ever full.
May the roof over your head be always strong.
And may you be in heaven half an hour before the devil knows you’re dead.
—Irish prayer


The Start Of Something Delicious!

This is my first post in my first blog ever! And I’m so excited!

For those who don’t know me, I’m the most perfect example of a food fanatic. I’m the girl that takes a picture of everything I eat, before I eat it, just in case I want to relive the memory later (this has led to an accumulation of a frightening amount of food pictures that I can’t bring myself to delete). I’m an artist at heart. I can never pass up the opportunity to capture a glorious moment of culinary beauty! My friends have been trained to sit and stare at their delicious meals so that I can get my perfect shot before they dig in, no matter how starving they may be. (Haha, best friends ever!) I’m the annoying girl on Facebook that’ll flood your newsfeed with photo after photo of everything I’ve ever eaten. It took me months and months (over a year), of my friends and family telling me over and over again to “Start a food blog!”, to finally realize how passionate I am about food, cooking, photography, and everything in between.

This Hungry Kitten is a blog dedicated to my love for food. It’s a place where I will share my favourite recipes, my favourite restaurants, and my favourite food photos. The internet has been an amazing resource to me for recipe hunting, reading restaurant reviews, and learning great lessons in cooking. Apart from the valuable cooking basics I picked up from mama and papa, I’ve pretty much learned everything else I know about cooking and food through cookbooks and websites. I’m so thrilled that now I’ll be able to share what I’ve learned with the rest of the world!

Growing up in Toronto with a Chinese mom and Scottish dad opened the doors to worlds of different foods for me. My mother usually opts for the Asian cuisine (Chinese, Japanese, Korean, Thai food…she loves it all). My dad is a food adventurer and loves discovering new flavours. I grew up eating anything and everything from chicken feet at dim sum, sharing rotis with my dad, smoked meat sammies in Montreal, mix and match souvlaki skewers with my sis, to veggies and seafood of all kinds, in all forms. I eat what I love, and I love it all!

When I’m not at work in the lab (I’m a microbiologist), shopping, at the gym, in dance class, relaxing in the bath, taking naps, or doing whatever else I do, I am usually fooding. I may have made this word up, but for me, it involves cooking, dining, looking up recipes, ingredient searching, reading reviews, and finding new restaurants in Toronto where I can get my eat on. Don’t get me wrong, I definitely love to indulge, but healthy eating is also a top priority for me and I try new healthy options in my cooking all the time. I spent half my life training professionally to become a ballet dancer, I understand the importance of a healthy diet. I’ll be posting lots of yummy healthy recipes in the weeks to come! I often try vegan, gluten-free, low-carb or sugar-free/low-sugar recipe options. I don’t have very many dietary restrictions, but I take special measures when cooking for friends :). If it tastes amazing and I’ve made it healthier, then that’s a super plus!

Enough about me! I could babble on for days! Hopefully this first post has given you an overview of who I am, the focus of this blog, and why I’m blogging. Hope it’s a hit and that you’re as excited as I am! I’ll hopefully have some recipes and reviews up soon!

Happy eating! xx